9 Senior-Friendly Mobility Exercises to Keep You Active (No Equipment!)
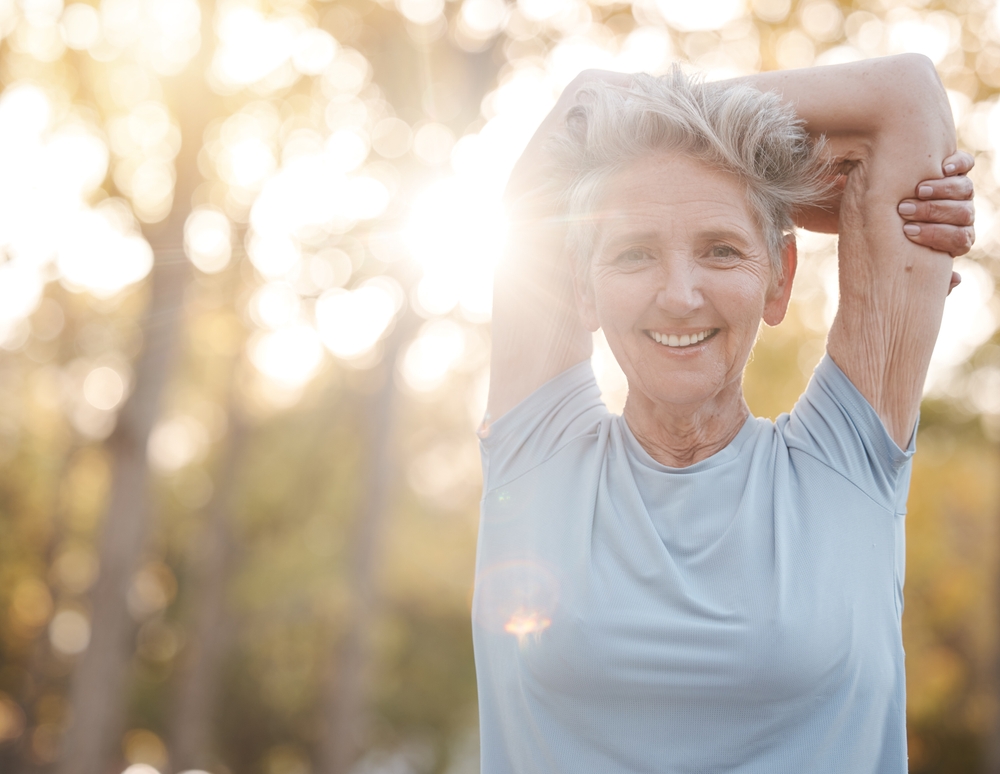
One of the best things you can do to stay healthy and active with age is to make mobility exercises a regular part of your routine!
Even if you’re already noticing mobility issues crop up, it’s never too late to start exercising. In fact, a quick mobility routine is often all it takes to start feeling better.
Here are the biggest benefits of mobility exercises:
- Keeps joints healthy
- Improves stiffness and pain
- Makes everyday activities easier
- Help you stay active
- Helps you look (and feel!) younger
To see these benefits firsthand, read on to discover 9 simple mobility exercises from certified trainer Chris Freytag to help keep you active and healthy for years to come. (No equipment required!)
Tips for Doing These Exercises
Photo Credit: Shutterstock
Before starting the next 9 exercises, here are a few tips to keep in mind:
- These mobility exercises are for older adults with mobility issues and those looking to stay active. They’re not for people with injuries. These folks should work with a physical therapist or other healthcare provider who can supervise their recovery.
- You only need floor space or a yoga mat!
- Do these exercises two to three times per week. Keep your movements controlled and work at a comfortable pace.
- At first, these exercises might feel awkward and stiff. But the more you do them, the warmer your muscles and the looser your joints will get. Over time, the following exercises will feel easier, and so will daily physical activity.
Let’s get started!
1. Shoulder Rolls
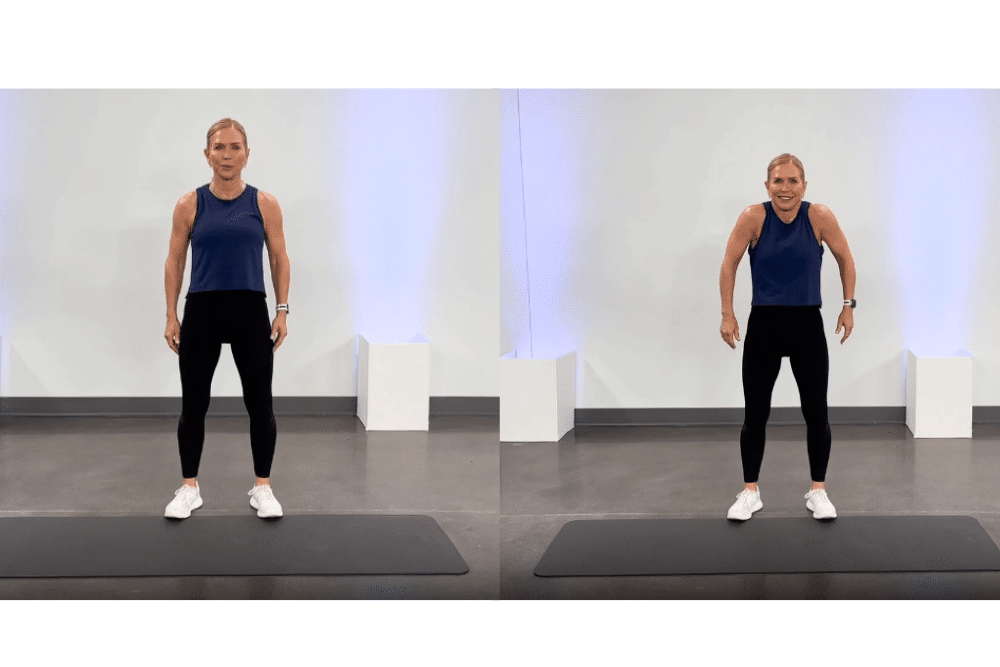
Photo Credit: Get Healthy U
Basic shoulder rolls are simple exercises that loosen up the shoulder muscles and joints. Shoulder mobility is critical for basic tasks like reaching overhead and sports like tennis and swimming.
How to perform a shoulder roll:
- Stand with your feet hip-width apart.
- Shrug your shoulders up toward your ears. Then, slowly roll them in a forward motion.
- After about 30 seconds, roll your shoulders in a backward motion.
Muscle Groups Targeted: Shoulders
2. Arm Circles
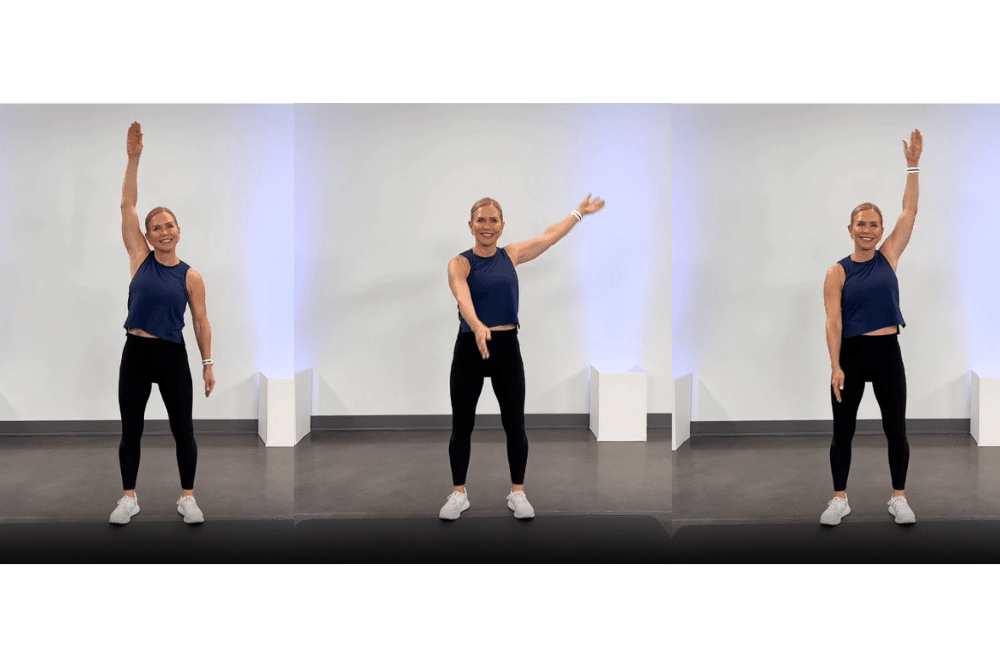
Photo Credit: Get Healthy U
This move loosens the shoulder joints and engages the shoulders, biceps, and triceps. It’s an easy way to improve posture and get your arms and shoulders ready for sports like swimming and pickleball.
How to perform an arm circle:
- Stand tall with your feet shoulder-width apart.
- Raise and extend your arms to your sides.
- Without bending the elbows, rotate your arms forward in small circles for 30 seconds. Then, rotate your arms backward in small circles for 30 seconds.
Muscle Groups Targeted: Shoulders, Biceps, Triceps, Upper Back
3. Hip Circles
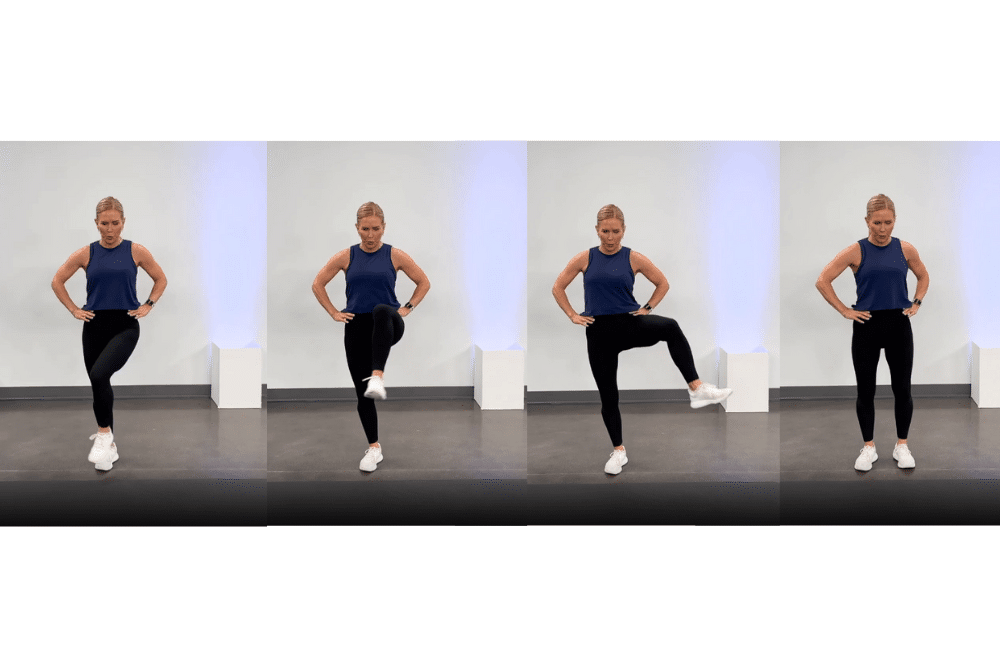
Photo Credit: Get Healthy U
This simple exercise helps loosen up the muscles and joints in your hips. As the hips play a role in practically every activity you do, it’s important for them to have a healthy range of motion.
How to perform a hip circle:
- Stand tall with your feet shoulder-width apart and place your hands on your hips.
- Keeping a slight bend in your knees, slowly circle your hips in a clockwise direction for 30 seconds. Then, switch directions and circle your hips counterclockwise for 30 seconds.
Muscle Groups Targeted: Lower Back, Hips
4. Standing Side Bends
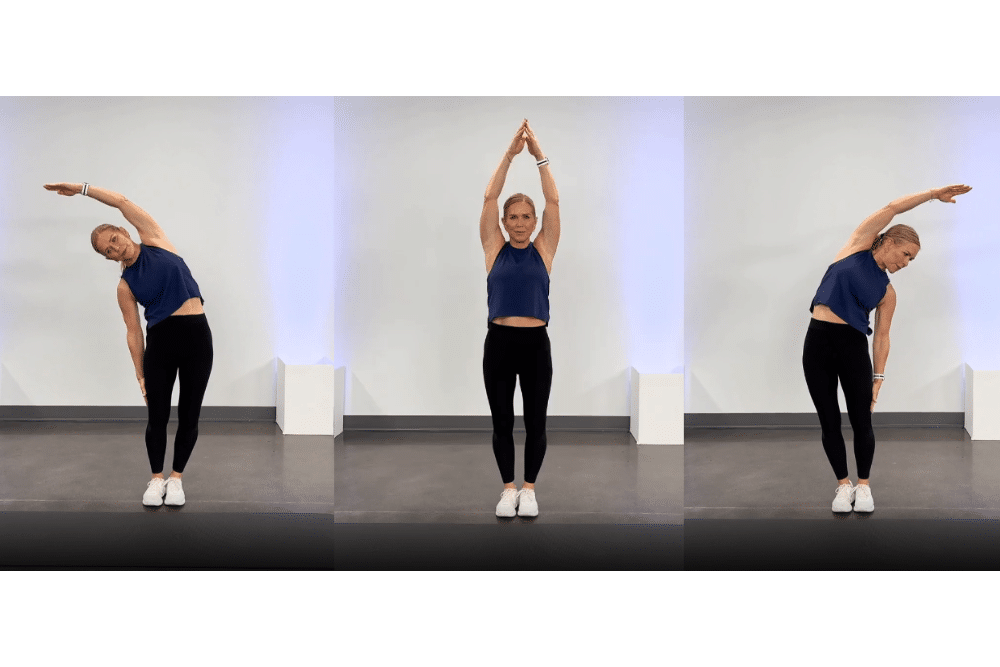
Photo Credit: Get Healthy U
The standing side bend stretches the spine and obliques (side abs). This helps improve posture for sports, new exercise, and daily activities.
How to perform a standing side bend:
- Stand tall with feet and legs together. On an inhale, reach both arms straight up overhead.
- Lower your right arm to the right side of your body. On an exhale, lengthen the left arm over your head, bending your body gently to the right.
- Inhale to return both arms overhead and repeat on the left side. Do six to 10 reps per side.
Modification: Do this exercise in a sturdy chair if you get tired from standing or can’t keep your balance while bending. If chair exercises fit your comfort zone, try these 10 best chair exercises for seniors, too!
Muscle Groups Targeted: Spine, Obliques
5. Wall Push-Ups
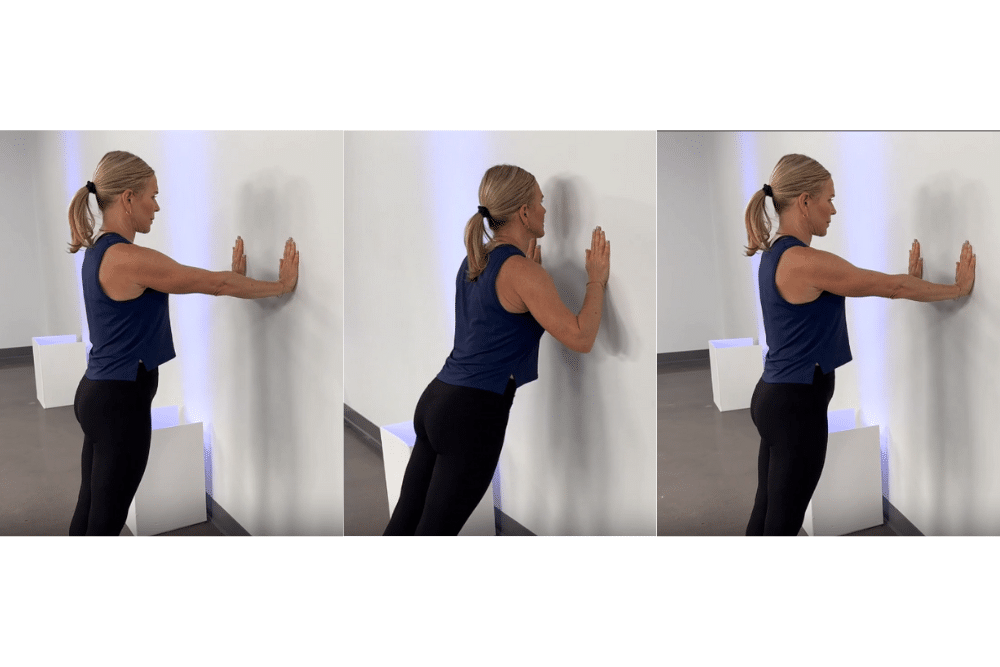
Photo Credit: Get Healthy U
Wall push-ups are a great mobility exercise for seniors that target the shoulders, chest and triceps. It helps with daily activities such as pushing open doors and getting up from a chair.
How to perform a wall push-up:
- While standing, place your hands on a wall shoulder-width apart.
- Perform a push-up, lowering your chest toward the wall slowly. Then press back up.
- Your elbows should angle behind you, not point straight out to the sides.
- Do six to 10 reps.
Muscle Groups Targeted: Shoulders, Triceps
6. Side-to-Side Lunges
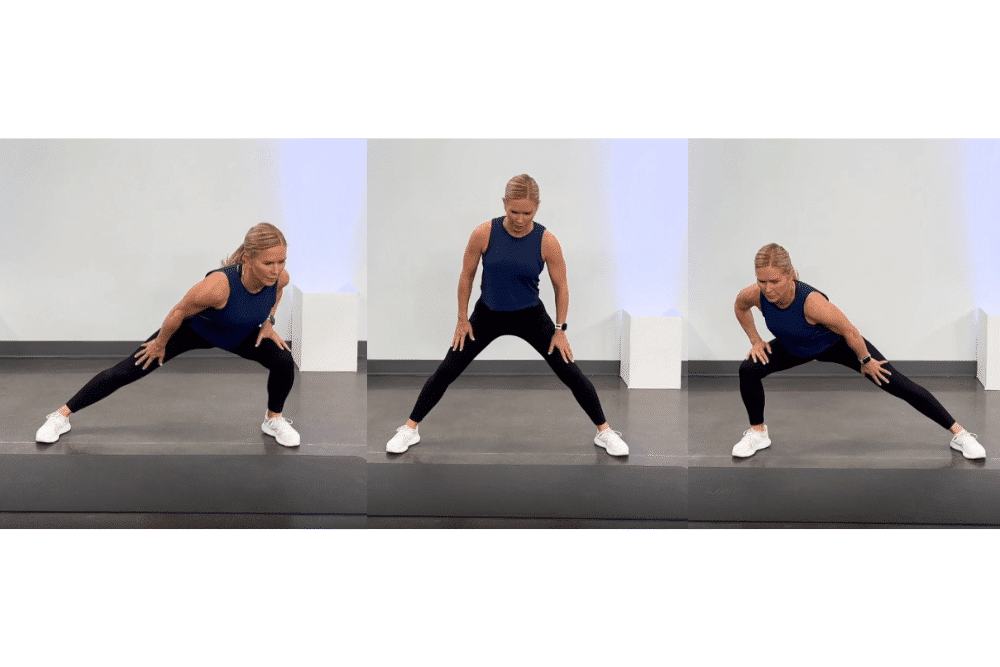
Photo Credit: Get Healthy U
This is a great lower-body exercise for strengthening your quads, glutes, hamstrings, and inner and outer thighs—and by moving side-to-side, you’ll improve balance and stability.
How to perform a side-to-side lunge:
- Start standing with feet slightly wider than shoulder-width apart and toes pointed forward.
- Shift your body weight onto one leg and bend the knee to a 90-degree angle. Press your glutes behind you and keep the other leg straight.
- Return to the center and switch sides. Do six to 10 reps per side.
Modification: To make this exercise easier, shorten your range of motion or hold onto the back of a chair for balance.
Muscle Groups Targeted: Quads, Glutes, Hamstrings, Outer Thighs, Inner Thighs
7. Cat-Cows
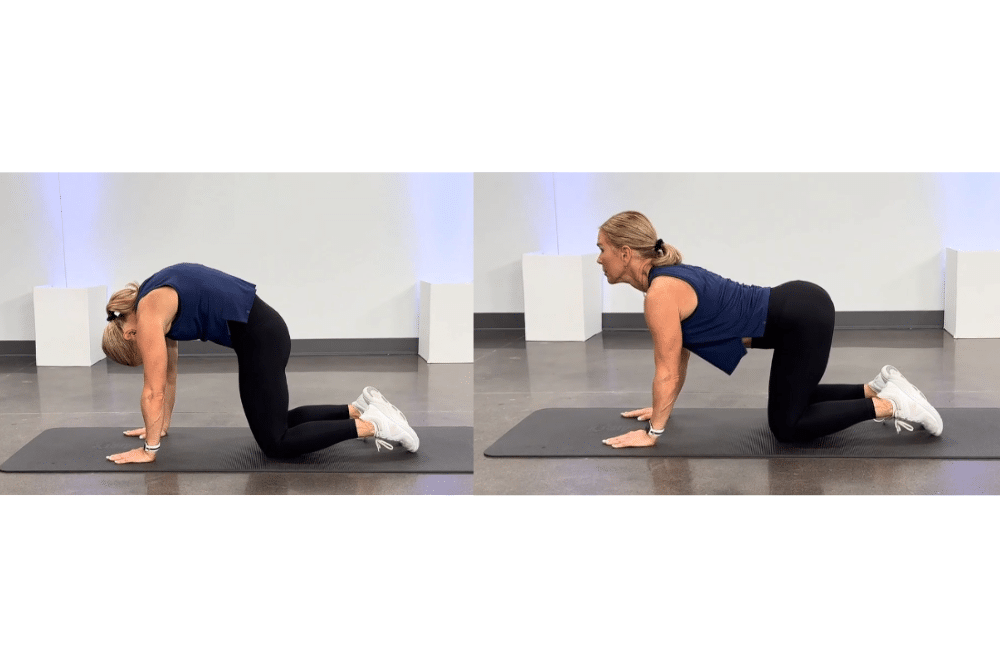
Photo Credit: Get Healthy U
The cat-cow yoga pose is a great mobility exercise for seniors that uses slow movements to release tension all along the spine, from the neck to the tailbone. It’s very effective for improving posture and doesn’t require any special equipment.
How to perform a cat-cow:
- Begin on your hands and knees with hands directly under shoulders and knees directly under hips.
- Start with your spine in a “neutral” or long position. On an exhale, slowly tuck your tailbone, lowering the crown of your head so your back gently rounds into a cat pose.
- Return to a neutral spine. On an inhale, gently lift your chest and tailbone so your lower back curves downward. Look slightly upward with a relaxed neck. This is cow pose.
- Continue alternating between cat and cow for six to 10 reps.
Modification: You can also do cat-cow while standing if the floor version is too challenging. Simply place your hands on top of your knees or the seat of a chair and focus on moving your spine.
Muscle Groups Targeted: Neck, Spine, Shoulders, Upper Back, Middle Back, Lower Back
8. Bird Dogs
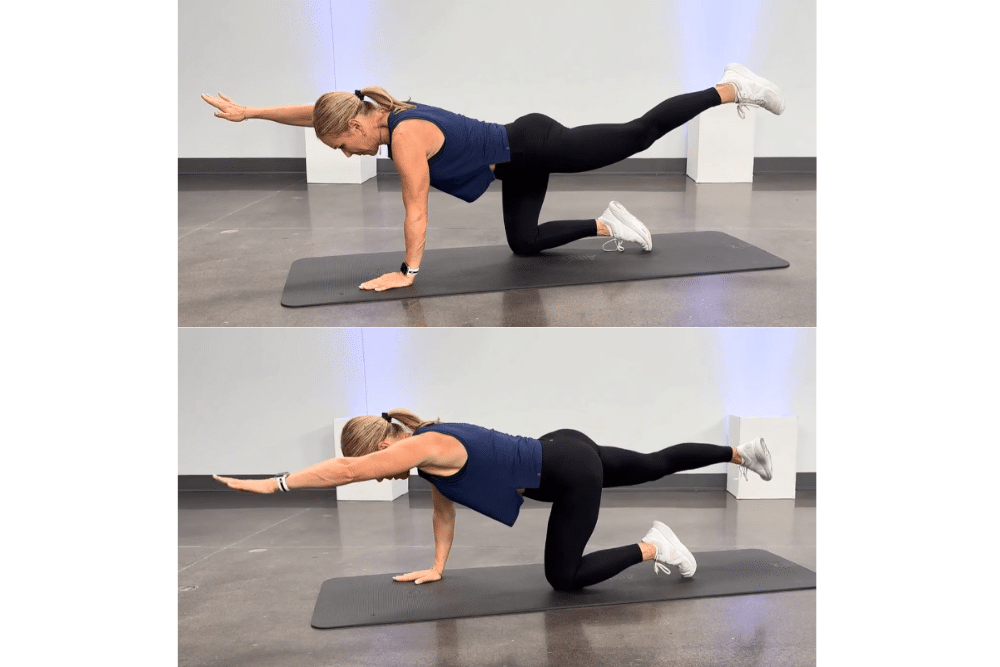
Photo Credit: Get Healthy U
The bird-dog strengthens the lower back and abdominals while teaching your body to balance and find stability.
How to perform a bird-dog:
- Begin on your hands and knees with hands directly under your shoulders and knees directly under your hips.
- Reach one arm long, draw in the abdominals, and extend the opposite leg behind you. Hold briefly.
- Return your hand and knee to the floor and repeat on the other side. Do six to 10 reps per side.
Modification: To make the exercise easier, lift just one limb at a time instead of two, or keep your limbs closer to the ground.
Muscle Groups Targeted: Abdominals, Lower back
9. Glute Bridge

Photo Credit: Get Healthy U
The bridge is a classic yoga pose that stretches the chest, neck, spine, and hips and strengthens the glutes, core, and lower back.
How to perform a glute bridge:
- Lie on your back with knees bent and feet flat on the floor close to your glutes. Your knees should be in line with your hip bones.
- Place your arms flat on the floor at your sides and tuck your shoulders under your back.
- Press your palms into the ground as you raise your hips, squeezing your glutes and abdominals. Keep your neck relaxed on the mat.
- Continue to move your hips up and down for 30 seconds.
Muscle Groups Targeted: Chest, Neck, Spine, Glutes, Abdominals, Lower Back
