Seated Core Exercises for Seniors That Actually Work
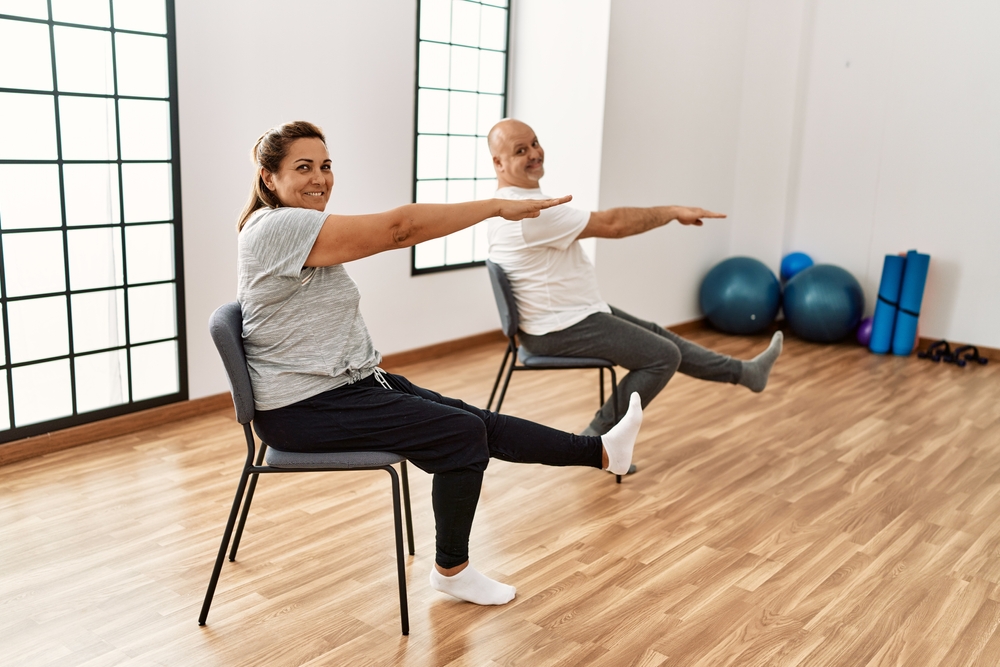
Targeting your midsection with sculpting and strengthening exercises is a great way to promote healthy aging, no matter what you current fitness capabilities!
Here are the benefits of working your core as often as you can:
- Improves posture
- Reduces back pain
- Improves balance
- Helps with everyday activities
- Improves coordination
The following low-impact moves are some of the top core exercises for older adults, and most involve a chair for stability.
Directions:
- Aim to do these exercises daily (or at least 2-3 times per week) to keep your core muscles strong and healthy.
- Perform each move for 5-10 reps (per side), and you’ll get a great core workout in less than 10 minutes!
1. Seated Forward Roll-Ups Exercise
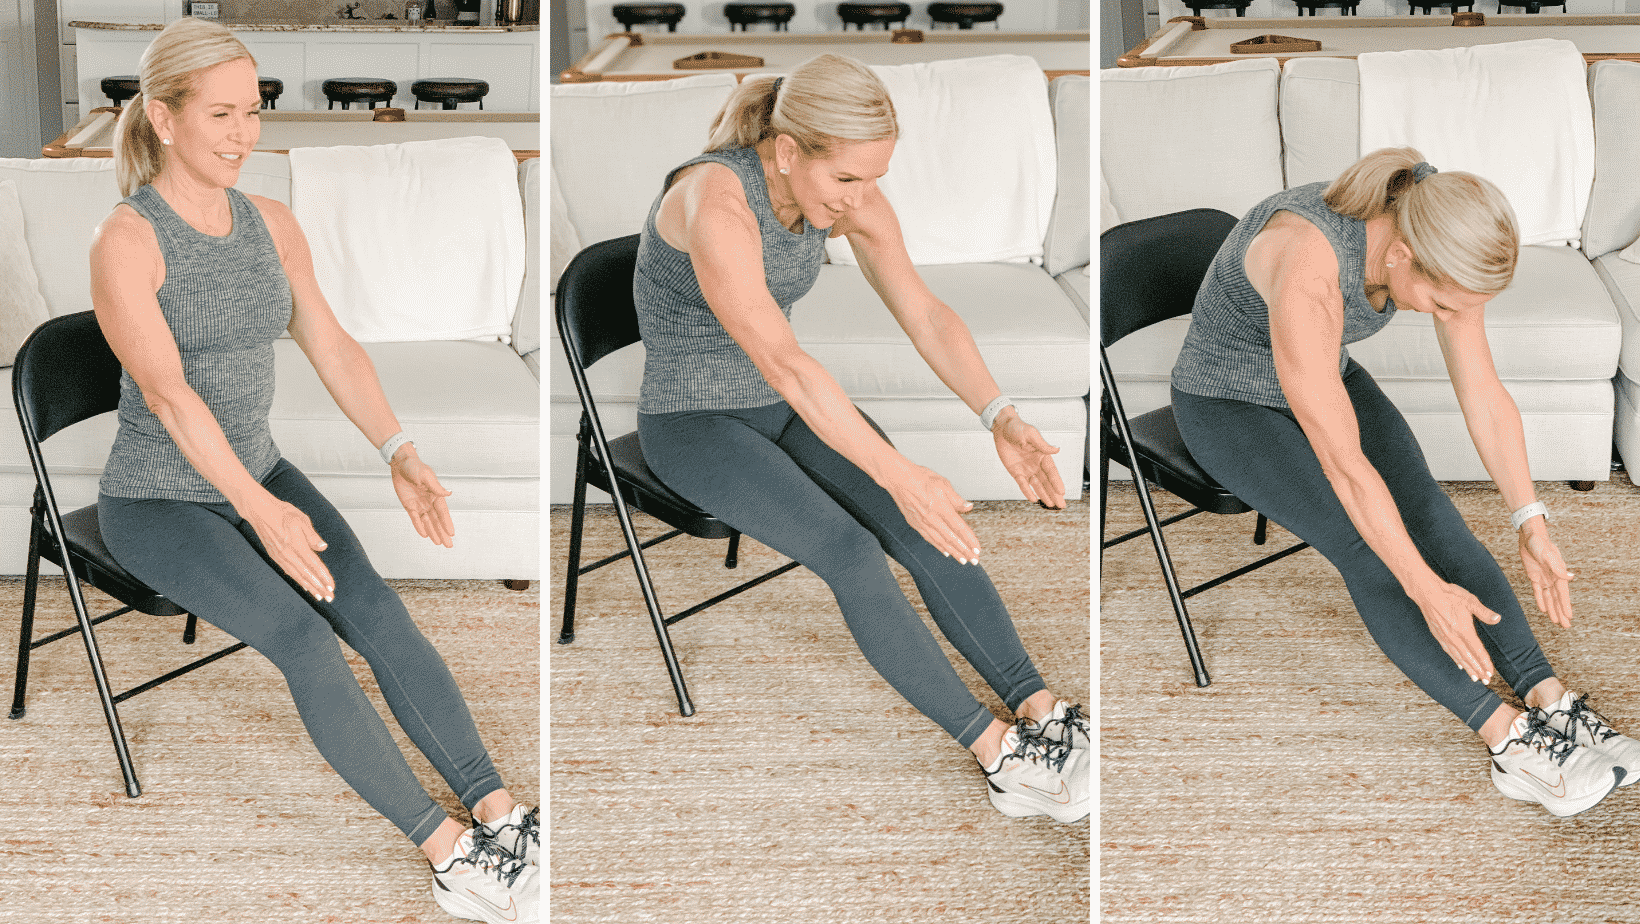
Photo Credit: Get Healthy U
Here’s how to perform a seated forward roll-up:
- Sit in a chair with your legs extended, heels on the floor, and feet flexed towards your face. Extend your arms in front of you. Keep an upright posture; don’t slouch or lean back in the chair.
- Begin curling your chin to your chest. Exhale as you roll the entire torso up and over, keeping your legs straight, abs engaged. Reach down towards the toes.
- Once you can’t reach any further, inhale as you begin to roll back up to the starting position, one vertebra at a time.
- Repeat moving slowly. Avoid using momentum; try to use your abdominals to lift and lower.
2. Seated Side Bends
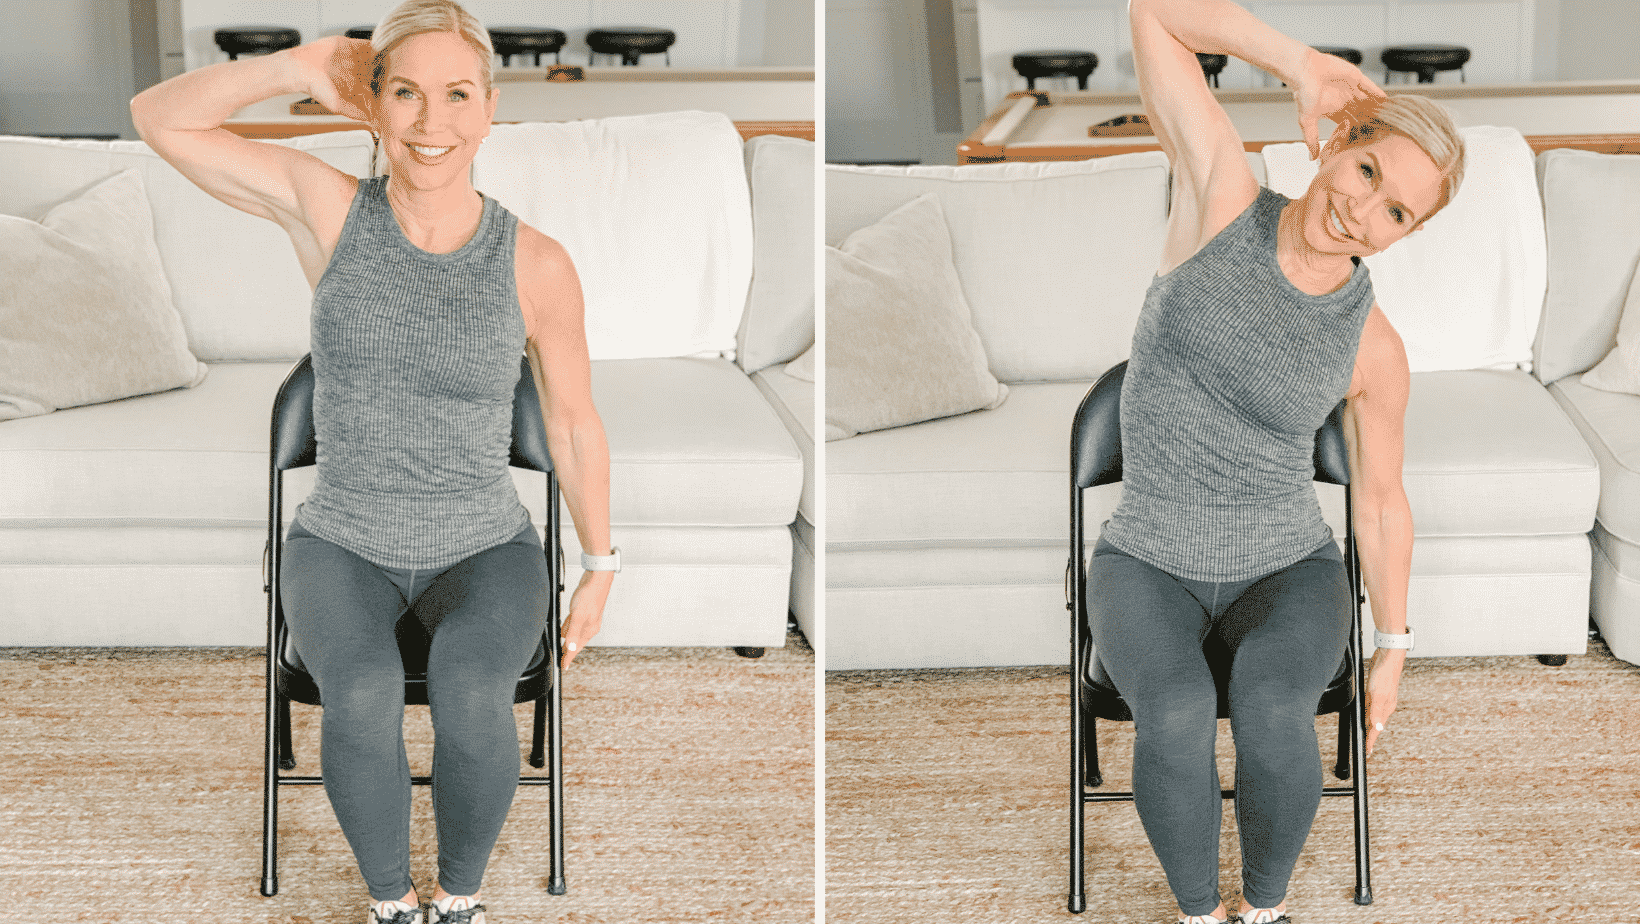
Photo Credit: Get Healthy U
Here’s how to perform seated side bends:
- Sit with knees bent and feet flat on the ground. Bend your right arm to bring your right hand to the right side of your head. Allow your left arm to hang at your side. Keep an upright posture; don’t slouch or lean back in the chair.
- Inhale. As you exhale, bend gently at the waist to lower your left arm toward the floor. Keep your chest open and pull your right elbow back to feel a stretch in your right side.
- Inhale to return to starting position. Repeat.
3. Seated Leg Lift Exercise

Photo Credit: Get Healthy U
Here’s how to perform a seated leg lift:
- Sit in a chair. Your left knee should be bent with your left foot flat on the ground, and your right leg extended. Keep an upright posture; don’t slouch or lean back in the chair.
- Engage your core to raise your right leg. Lift your leg as high as you can without letting your back collapse. Hold briefly before returning your foot to the floor.
4. Seated Leg Taps

Photo Credit: Get Healthy U
Here’s how to perform seated leg taps:
- Sit in a chair with knees bent and feet flat on the ground. Keep an upright posture; don’t slouch or lean back in the chair.
- Hold onto the bottom of your seat for support. Engage your abdominals and extend both legs out in front of you, tapping the floor with both feet.
- Reset by pulling your legs under your chair, allowing your feet to rest on the floor. When you’re ready, repeat.
5. Seated Half Roll-Back Exercise
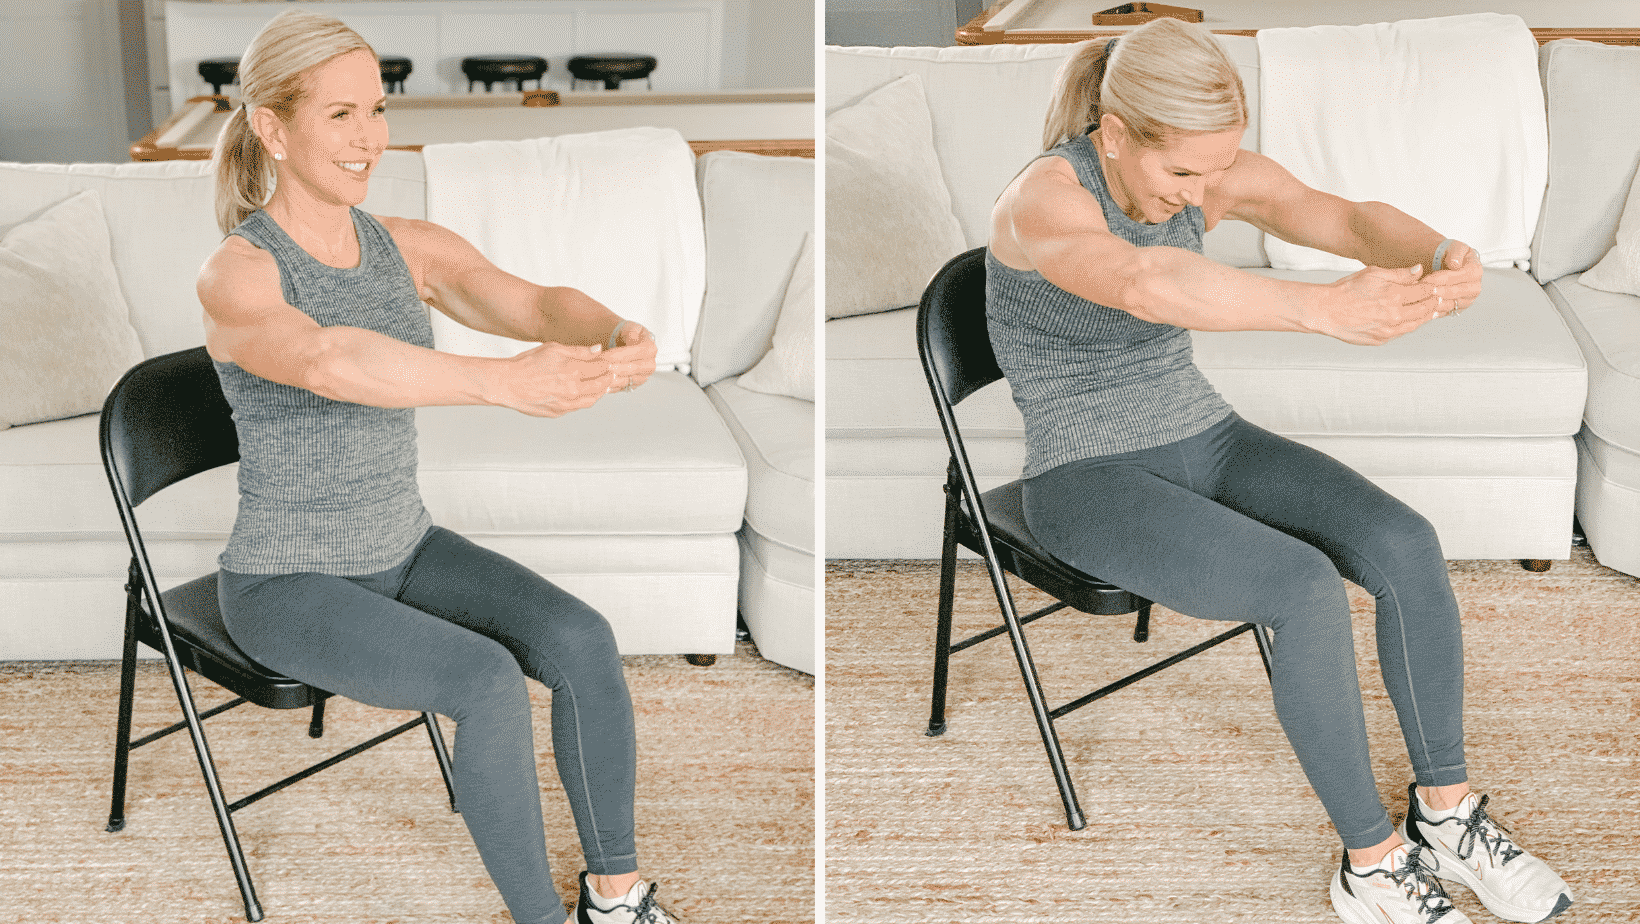
Photo Credit: Get Healthy U
Here’s how to perform a seated half roll-back:
- Sit in a chair with knees bent and feet flat on the ground. Lift your arms in front of your chest to create a circle. Keep an upright posture; don’t slouch or lean back in the chair.
- Keeping your feet on the floor and your arms joined in a circle in front of your chest, begin to round your back. As you round your back, think about scooping your abdominals.
- Once you can’t go any further, engage your abs as you slowly roll back up to the starting position.
6. Glute Bridge
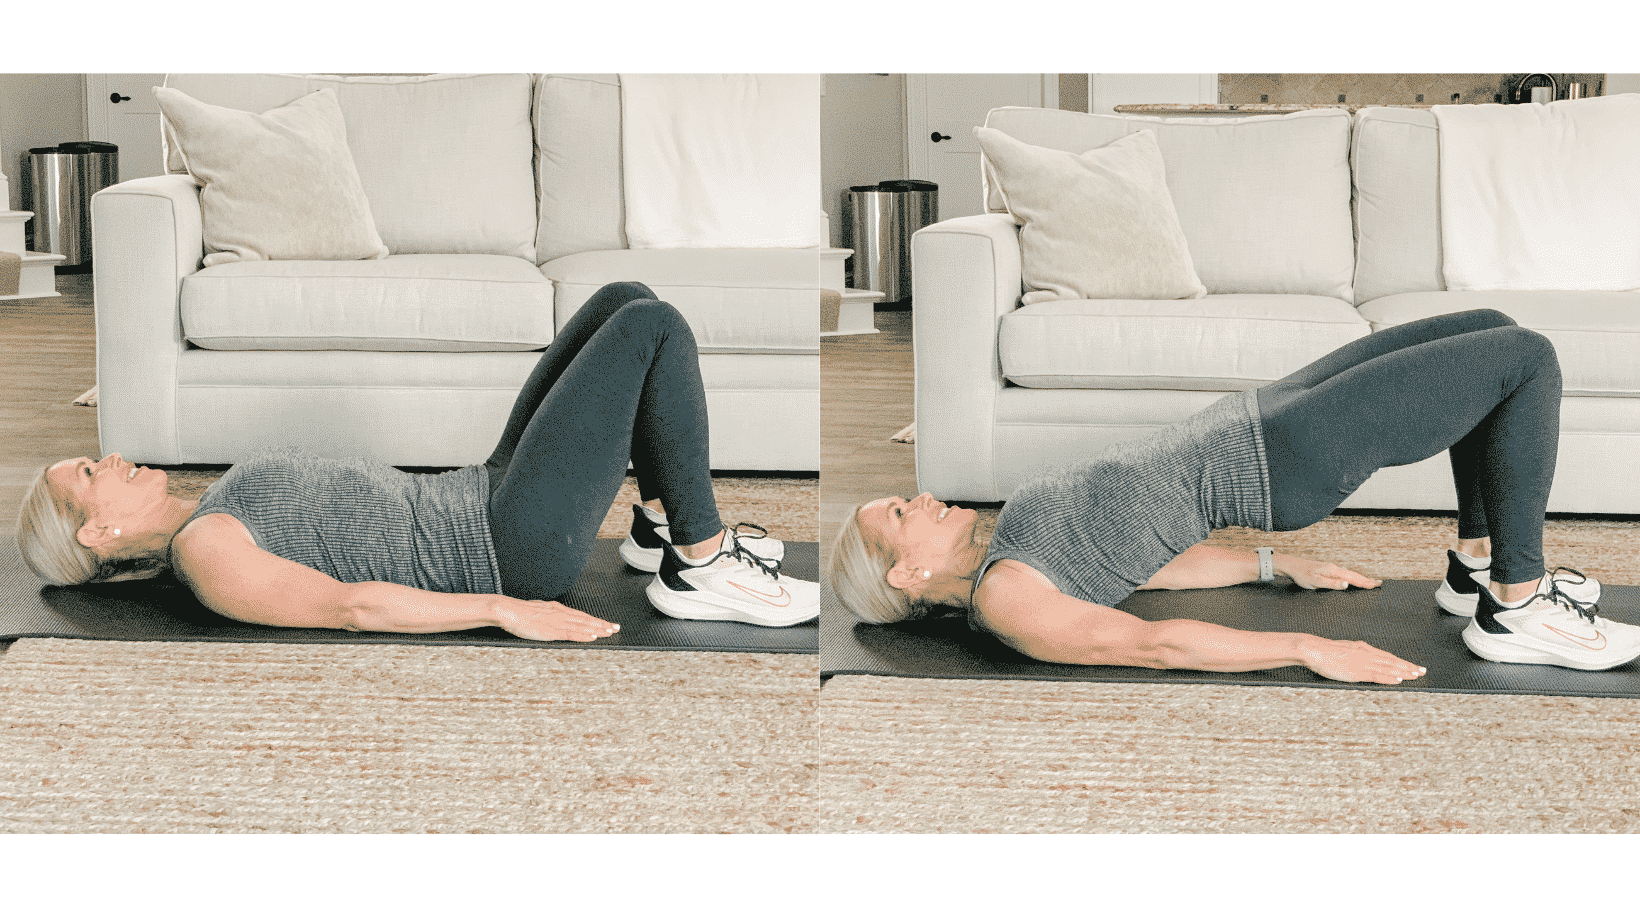
Photo Credit: Get Healthy U
Here’s how to perform a glute bridge:
- Lie on your back with knees bent and feet flat on the floor, hip-width apart.
- Engage your abs and squeeze your glutes to lift your hips to a bridge.
- Hold briefly and return your glutes to the floor with control.
