10 Common Menopause Symptoms—And How to Deal With Them

Menopause is a natural phase in every woman’s life, but it often comes with a variety of challenging symptoms. From hot flashes and night sweats to mood swings and poor sleep, these changes can certainly feel overwhelming!

Here, we’ll explore the 10 most common menopause symptoms, along with practical tips for each to help you navigate your menopause journey with confidence and ease.

1. Hot Flashes

A woman sitting on the couch with her laptop having a hot flash and fanning herself.

Photo Credit: Shutterstock

Hot flashes are sudden, intense feelings of warmth that spread over the body. They occur thanks to fluctuating hormone levels (less estrogen), which affect the body’s temperature regulation. Hot flashes commonly start in the upper body and face and can spread over the whole body instantaneously.

You will notice a change in your body temperature, even feeling like your body is on fire. 

How to Deal With Hot Flashes:

  • Stay Cool: Wear lightweight clothing and keep your environment cool. Dress in layers so you can peel off a few if needed. 
  • Hydrate: Drink plenty of water to stay hydrated. Try these tips for drinking more water for inspiration!
  • Diet & Lifestyle: Eating healthy and eliminating processed foods can help. Avoid spicy foods, caffeine, and alcohol which can trigger hot flashes.
  • Relaxation Techniques: Practice deep breathing exercises at the onset of hot flashes. Also, for overall stress reduction try meditation
  • Cooling Necklaces:  There are a variety of options that can help keep you cool.

2. Night Sweats

A woman lying in bed with her arm over her face.

Photo Credit: Shutterstock

Night sweats are different from hot flashes. Think of them as hot flashes on steroids that occur during sleep and cause excessive sweating. Basically, you wake up, and your pajamas and sheets are soaking wet.

Again, hormonal fluctuations are the culprit here—particularly decreased estrogen levels, which interfere with the body’s heat regulation.

How To Deal With Night Sweats:

  • Bedroom Environment: Keep your bedroom cool and well-ventilated, using a fan if needed.
  • Light Bedding: Use lightweight blankets and moisture-wicking pajamas.
  • Hydration: Drink plenty of fluids throughout the day.

3. Joint Pain

A woman sitting on the bed with hip joint pain.

Photo Credit: Shutterstock

A decline in estrogen can cause inflammation, leading many women to experience menopause joint pain and stiffness. 

This issue often goes undiagnosed, but it can be a real problem!

How To Deal With Menopause Joint Pain:

  • Stay Active: Regular workouts and mobility exercises help keep joints flexible. Joints are where two bones come together, and consistent movement helps keep them naturally lubricated.
  • Diet: Eat a healthy diet rich in anti-inflammatory foods like fatty fish, nuts, and leafy greens.
  • Supplements: Consider Omega-3 supplements for joint health.

4. Mood Swings

A sad woman feeling lonely while sitting on her couch.

Photo Credit: Shutterstock

Hormonal imbalances can impact brain chemicals that regulate mood. And if you are sleep deprived (another one of our ten common symptoms), your mood swings are worse.

Mood swings are sudden and intense changes in emotional state, often without any apparent reason. Think irritability, depression, and more anxiety than usual. One minute you are fine, the next you are sobbing at a sappy commercial.

You feel like you aren’t controlling your own emotions or mood changes.  

How to Handle Mood Swings:

  • Mindfulness & Meditation: Practice stress-relief techniques.
  • Healthy Lifestyle: Regular exercise and balanced nutrition can stabilize mood. Make sure you are getting your vitamins and minerals and needed supplements. 
  • Social Support: Engage with friends, family, or support groups. If feelings become unbearable, please seek the help of a therapist or psychologist and your doctor. 

5. Menopausal Weight Gain
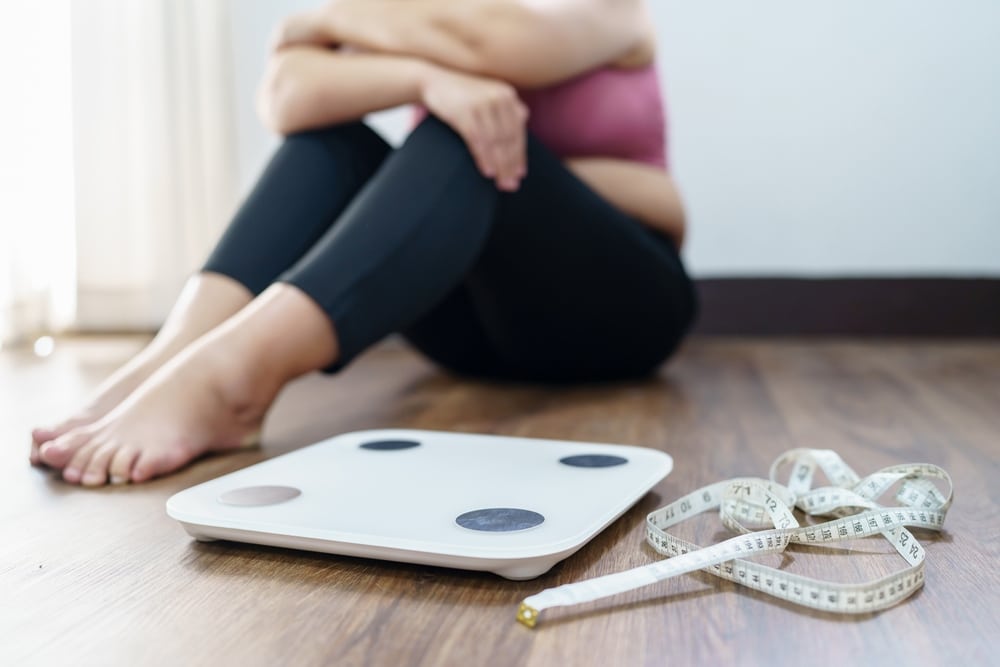
An overweight woman sitting on the floor next to a floor scale.

Photo Credit: Shutterstock

Menopause-related weight gain is incredibly common due to slowing metabolism and hormonal changes. Menopausal weight gain typically accumulates around the abdomen.

How to Handle Menopausal Weight Gain:

  • Balanced Diet: Focus on whole foods and reduce processed foods. Eat more protein and fiber. Get rid of chemicals, fake food coloring and additives which cause inflammation. 
  • Regular Exercise: Incorporate both cardio workouts and strength training. If you are not strength training and you are over 50, now is the time! Muscle is the key to aging and staying strong and keeping your metabolism energized. (You can also check out the five benefits of HIIT exercise during menopause.)
  • Portion Control: Be mindful of your portion sizes—calories do matter!

Check out more top tips for getting rid of menopause belly fat.

6. Poor Sleep

Older woman falling asleep while sitting at her desk.

Photo Credit: Shutterstock

Hormonal changes can disrupt sleep patterns. Sleep problems can include difficulty falling asleep or staying asleep, often leading to overall fatigue.

How to Improve Poor Sleep:

  • Sleep Routine: Establish a consistent sleep schedule. I had to get rid of my phone in bed! 
  • Caffeine Intake: Avoid caffeine. This was key for me was not having any after lunch.
  • Sleeping Environment: Create a cool, dark, and quiet sleeping space.
  • Supplements: There are many natural supplements that contain melatonin, magnesium, and other ingredients to help you fall and stay asleep. 

If you’re struggling with a consistent nighttime routine, check out these science-backed tips for getting better sleep.

7. Brain Fog 

A woman sitting at an outdoor table with her hand on her head in frustratiion.

Photo Credit: Shutterstock

Hormonal shifts can affect cognitive function. As estrogen drops, your receptors may not be triggering well, and your lack of recall, concentration, and focus can worry you. 

Many women experience brain fog as a common symptom of menopause. It’s recognized as forgetfulness or difficulty concentrating. It can also look like having a hard time remembering words or recalling what you just did or why you walked into a room.

How To Deal With Brain Fog:

  • Mental Exercises: Engage in activities that challenge your brain. Play games, read daily, learn new things. 
  • Stay Organized: Use planners and reminders.
  • Healthy Lifestyle: Maintain a balanced diet and regular physical activity.
  • Stay Socially Connected: Connect with friends and family and try not to isolate yourself. 

8. Loss of Libido

Older woman sitting on a hill outside.

Photo Credit: Shutterstock

During menopause, many women experience a loss of libido or a decrease in sexual function.

All of a sudden, you may have a lack of interest in sex, vaginal dryness, and pain during sex. This is because lower estrogen levels can reduce blood flow to the genital area and decrease arousal. 

How To Deal With Loss of Libido:

  • Open Communication: Talk with your partner about your needs and concerns.
  • Lubricants: Over-the-counter vaginal moisturizers and water-based lubricants can help alleviate vaginal dryness and discomfort during sex.  
  • Consult a Doctor: Seek advice on possible treatments.

This is a complex subject, and there are a few things you can do on your own, but reaching out to your healthcare provider to talk about your menopausal transition is encouraged. 

9. Skin Changes
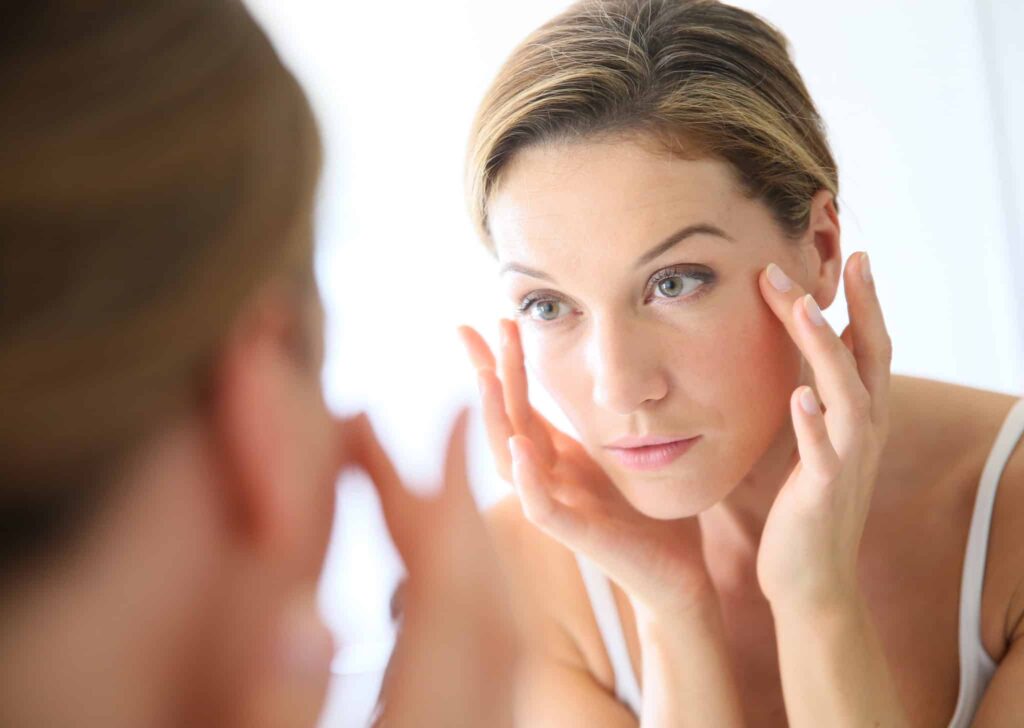
A woman examining her skin in the mirror.

Photo Credit: Shutterstock

Many women experience noticeable changes in skin texture, coupled with the onset of wrinkles, dry patches, itchy skin, and slow wound healing. This one is a doozy.

Many women complain of crepey arms, legs, and necks in particular. Once again, the decline of estrogen is the culprit because it causes less blood flow to your skin. Menopause also brings on an accelerated loss of collagen and elastin.  

How To Deal With Skin Changes:

  • Diet and Supplements: Make sure to take adequate vitamin D. Collagen supplements can also be helpful. 
  • Topical Moisturizers: Use quality moisturizers with ingredients like hyaluronic acid to hydrate the skin. Use topical retinoids and Beta hydroxy acids to improve texture. 
  • Strength Train: You can’t eliminate crepey skin but by building muscle, it certainly looks better. 
  • Stay Hydrated: Drink plenty of fluids throughout the day. 
  • Skin Treatments: Talk to your dermatologist or a medispa about options to reach your skin goals. 
  • Lifestyle Changes: Wear a clean sunscreen. Wear UV protective clothing and avoid peak sun hours. 

10. Migraine Headaches
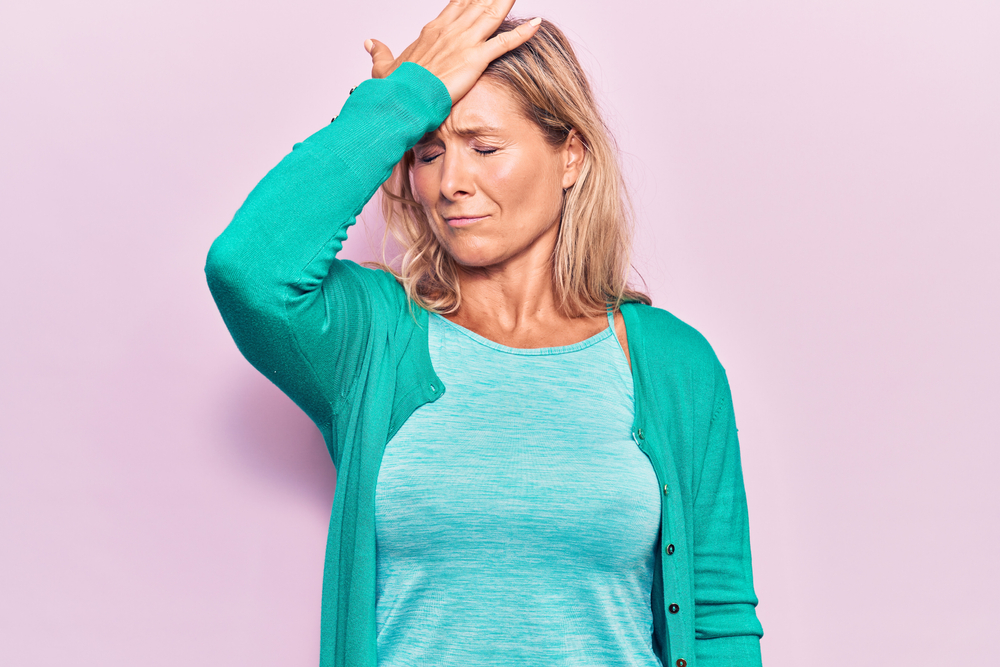
middle aged woman frustrated with fitness myths

Photo Credit: Shutterstock

Migraines and headaches are very common during menopause. Many women experience frequent or severe headaches that may be new or worsening.

A migraine is a specific type of headache that is often characterized by throbbing pain on one side of the head. 

How To Improve Menopausal Migraines or Headaches:

  • Hydration: Drink plenty of water.
  • Alcohol Intake: Reduce alcohol consumption. 
  • Over-the-Counter Pain Relief: Use medications like Advil or Excedrin as needed. 
  • Professional Advice: If headaches persist, consult a healthcare provider.

While these conditions and symptoms are common, everyone’s experience is unique. Always consult with your doctor to discuss any concerns or symptoms you may be experiencing that are impacting your quality of life.

Remember, you are not alone! With the right strategies, you can navigate menopause with confidence and grace.

Is a Fitness Tracker Right for You? The Pros and Cons For Women Over 40

Fitness trackers have become an essential piece of home gym equipment and a regular part of our daily lives, especially for those of us working towards or maintaining fitness goals!

A fitness tracker is a wearable device (often designed as a watch) that monitors various aspects of your physical health throughout the day while you wear it. These devices have come a long way in terms of design and functionality.

With sleek, popular designs, fitness trackers promise to help with goal setting (hit those daily steps!) and health monitoring (think quality of sleep!)—but they also come with a fair share of concerns.

Here, we explore the pros and cons of using a fitness tracker, specifically for middle-aged women.

Pro: Goal Setting and Motivation

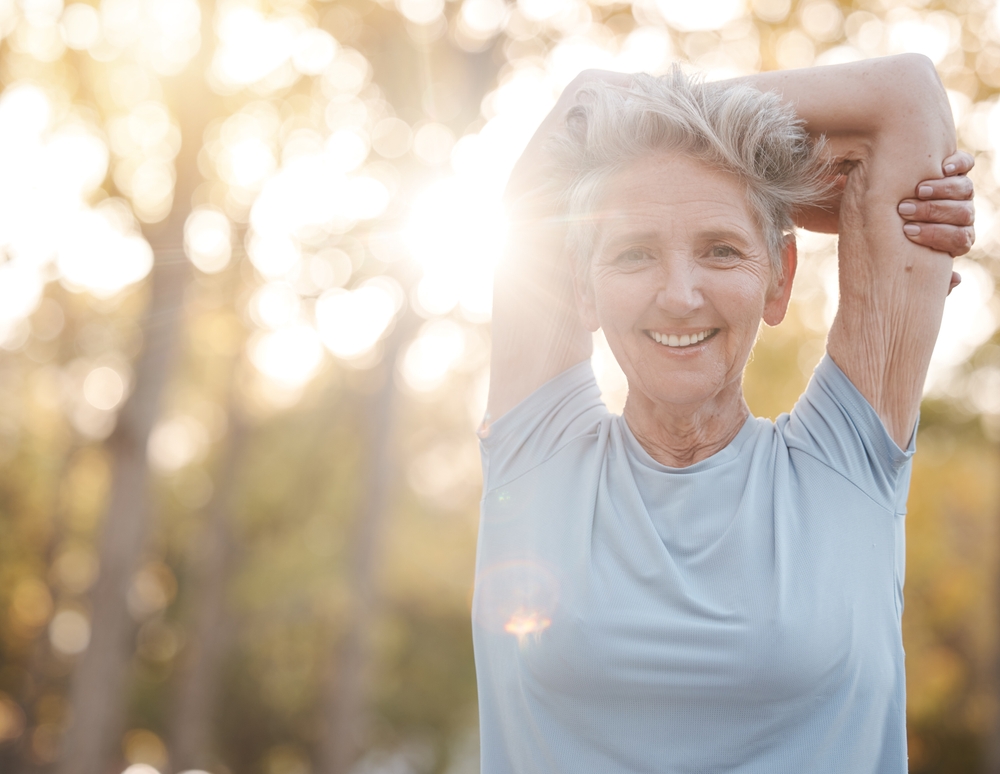
Older woman stretching before a functional strength training workout.

Photo Credit: Shutterstock

One of the most significant benefits of using a fitness tracker is its ability to help you set and achieve your fitness goals.

Whether it’s increasing your daily step count (have you ever wondered how many steps it actually takes to lose weight?), staying active throughout the day, or monitoring your nighttime patterns to focus on getting better sleep, these devices provide tangible targets to aim for.

They can serve as a daily reminder and motivator, keeping you focused on your health and fitness objectives.

Possible Con: Obsessive Behavior

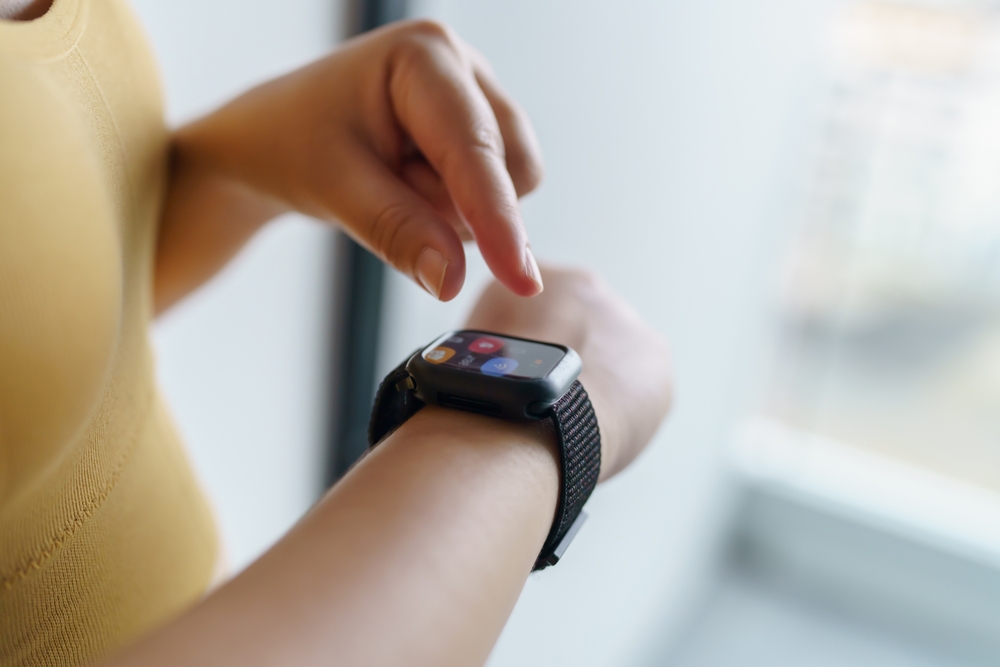
Woman looking at her fitness tracker watch.

Photo Credit: Shutterstock

There’s a fine line between being motivated by your fitness goals and becoming obsessed with them.

For some, constant monitoring and data tracking can lead to an unhealthy fixation on numbers, potentially overshadowing the real focus on health and well-being.

Pro: Health Tracking

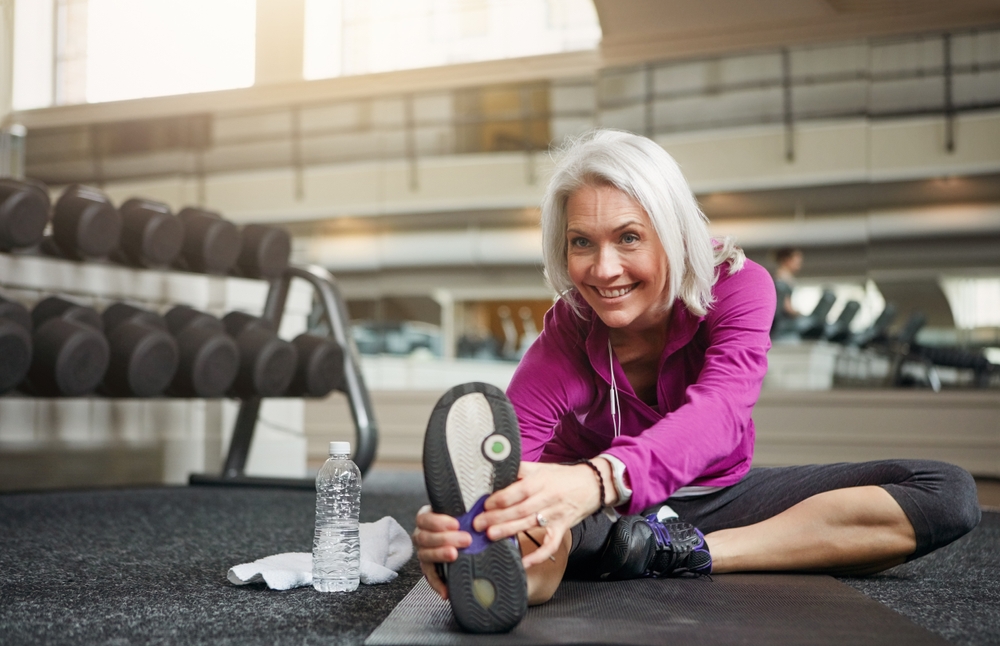
Older woman stretching on gym floor for a low-impact workout for bad knees.

Photo Credit: Shutterstock

For middle-aged women, monitoring health metrics such as heart rate, blood oxygen, and sleep quality can be vital. Fitness trackers offer an easy way to monitor these aspects continuously, allowing for early detection of potential health issues.

Some trackers, like the Apple Watch, will help you manage your medications, check for AFib, and call 911 in emergency situations.

This continuous feedback can empower you to make informed decisions about your health and lifestyle.

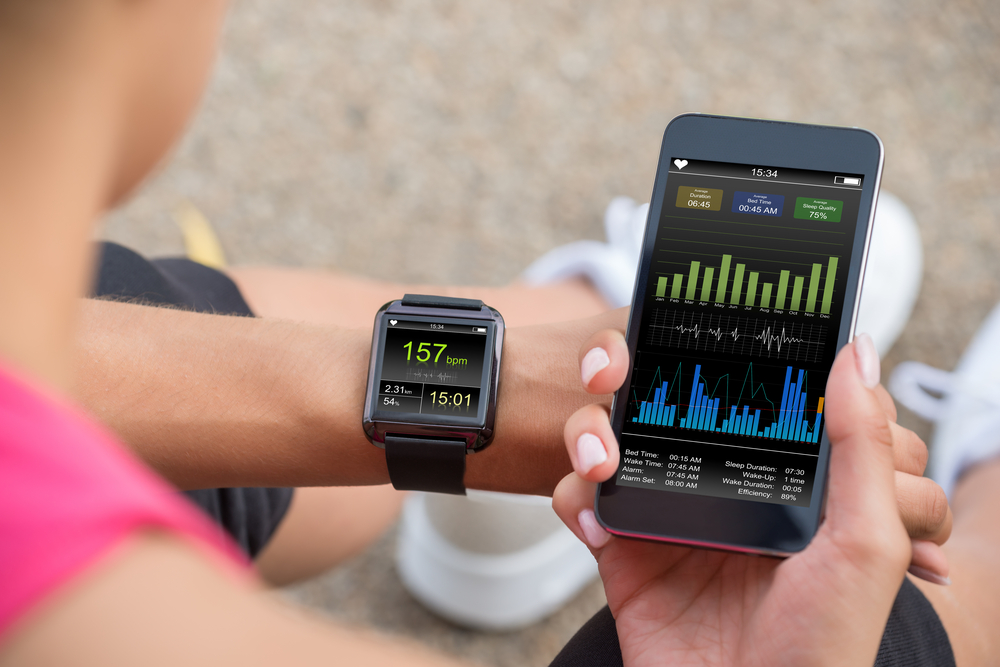
Possible Con: Device Accuracy

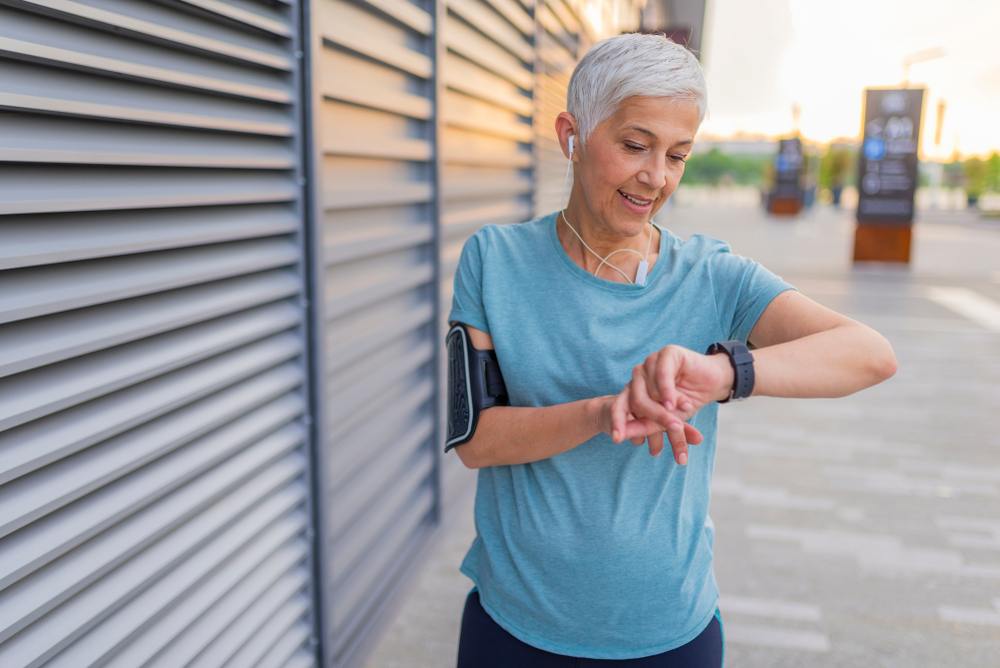
Female Runner Looking At Her Mobile And Smart Watch fitness tracker.

Photo Credit: Shutterstock

While fitness trackers have come a long way, the accuracy of the data they provide can sometimes be questionable.

Steps counted, calories burned, and sleep monitored can all have variances, which might lead to slight misinterpretations of your health and activity levels.

For most people, it’s close enough, but others may be very focused on the numbers.

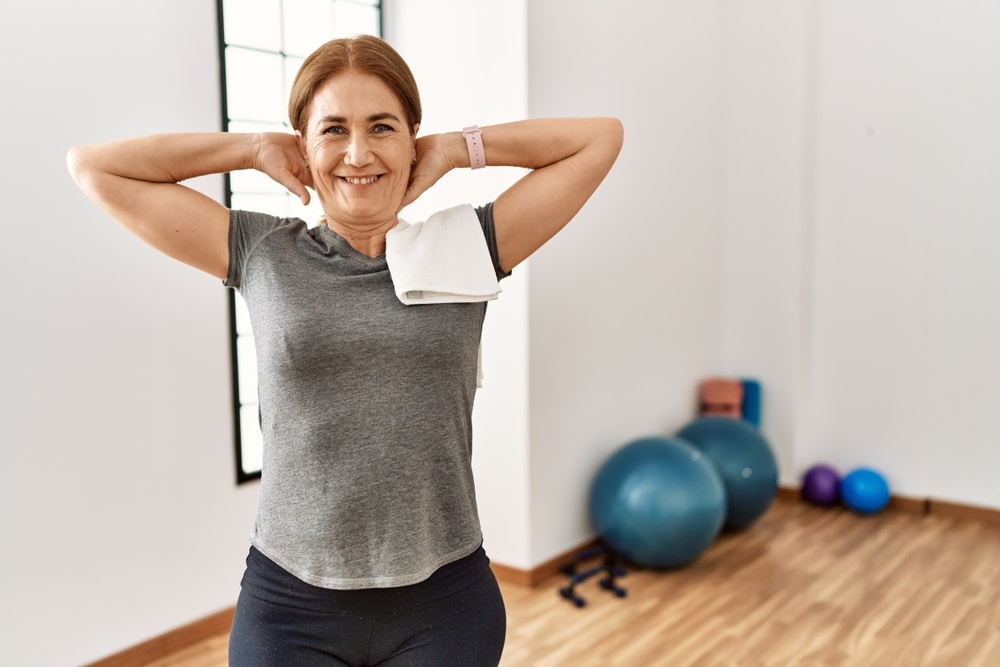
Pro: Workout Guidance

Smiling woman with her hands behind her head at the gym.

Photo Credit: Shutterstock

Many fitness trackers come equipped with built-in workout routines and suggestions, making it easier than ever to get a guided exercise session without the need for a personal trainer or gym membership.

This feature is particularly beneficial for those new to exercising or looking to diversify their workout regimen.

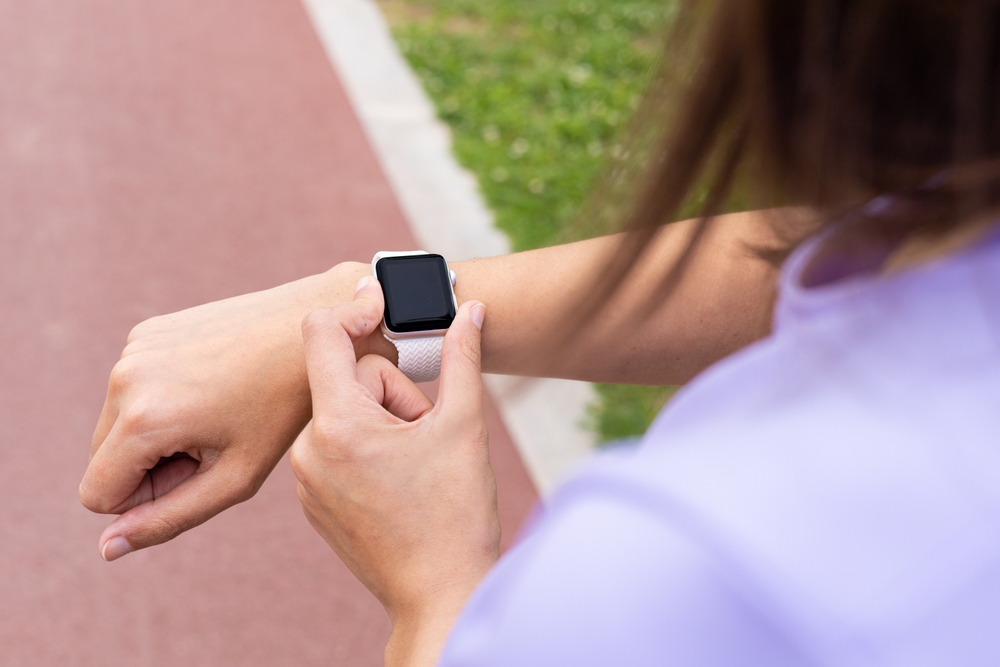
Possible Cons: Price, Battery Life, and Data Privacy

woman checking smartwatch fitness tracker after running outdoors.

Photo Credit: Shutterstock

Cost: Quality fitness trackers are not cheap, and the initial investment can be quite high. Considering the need for periodic upgrades and replacements, the cost can add up, making it a significant factor to consider before purchasing.

Battery Life: The convenience of a fitness tracker can quickly diminish if you’re constantly needing to charge it. Battery life varies widely among different models, with some requiring daily charging, which can be a hassle for busy individuals.

Data Privacy: The collection of significant amounts of personal health and activity data can certainly raise privacy concerns. It is crucial to ensure that your data is secure and understand how the device manufacturer uses it.

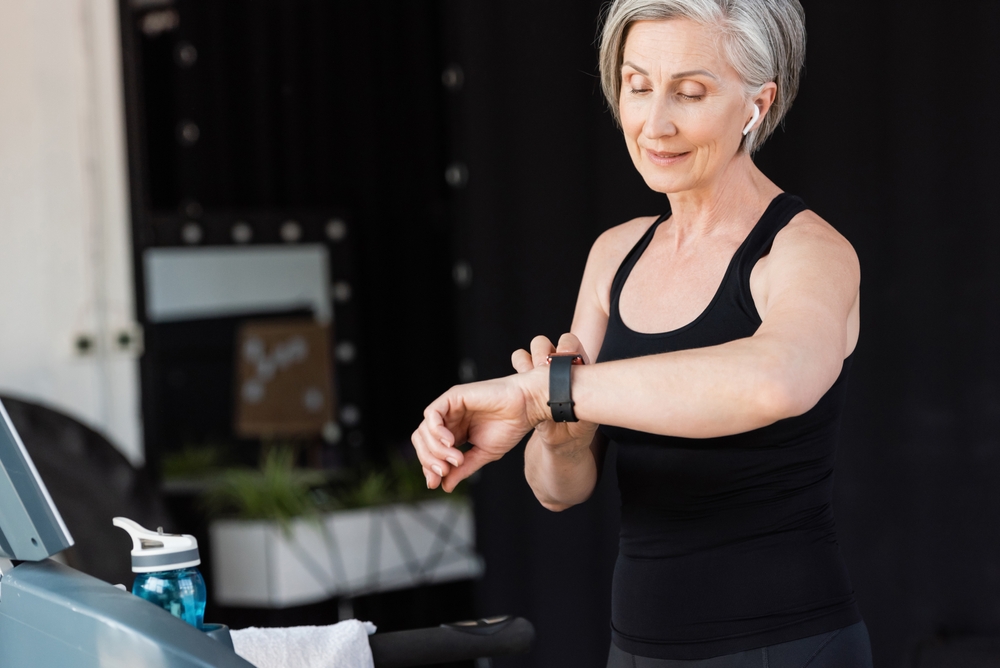
Pro: Convenience

Woman with wireless headphones checking activity on fitness tracker in the gym.

Photo Credit: Shutterstock

The convenience of having a multipurpose device on your wrist cannot be overstated.

Beyond just fitness, these gadgets can offer functionalities like message notifications, weather updates, and music control, integrating seamlessly into your daily life.

So, Is a Fitness Tracker Right For You?

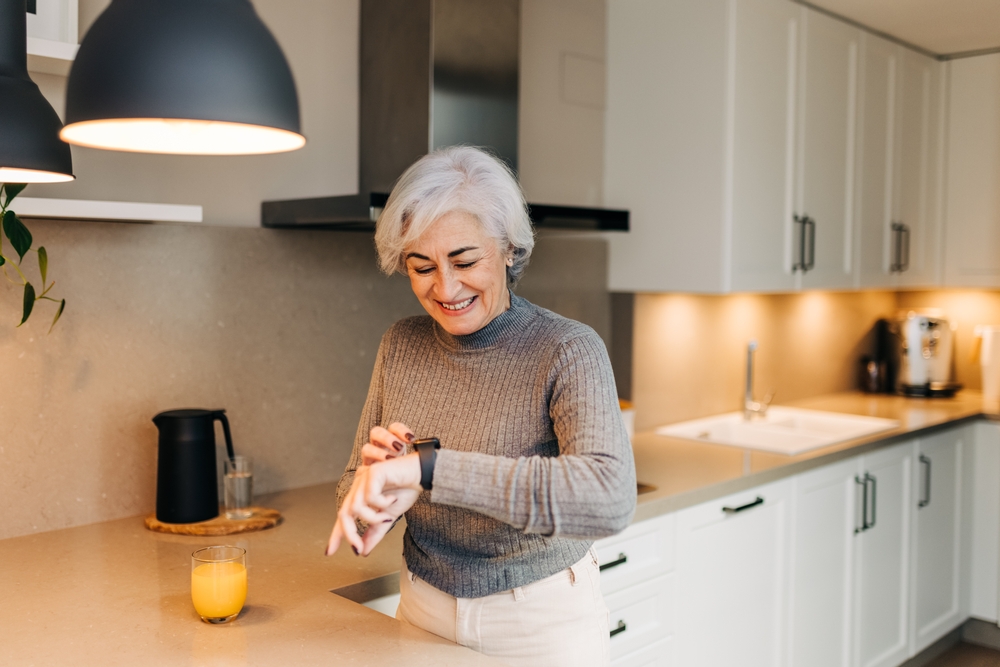
Healthy senior woman smiling at her smartwatch fitness tracker while standing in her kitchen.

Photo Credit: Shutterstock

Fitness trackers offer a convenient and innovative way for middle-aged women to monitor their health and fitness goals.

That said, it’s important to weigh the pros, such as motivation, health tracking, workout guidance, and convenience, against the cons, including data accuracy, potential for obsessive behavior, cost, battery life, and privacy concerns.

Ultimately, the decision to use a fitness tracker should align with your personal health goals and lifestyle preferences, ensuring it serves as a tool for empowerment rather than a source of stress.

Whether you decide to use a fitness tracker or not, remember that the path to wellness is personal and varied, and the best approach is the one that makes you feel supported, motivated, and healthy!

7 Must-Try Exercises for a Lifted and Toned Booty

Strong glutes are important for your overall health. They are the largest muscle group in your body and play a crucial role in supporting and enabling various movements.

These seven booty exercises can help you strengthen your buns, promote good posture, improve mobility, and stabilize your hips. (Who knew butt exercises could have such a lasting impact?)

All you need is this list of exercises and the will to be consistent, and you’ll get one step closer to a better butt!

The following are 7 of the best butt exercises you can do from home. You can incorporate them into your existing workouts or do them all together for one killer, butt-kicking workout!

If you do them as an exercise program, perform 8-10 repetitions of each movement. These moves are all bodyweight except for the resistance band butt blaster—but this move can be modified without the resistance band, too.

1. Basic Squat Exercise

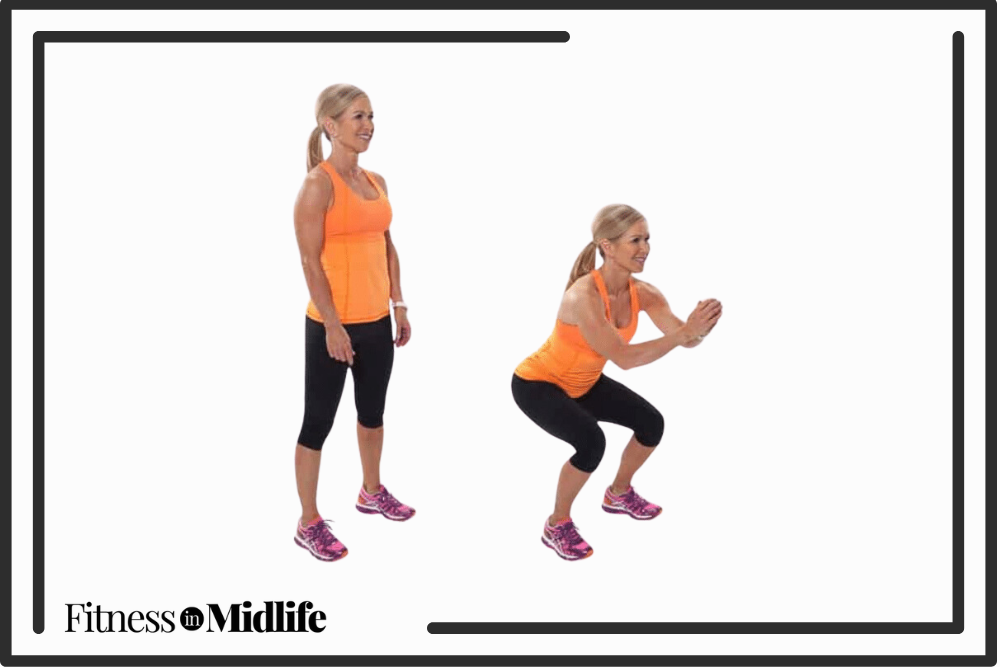
Chris Freytag doing a basic squat booty exercise.

Photo Credit: Get Healthy U


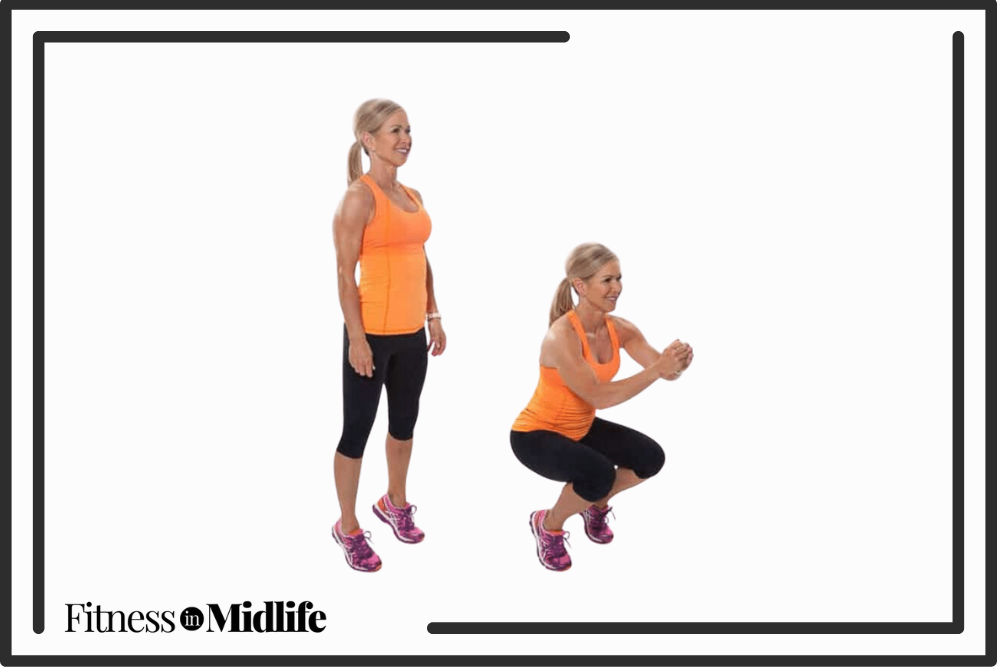
The basic squat is an effective lower body move that strengthens all leg muscles including glutes, quads, hamstrings, and calves. You can stick to bodyweight at first, and add additional resistance as you build muscle strength.

How To Do A Basic Squat:

  • Stand tall with your feet hip-distance apart. Your hips, knees, and toes should all be facing forward.
  • Bend your knees and extend your buttocks backward as if you are going to sit back into a chair. Make sure that you keep your knees behind your toes and your weight in your heels. Rise back up and repeat.

2. Skaters

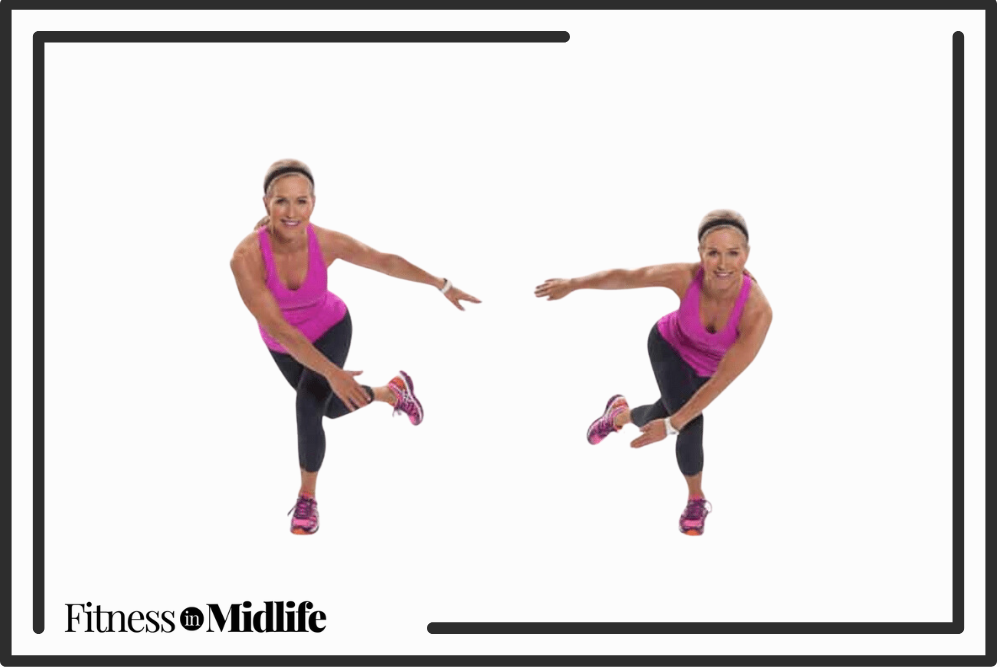
Chris Freytag doing a skater booty exercise.

Photo Credit: Get Healthy U


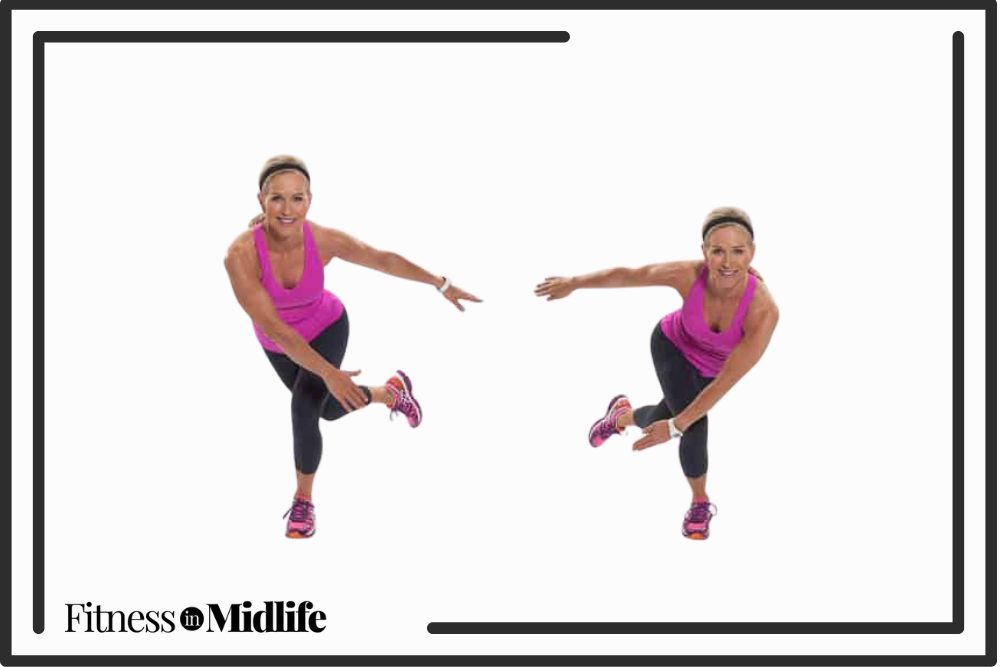
Skaters are a cardiovascular exercise where you perform a lateral jump to get your heart rate up, strengthen your legs and improve stability and balance. The strengthening part of this exercise is mostly focused on quads and glutes. However, an added benefit to this move is a strengthening of your medial glute- or the outer thigh. 

How To Do Skaters:

  • Start with your legs slightly wider than shoulder-distance apart and arms at the sides.
  • Bring one leg behind at a slight angle into a reverse lunge. The front knee will come to a 90-degree angle.
  • Swing the arms in front of that bent knee and leap the back leg forward to switch sides in a skating motion—arms alternate as you switch sides like a speed skater.

3. Squat Jumps Exercise

Chris Freytag doing squat jumps.

Photo Credit: Get Healthy U

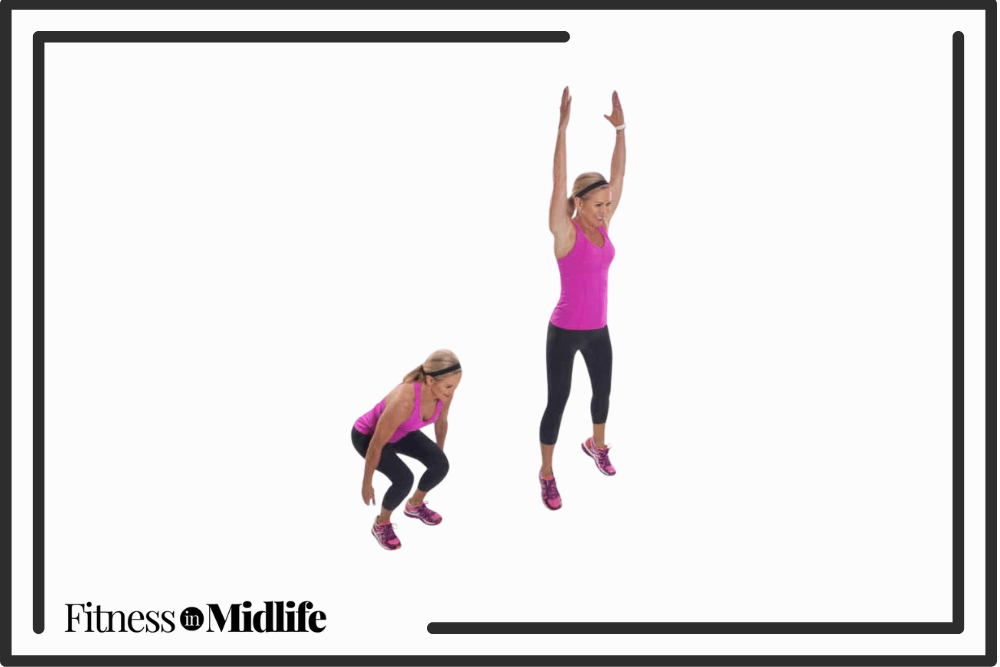
Squat jumps are a powerful, plyometric exercise that strengthens your entire lower body and increases your heart rate for a significant calorie burn. Squat jumps target your quads, hamstrings, glutes and calves while also toning the ab and back muscles.

How To Do Squat Jumps:

  • Start standing with feet hip-distance apart and lower into a squat position by bending the knees. Keep the spine straight, chest lifted, and knees behind toes. Arms are in front of the chest for balance.
  • Jump straight up and swing arms overhead. Return to squat.

4. Resistance Band Butt Blaster Exercise

Chris Freytag doing a resistance band butt blaster exercise.

Photo Credit: Get Healthy U

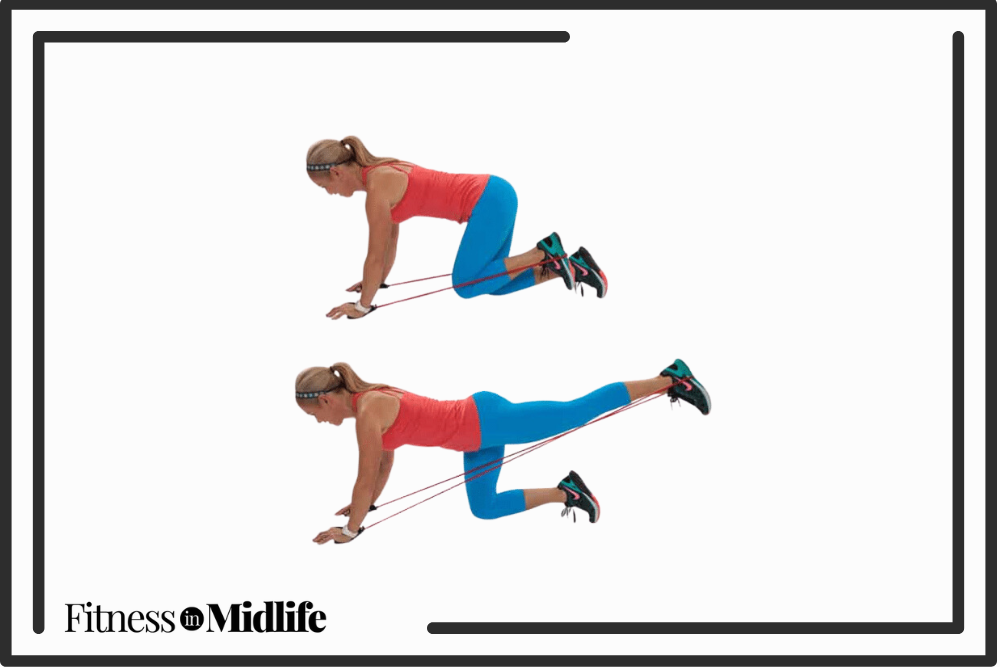
The resistance band butt blaster is a unique way to strengthen your glutes without having to do any squats or lunges or even put body weight on your knees. The resistance band provides a unique opportunity to find new ways to complete exercises that might otherwise be impossible.

Note: You don’t have to use a resistance band if you don’t have one; it can easily be modified as bodyweight-only.

How To Do Resistance Band Butt Blasters:

  • Kneel on the floor and wrap band under the right foot, and place hands down under shoulders holding handles against the floor.
  • Lift right knee off the floor slightly and push the right foot back to extend leg straight against the band, squeezing your glute.
  • Release slowly, bringing the knee back into a bent position. Continue for desired reps and switch feet.

5. Glute Bridge Exercise

Chris Freytag doing a bridge exercise for lower abs.

Photo Credit: Get Healthy U

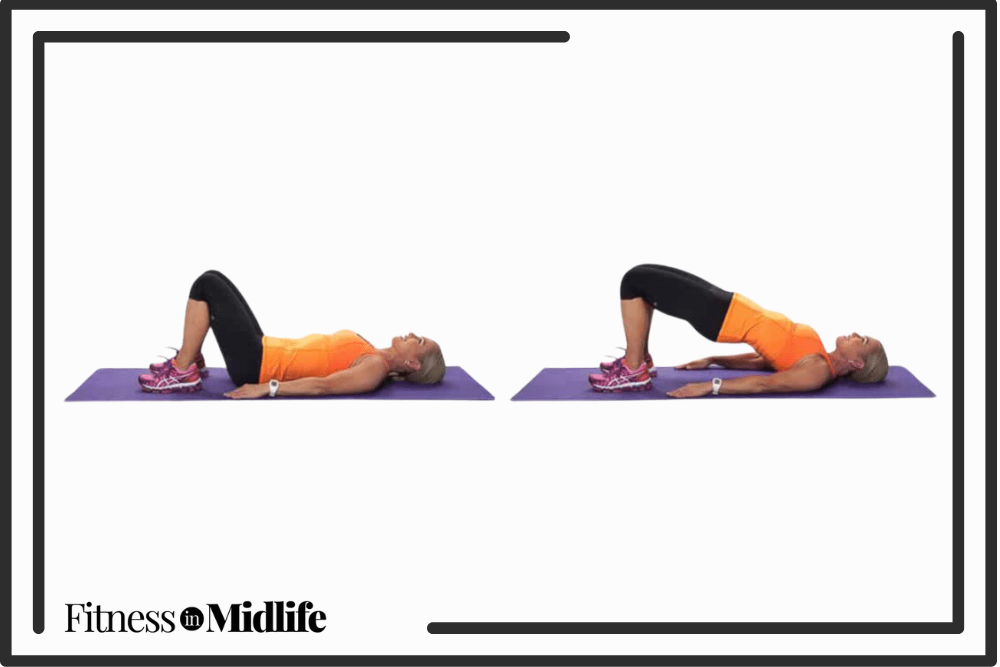
The glute bridge is a simple exercise with powerful results. It helps you build strength, improve posture, and sculpt a toned, firm posterior.

How To Do Glute Bridges:

  • Lie on back with bent knees hip-distance apart, and feet flat on mat stacked under the knees.
  • Engage the core and squeeze your glutes as you lift your hips to a bridge. Hold, squeezing tight, and return to the mat with control. Repeat for the desired number of reps.

6. Plié Squats

Chris Freytag doing a plie squat booty exercise.

Photo Credit: Get Healthy U

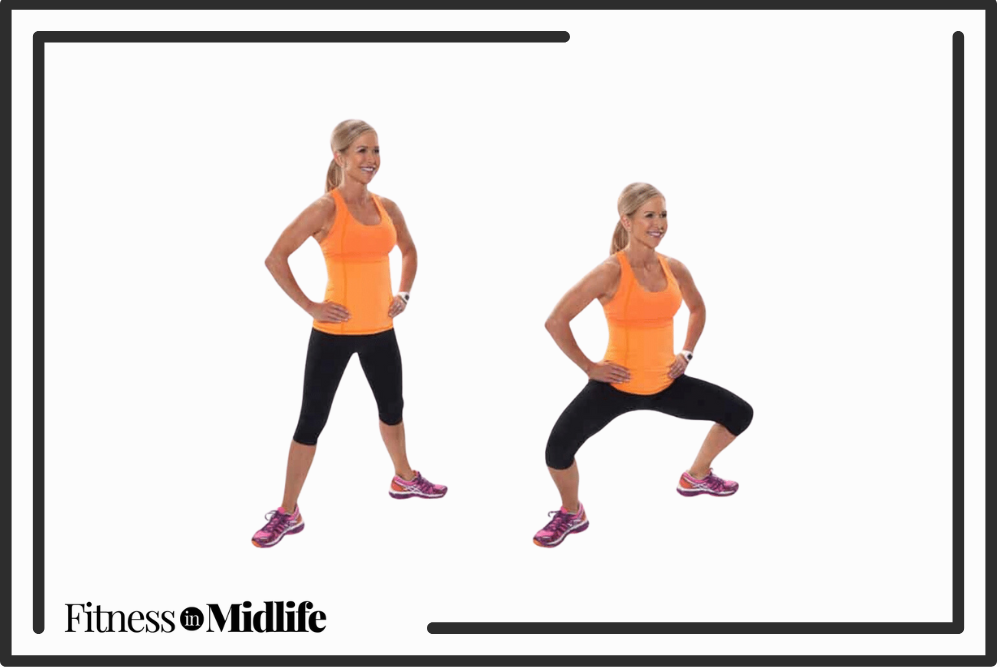
A plié squat is an exercise that strengthens the legs, glutes, and calves and increases the range of motion in your hips. They are sometimes referred to as a sumo squats, since the toes are turned outwards in a wide stance position. This lower body move targets the thighs (toning the inner thighs,) hamstrings, and glutes (the strongest and most powerful muscles in your butt.)

How To Do Plié Squats:

  • Stand with feet slightly wider than shoulder distance apart and toes turned out into a 45-degree angle.
  • Bend knees and lower your torso, keeping your back straight and abs tight.
  • Squeeze your glutes and come to a standing position.

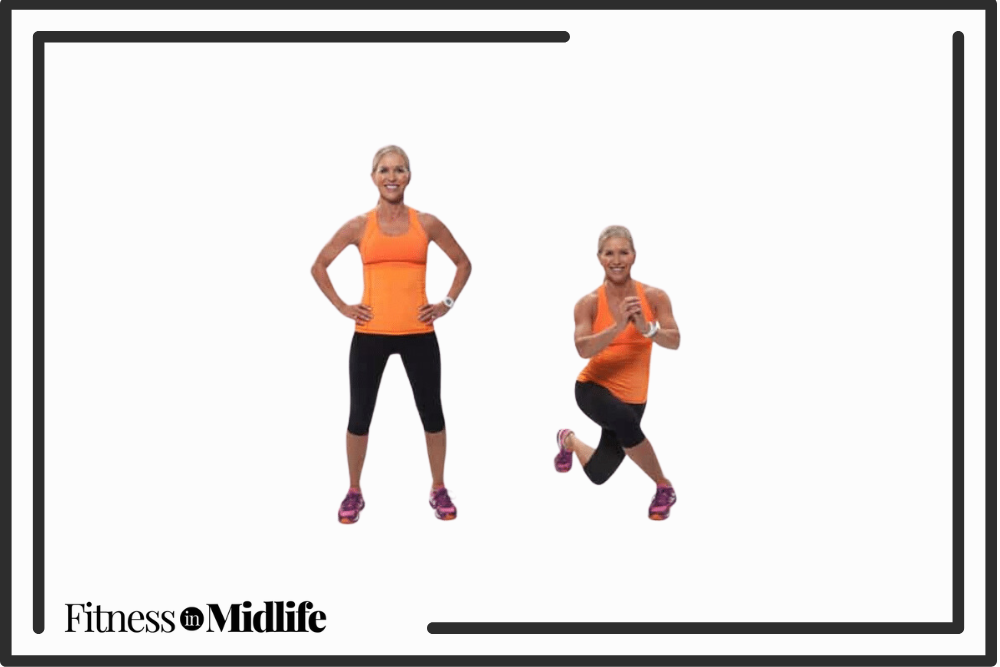
7. Cross Behind Lunges

Chris Freytag doing a cross behind lunge booty exercise.

Photo Credit: Get Healthy U

The cross behind lunge is a great version of a lunge that focuses on strengthening your glutes, quads, hamstrings and calves. It lets you sink into a deep range of motion to really shape your booty and sculpt your thighs, and can be done with bodyweight alone, or added weight. Bonus! They’re low impact and a great way to get an awesome rear end.

How To Do Cross Behind Lunges:

  • Begin standing with your feet hip-distance apart.
  • Transfer your body weight onto your left leg and cross your right foot behind your left leg keeping your hips facing forward as you bend both knees and lower yourself toward the floor in a lunge. Keep your back straight, and chest lifted to keep your weight in the front leg. Step back to the start position and repeat on the other side.

You don’t have to visit a plastic surgeon to get a bigger butt. Use this booty

5 Common Health Concerns for Women Over 50 (And What to Do About Them)

Health issues tend to pop up more frequently as we age, and while they might not seem like a big deal at first, ignoring them can lead to bigger problems down the road.

While individual concerns can vary widely, there are some common health concerns among women over 50. As a 58-year-old fitness trainer, Chris Freytag has spent decades working with women and has narrowed down the most frequent.

Here are her top five concerns for women over 50, along with advice on how to help.

Concern #1: Bone Health and Osteoporosis

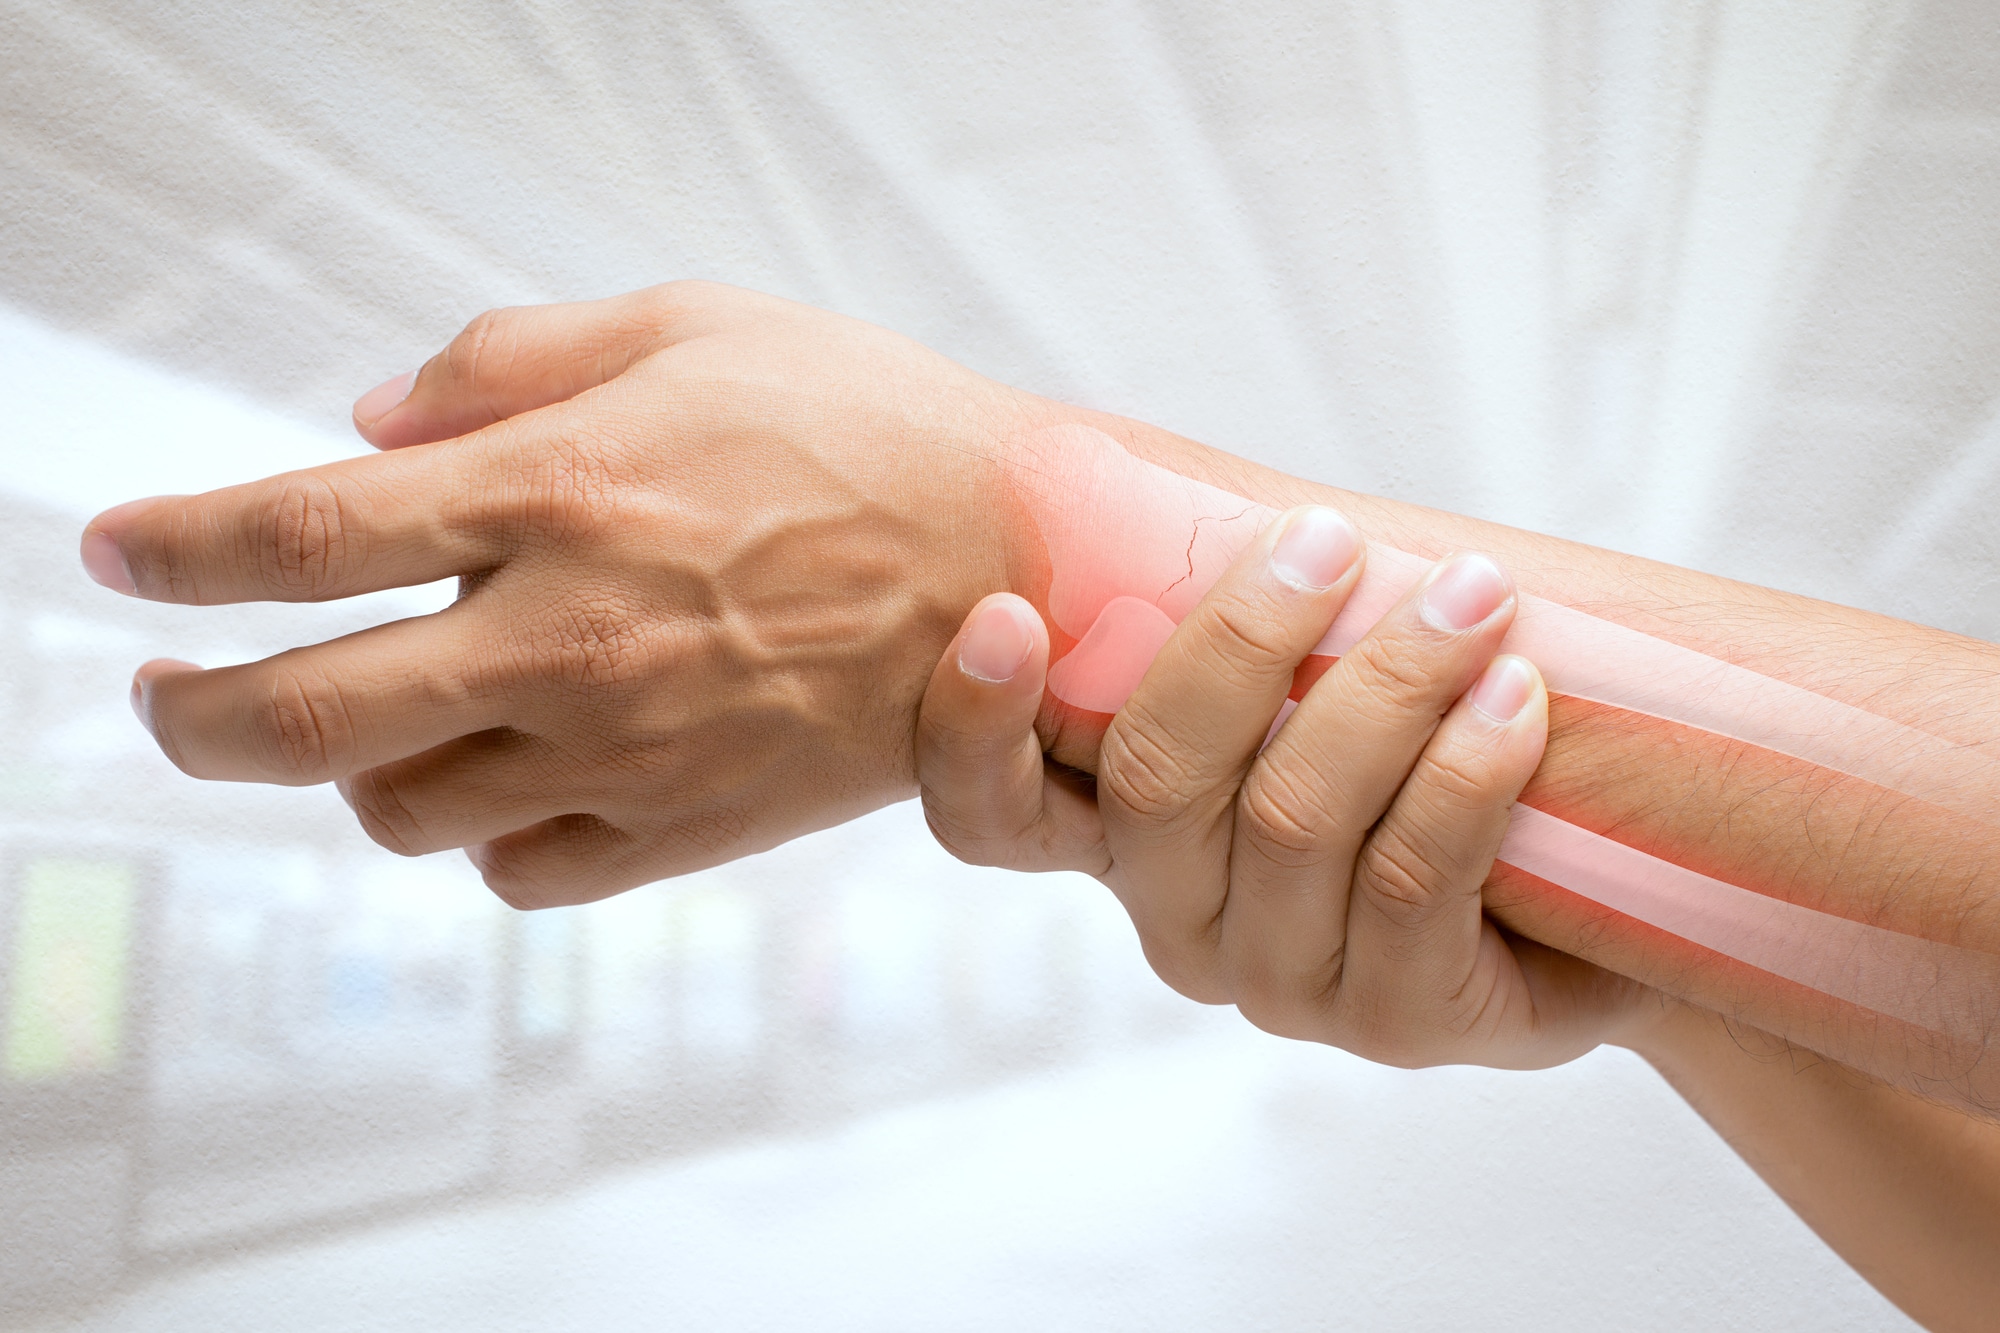
A man massaging painful wrist on a white background.

Photo Credit: Depositphotos

As women age, they are at an increased risk of osteoporosis and fractures due to bone density loss.

Solution: Weight-bearing exercises, resistance training, and activities like walking and dancing can help maintain bone density. Adequate calcium and vitamin D intake are also crucial!

You can ask your healthcare provider whether calcium and/or vitamin D supplements may benefit your specific needs.

Concern #2: Weight Management and Metabolism

woman smiling at scale measurement

Photo Credit: Shutterstock

Many women over 50 find it harder to maintain a healthy weight and struggle with a slowing metabolism.

Solution: Regular exercise, including both aerobic activities (like walking or swimming) and strength training, can boost metabolism and maintain muscle mass.

Moreover, eating habits play an important role in maintaining a healthy metabolism. Eating small meals more frequently throughout the day can help speed up your metabolism after 50 and keep it running at its optimal level.

It’s important to eat balanced meals that include lean proteins, complex carbohydrates, and healthy fats. Avoid processed foods high in sugar and saturated fat, as these can slow down your metabolism over time.

Concern #3: Heart Health and Cardiovascular Disease

older couple power walking

Photo Credit: Shutterstock

Heart disease risk increases with age, making cardiovascular health a significant concern.

Solution: Engage in aerobic exercises regularly to keep the heart healthy. This could include activities like jogging, cycling, or even brisk walking.

Additionally, managing stress through practices like yoga or meditation can also support heart health.

Concern #4: Joint Pain and Arthritis

A woman with hip pain trying to get out of bed.

Photo Credit: Shutterstock

Joint pain and arthritis become more common, limiting mobility and affecting the overall quality of life.

Solution: Low-impact exercises such as swimming and water aerobics can help reduce joint stress.

Strength training to support the muscles around the joints can also alleviate pain. Maintaining a healthy weight is crucial, as it reduces the load on joints.

Decreasing inflammation is also important! Researchers have identified that many foods found in the Mediterranean diet can help combat inflammation, which is a major cause of arthritis-related joint pain. 

Staples of the Mediterranean diet include fish like salmon, tuna, and sardines; antioxidant-rich fruits and veggies like berries, spinach, and kale; and monounsaturated fat sources like almonds, avocados, and olive oil.

Concern #5: Mental Health and Cognitive Function

A woman with a headache while sitting at her desk in front of the computer.

Photo Credit: Shutterstock

Mental health issues and cognitive decline, including memory loss and dementia, are concerns for many aging women.

Solution: Regular physical activity is linked to improved mood and cognitive function. Engage in activities that challenge the brain, such as puzzles or learning new skills. Prioritize social connections and consider practices like mindfulness meditation, which can support overall mental well-being.

Remember, it’s always best for individuals to consult with healthcare providers, including fitness experts or trainers, to create personalized plans that address these concerns based on their specific health needs and goals.

Stay Flexible and Independent As You Age With This Strength Training Method

As we age, staying flexible and independent becomes increasingly important. While cardio and stretching are essential, strength training often gets overlooked. But did you know the right strength training method can provide a significant boost to healthy aging?

This is where functional strength training comes into play!

Functional strength training is the key to maintaining mobility and independence. It builds muscles commonly used in everyday activities, making it easier and more enjoyable to move through your day.

Whether you’re a beginner or an experienced exerciser, there are endless variations and progressions to keep your workouts challenging and effective.

If you’re new to the concept of functional fitness, we’ve got you covered!

Here, we’ll break down everything you need to know about functional strength training, its amazing benefits, and how to incorporate it into your workout routine. (Plus, some exercises to get you started!)

What Is Functional Strength Training?

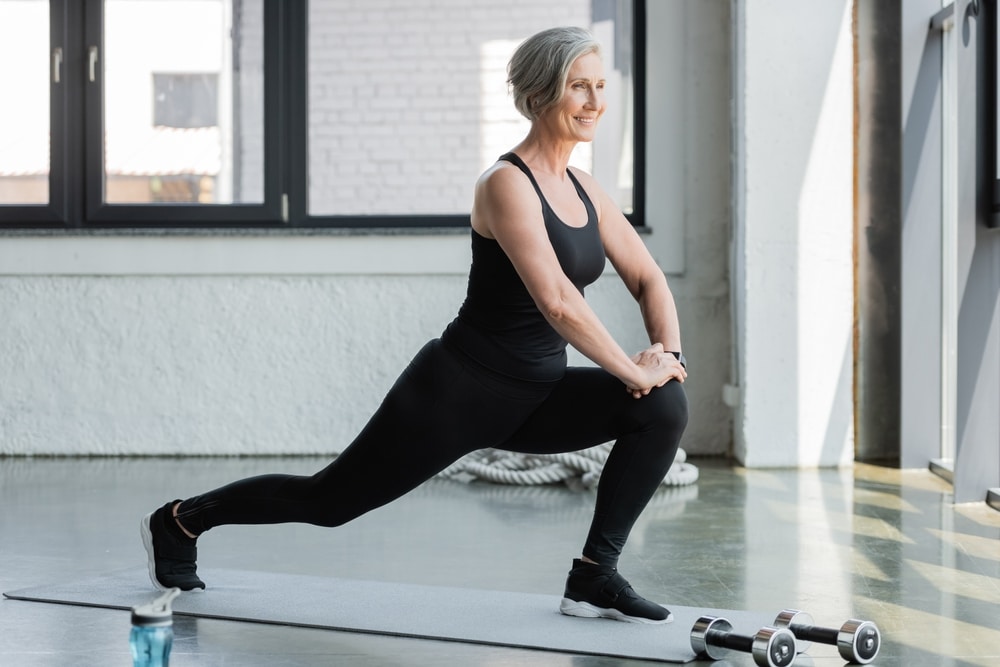
Older woman doing a lunge exercise for leaner legs in her home.

Photo Credit: Shutterstock

The term “functional strength training” might sound a bit daunting, but it’s actually not complicated! Simply put, it’s about getting back to the basics and focusing on movements that mimic everyday activities.

As we hit our 40s and beyond, maintaining functional strength becomes crucial for our overall health and well-being.

So, what exactly does a functional strength workout entail? Picture this: you’re lifting groceries, carrying your grandkids, or even just getting up from a chair. These are all movements that require strength and stability in various muscles throughout your body.

A functional strength workout targets those muscles, helping you build strength and endurance for real-life activities.

Types of Functional Strength Training Exercises

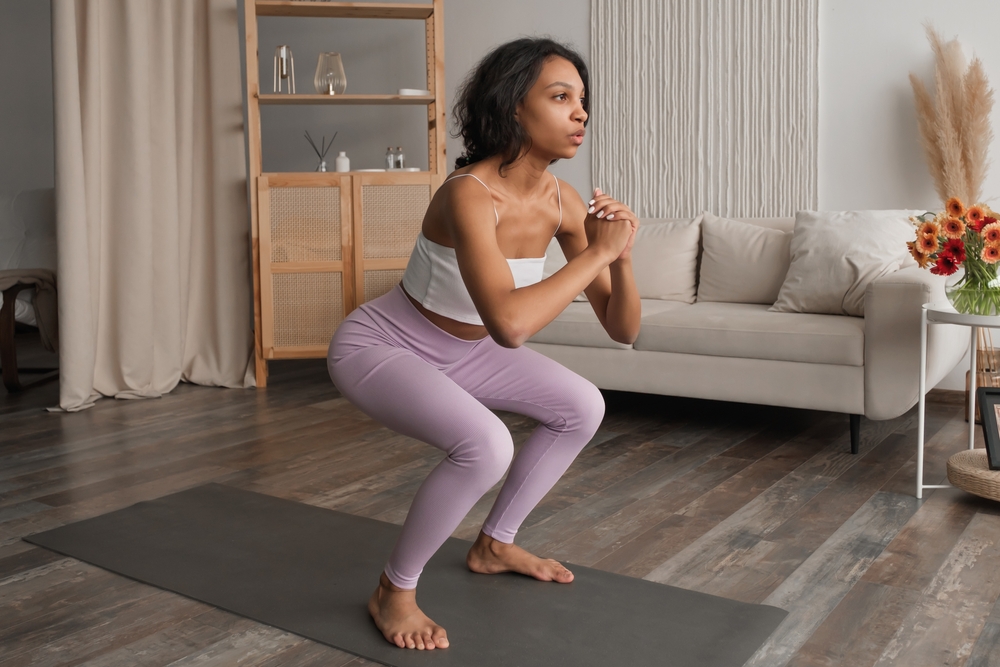
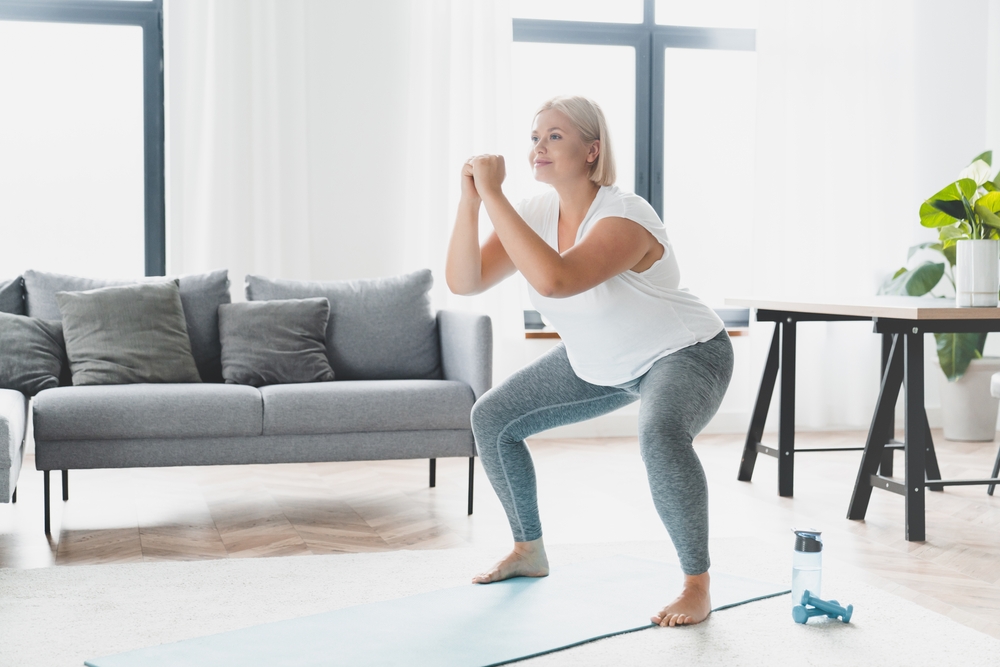
woman doing squat exercises indoors

Photo Credit: Shutterstock

A typical functional strength workout might include squatslungespush-ups, and rows. These movements engage multiple muscle groups at once rather than isolating individual muscles like traditional weightlifting exercises.

This not only saves time but also helps improve coordination and balance, which are essential as we age. (To learn more about this concept, check out which muscle groups are the best to work out together.)

But functional strength isn’t just about lifting weights. It’s also about incorporating movements that challenge your stability and mobility, like balancing on one leg or doing core exercises on an unstable surface.
These types of exercises help improve your body’s ability to move efficiently and reduce the risk of injury in everyday activities.

Functional Strength Training Aids in Everyday Life

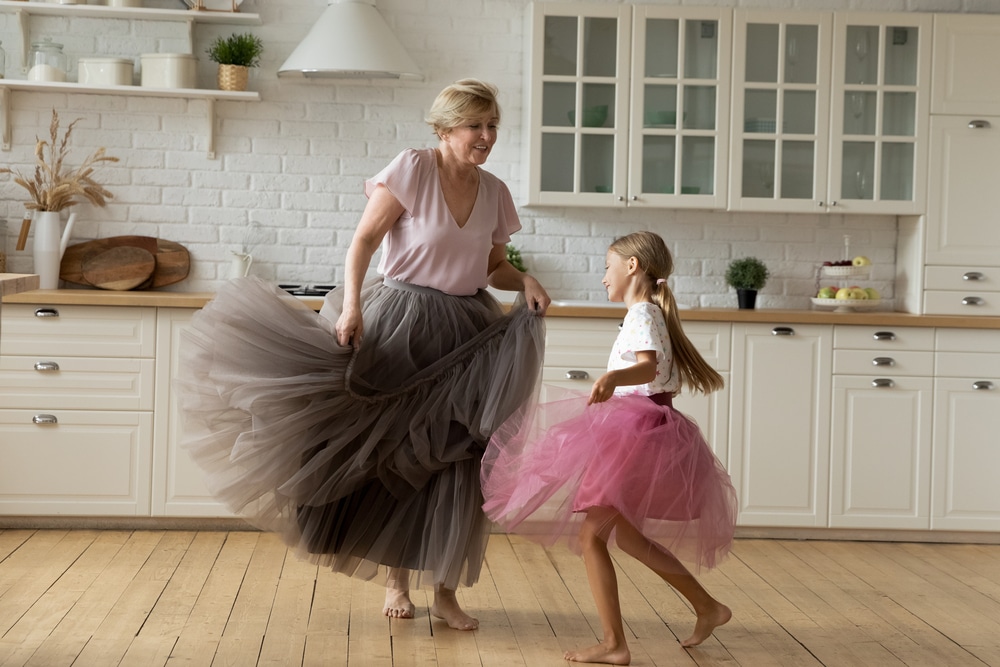
A grandmother dancing in the kitchen with her granddaughter.

Photo Credit: Shutterstock

Functional training focuses on movements that mimic everyday activities. As we age, it’s vital to maintain strength and mobility for tasks like lifting groceries, bending down to pick something up, or even playing with grandchildren.

By training our bodies to perform these movements effectively, we enhance our ability to navigate daily life with ease.

Functional Strength Training Helps Prevent Injuries

Older woman stretching on gym floor for a low-impact workout for bad knees.

Photo Credit: Shutterstock

Functional strength training targets multiple muscle groups simultaneously, improving overall strength, stability, and coordination.

This comprehensive approach helps reduce the risk of injuries, particularly common ones that occur during daily activities or as a result of age-related declines in muscle mass and flexibility.

Functional Strength Training Boosts Balance and Mobility

couple practicing balance exercises outside

Photo Credit: Shutterstock

Many functional exercises involve movements that challenge balance and proprioception, which is our body’s awareness of its position in space.
By incorporating balance exercises into our workouts, we can improve our balance and reduce the risk of falls—a common concern for older adults.

How to Incorporate Functional Strength Training Into Your Workouts

woman doing strength training with dumbbells

Photo Credit: Shutterstock

It’s easy to add some of these exercises to your workouts. Even spending just 10 to 15 minutes on some sort of functional training makes a huge impact!

Here are some common functional exercises to include in your workouts:

15 Lower Ab Exercises for a Flatter Stomach

The benefits of a strong core extend way beyond toned abs—it can improve your daily life, too! Whether you bend, lift, twist, or stand, your core is essential for maintaining balance and stability. (Not to mention, it can also alleviate lower back pain.)

By adding these 15 lower ab exercises to your overall core exercise routine (while maintaining a healthy diet), you’ll see improved stability, less back pain, and more defined lower abs.

Each of these lower ab exercises can help tone and strengthen your core, reduce lower back pain, and keep you feeling fit, strong, and energized. Be sure to take your time and maintain good form (these are not about speed!), and remember to breathe.
The following are the 15 best lower abs exercises to incorporate into your workout routine.
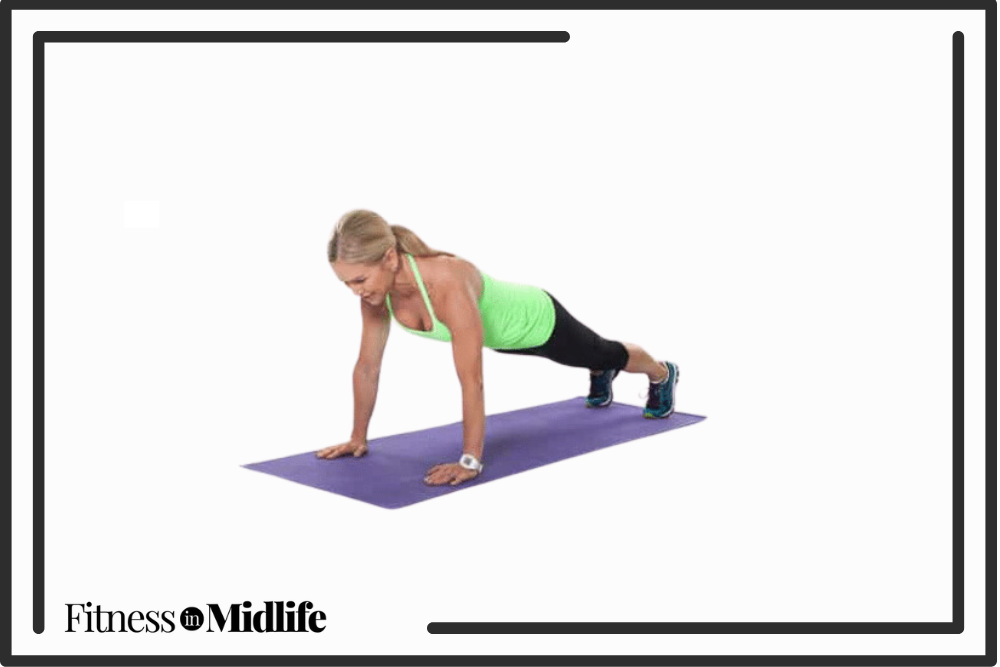
1. Plank

Chris Freytag doing a full plank exercise for lower abs.

Photo Credit: Get Healthy U

The plank is a staple of most ab workouts because it recruits the entire core. (Try this 8-minute plank challenge if you’re up for it!)

How to perform a plank:

  • Begin kneeling on all fours with your hands directly under your shoulders and toes on the mat.
  • Tighten your abdominals and raise your body up off the floor, lengthening your legs behind you. Hold your entire body tight, and remember to breathe.

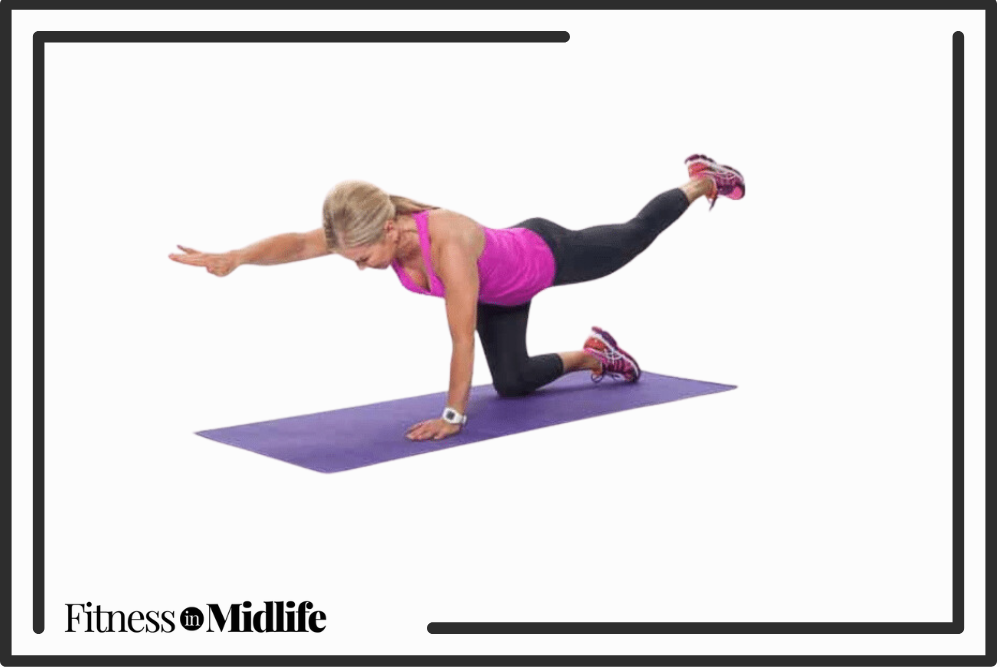
2. Bird Dog

Chris Freytag doing a bird dog exercise for lower abs.

Photo Credit: Get Healthy U

Bird dogs strengthen the lower back and abdominals while promoting stability and balance.

How to perform a bird dog:

  • Kneel on the mat on all fours. Reach one arm long, draw in the abdominals, and extend the opposite leg long behind you.
  • Repeat on the other side.

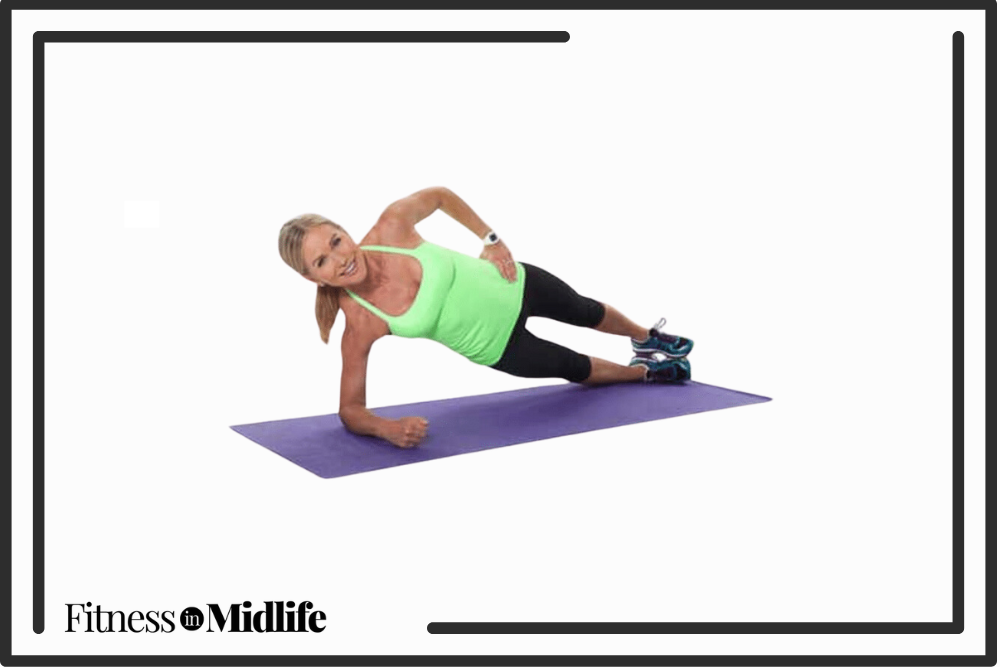
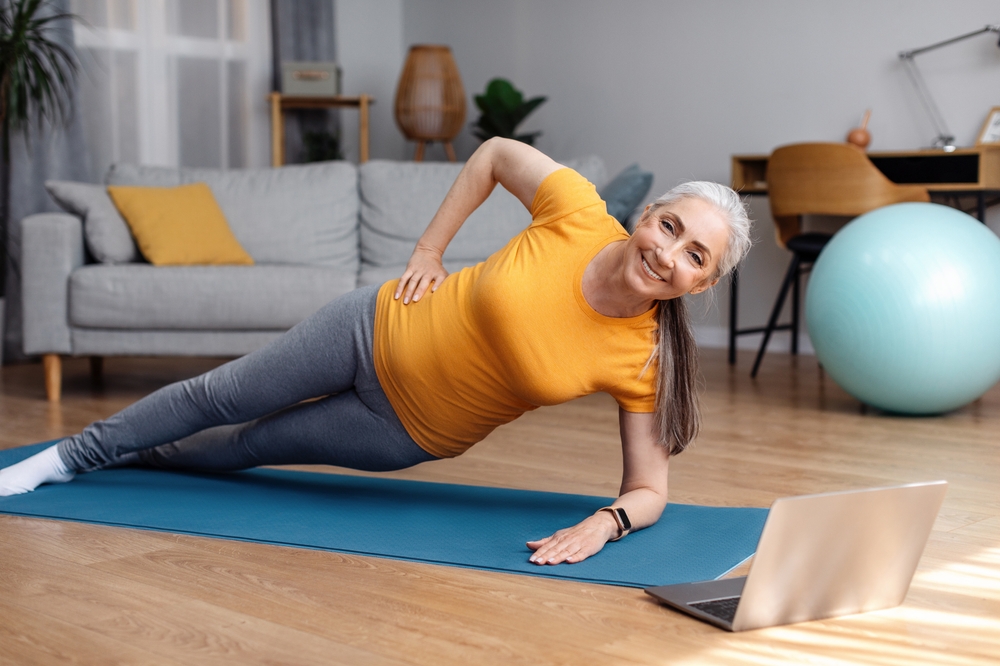
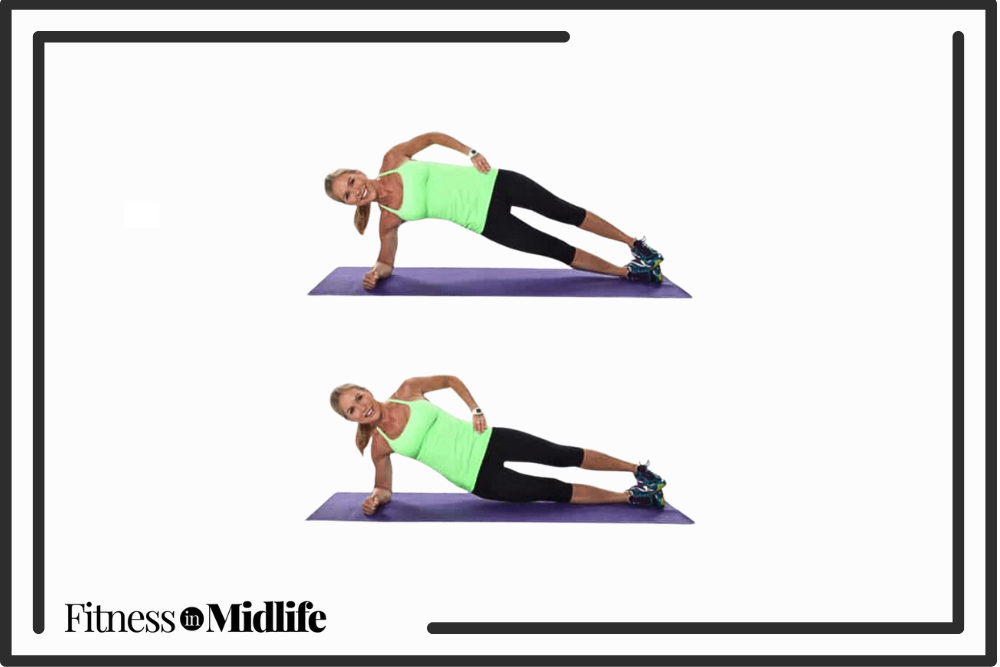
3. Forearm Side Plank

Chris Freytag doing a forearm side plank exercise for lower abs.

Photo Credit: Get Healthy U

The forearm side plank move targets your core and strengthens your shoulders and upper back.

How to perform a forearm side plank:

  • Being lying on the floor with your forearm on the mat and your shoulder stacked over your elbow. Legs are long, with your feet stacked on top of each other.
  • Lift your body into a side plank position, keeping your lower knee on the floor and your abdominals engaged. Try not to let your hips rise or drop.
  • Repeat on the other side.

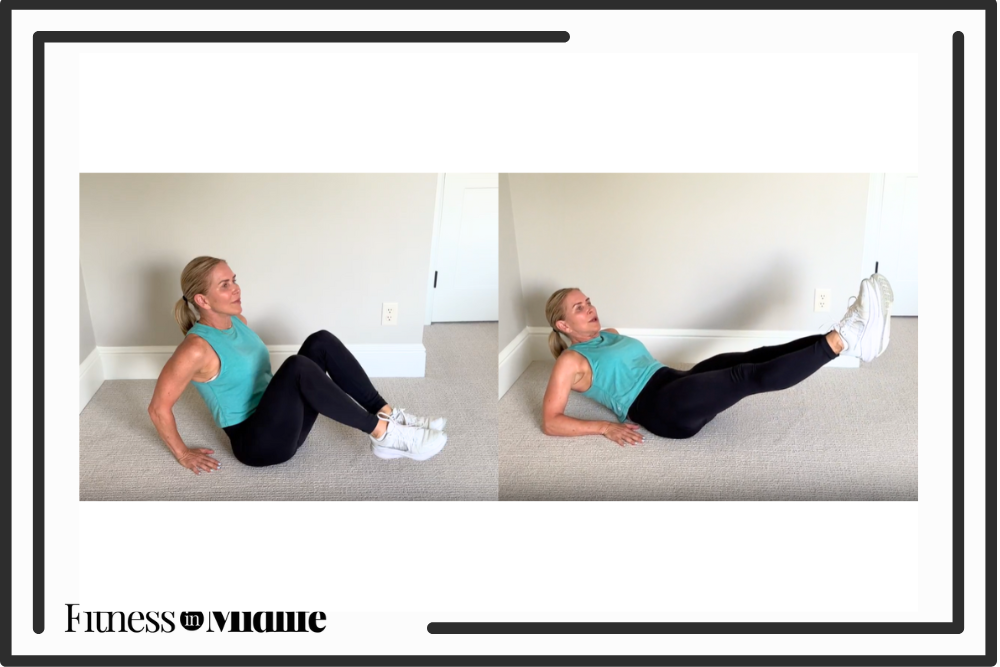
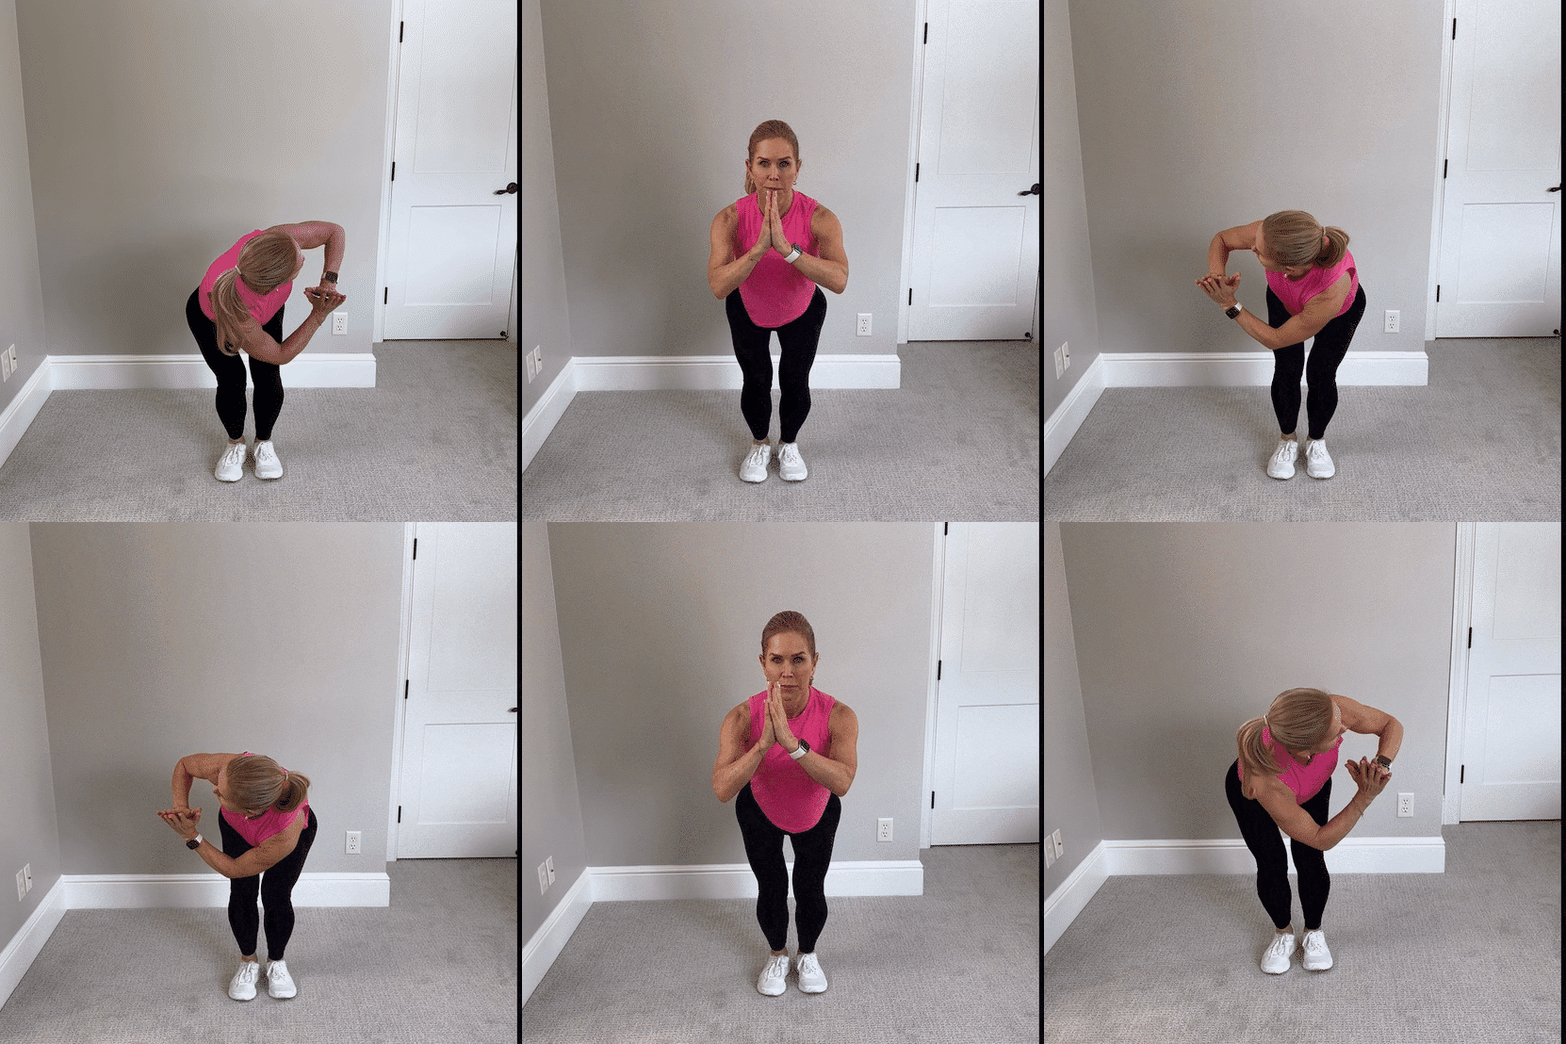
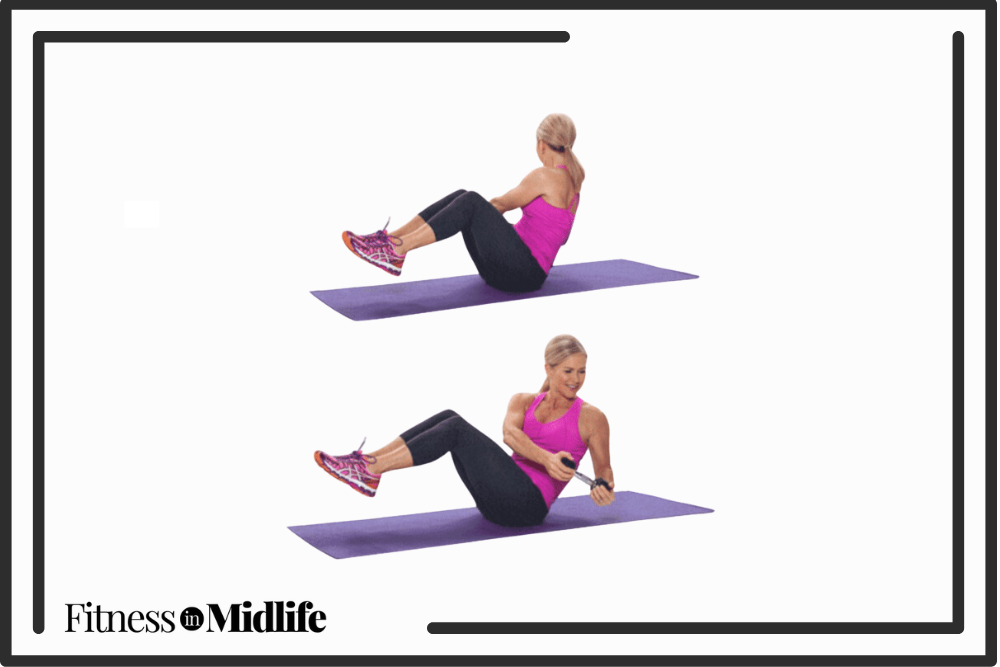
4. Bend-Extend Ab Tuck

Chris Freytag doing a bend extend ab tuck exercise for lower abs.

Photo Credit: Get Healthy U

Bend-extend ab tucks are great for working your lower abdominal area and protecting your lower back.

How to perform a bend-extend ab tuck:

  • Start seated on the mat with arms behind you, hands on the mat, and fingers facing your backside. Sit back on your hands and lift up your feet off the mat, keeping the knees bent.
  • Keep abs tight, press your legs out long, and your lower back down slightly (you should feel your lower abdominals working). Push yourself back up and pull your knees in to return to the start position.

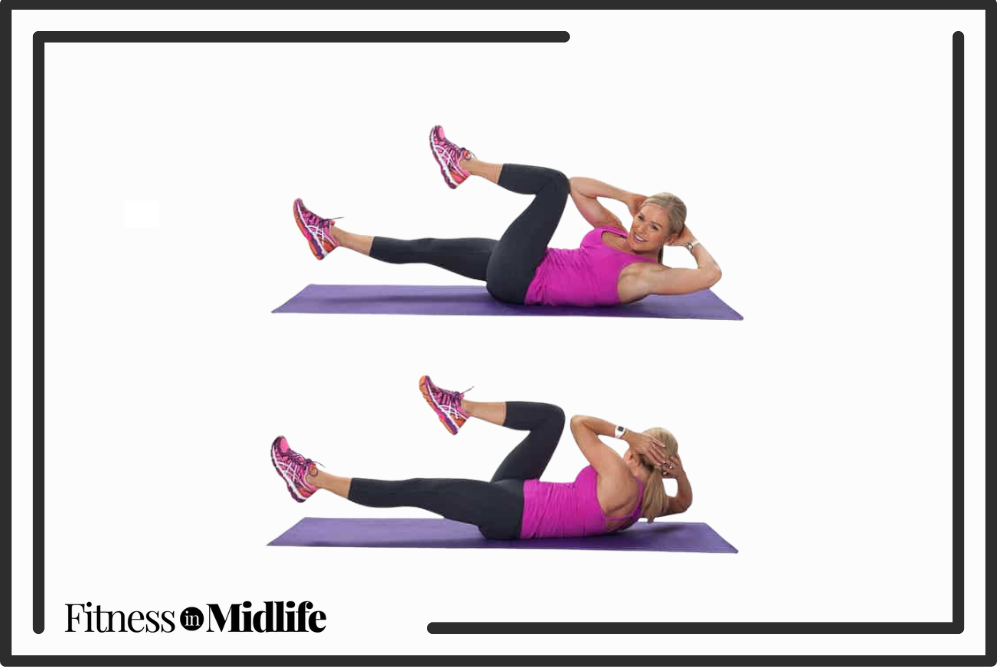
5. Bicycle Crunch

Chris Freytag doing a bicycle crunch exercise for lower abs.

Photo Credit: Get Healthy U

Performing bicycle crunches helps build coordination and a strong core.

How to perform a bicycle crunch:

  • Start lying on your back with your feet off the floor and legs in a tabletop position. Hands are behind your head, and your head, neck, and shoulders are flexed off the mat.
  • Bring one knee in and to the opposite elbow, reaching towards it. Repeat on the other side in a crisscross motion working the obliques.

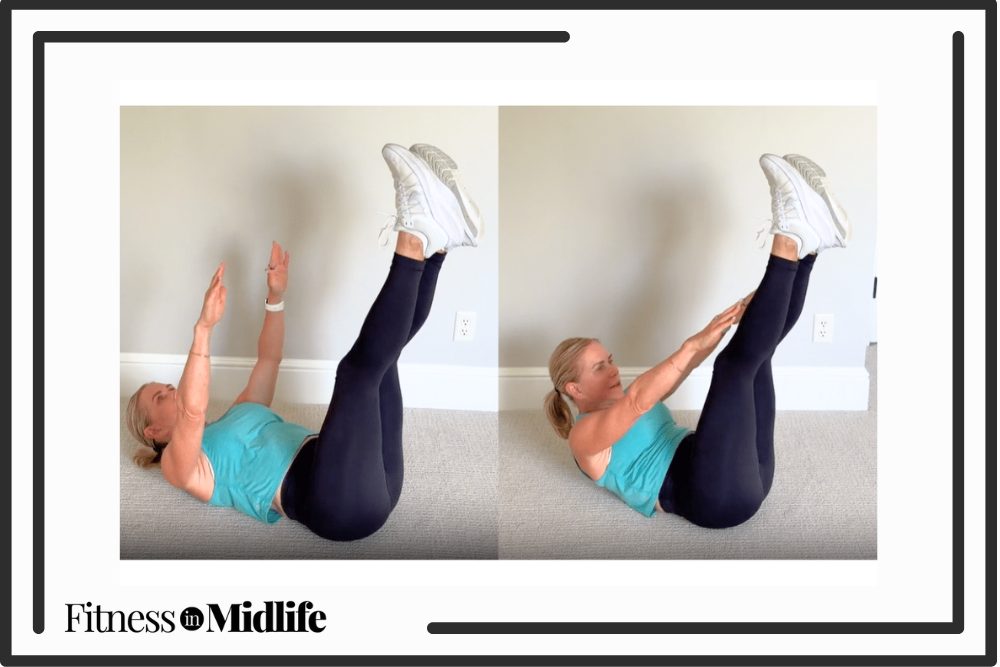
6. Toe Reach

Chris Freytag doing a toe touch exercise for lower abs.

Photo Credit: Get Healthy U

Performing toe reaches will focus on core engagement and target your transverse abdominis.

How to perform toe reaches:

  • Start on your back with your legs long-reaching towards the ceiling.
  • Bring your head, neck, and shoulders off the mat and reach your arms up towards your feet. Return to the tips of the shoulders and repeat.

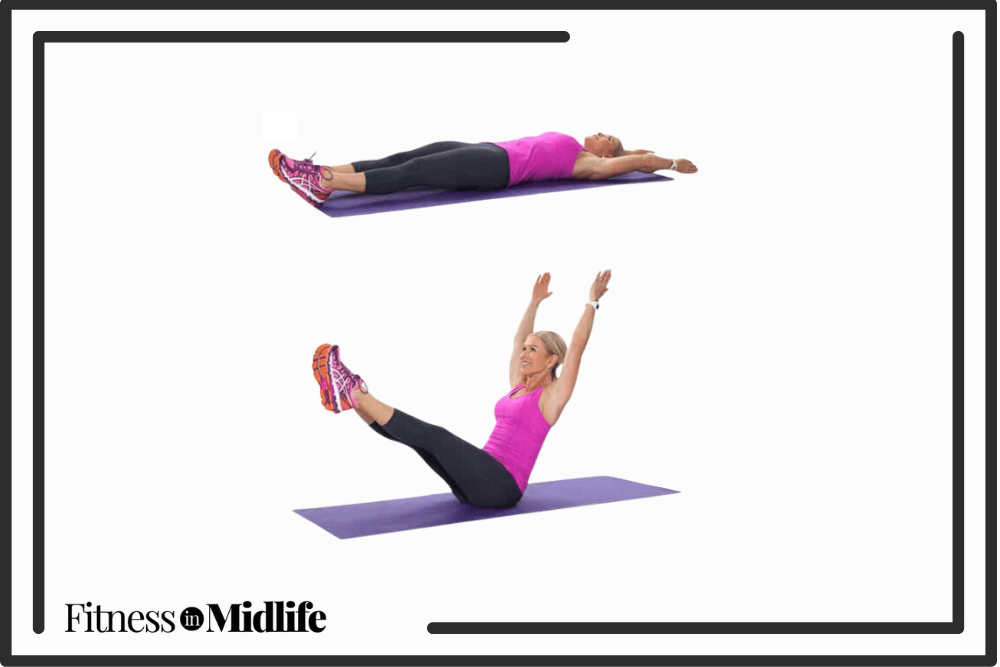
7. V-Up

Chris Freytag doing a v-up exercise for lower abs.

Photo Credit: Get Healthy U

V-ups are one of the best lower ab workouts for women!

How to perform v-ups:

  • Lie flat on the floor and extend your arms behind your head. Keep your feet together and your toes pointed.
  • Keep your legs straight and lift them up as you raise your upper body off the floor. Keep your core tight as you reach for your toes with your hands. Slowly lower yourself back down to the starting position.

8. Bridge

Chris Freytag doing a bridge exercise for lower abs.

Photo Credit: Get Healthy U

The bridge move stretches the chest, neck, spine, and hips while strengthening the glutes, core, and lower back. It also promotes good posture!

How to perform a bridge: 

  • Begin lying on your back with your knees bent and feet flat on the floor close to the glutes.
  • Place your arms flat on the floor next to you, tucking your shoulders under your back. Align your knees with your hip bones.
  • Press your palms down as you lift your hips high and squeeze the glutes and abdominals. Keep your neck relaxed on the mat.
  • Continue to breathe and hold for 30 seconds.

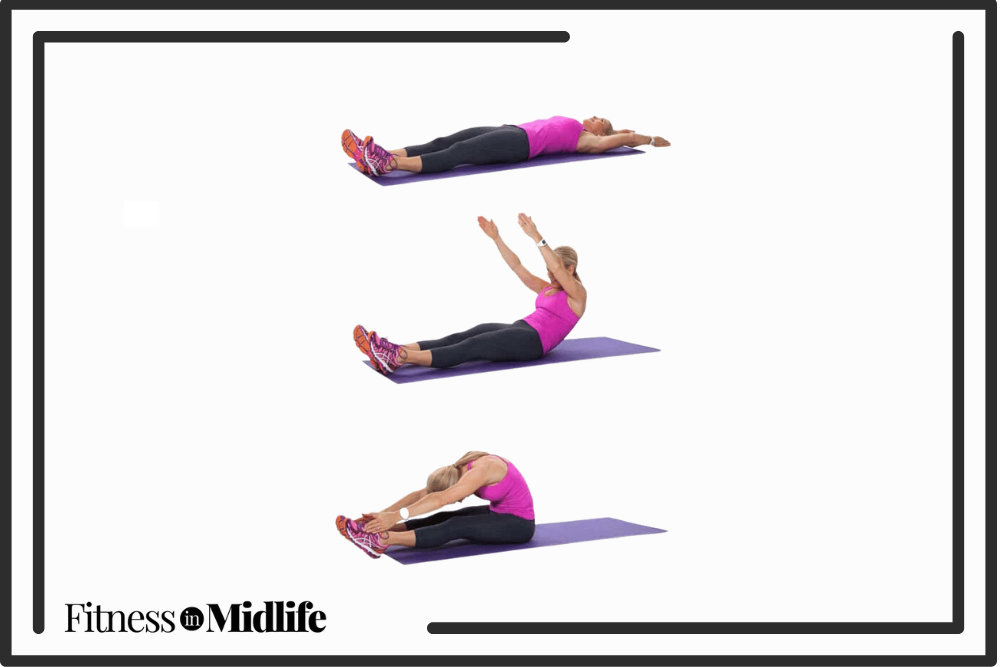
9. Full-Body Roll-Up

Chris Freytag doing a full body roll up exercise.

Photo Credit: Get Healthy U

Performing full-body roll-ups challenge your core and give you a great stretch for your back. 

How to perform a full-body roll-up:

  • Start lying on the mat with your arms extended overhead, legs long, and feet flexed.
  • Inhale as you lift your arms up and begin curling your chin and chest forward. Exhale as you roll the entire torso up and over your legs, keeping your abs engaged while reaching for your toes.
  • Inhale as you begin rolling your spine back down one vertebra at a time, and exhale as the upper portion of the back lowers and your arms reach pack overhead.  Repeat moving slowly and using the abdominals to lift and lower. 

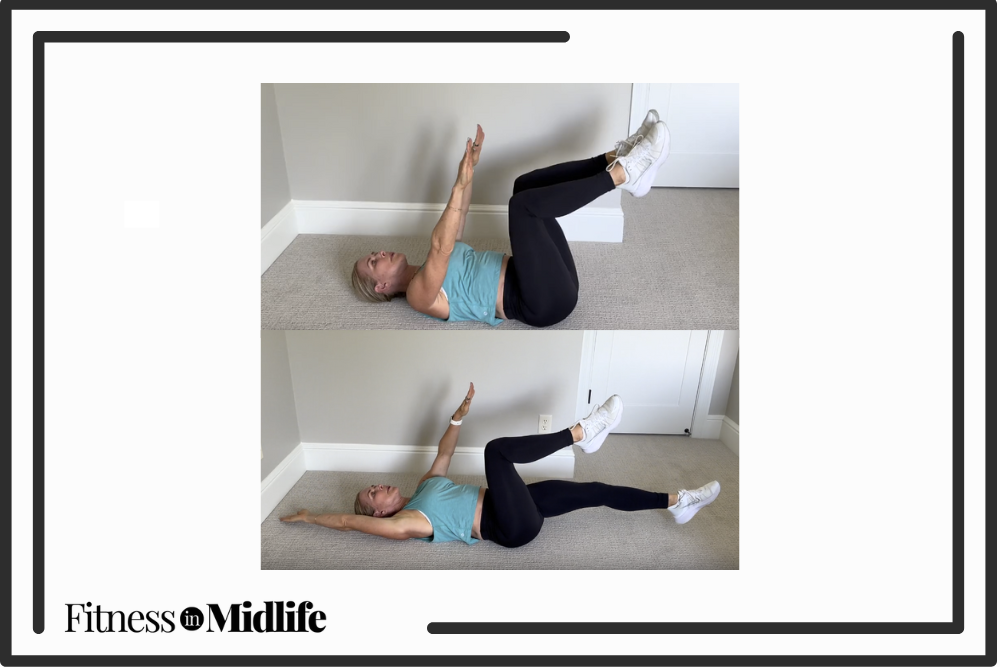
10. Dead Bug

Chris Freytag doing a dead bug exercise for lower abs.

Photo Credit: Get Healthy U

Dead bugs are low-impact and promote coordination, posture, and core strength while working the lower abs.

How to perform a dead bug: 

  • Start on your back with your arms extended toward the ceiling and your legs bent at 90 degrees, stacked over your hips, in a tabletop position.
  • Slowly extend your left leg out straight while dropping your right arm overhead. Keep both a few inches from the ground while squeezing your glutes and keeping your core engaged. Be sure to keep your lower back pressed to the floor. 
  • Repeat on the opposite side, extending your right leg and your left arm. (That’s one rep.)

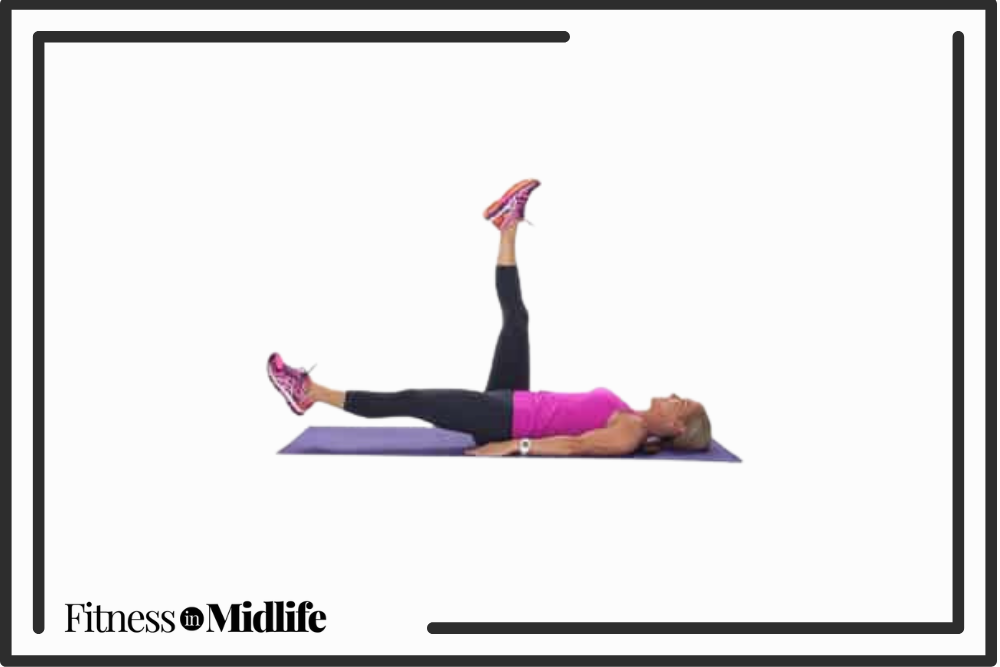
11. Leg Drops

Chris Freytag doing a leg drop exercise for lower abs.

Photo Credit: Get Healthy U

The leg drop move focuses on strengthening the lower abs and back. Keep your movements slow to really work the core!

How to perform leg drops:

  • Start lying on your back with both legs long towards the ceiling.
  • Keep your abs tight as you lower one leg until it’s a few inches off the floor, then switch legs.
  • Tip: never go so low with your legs that your back pops off the mat.

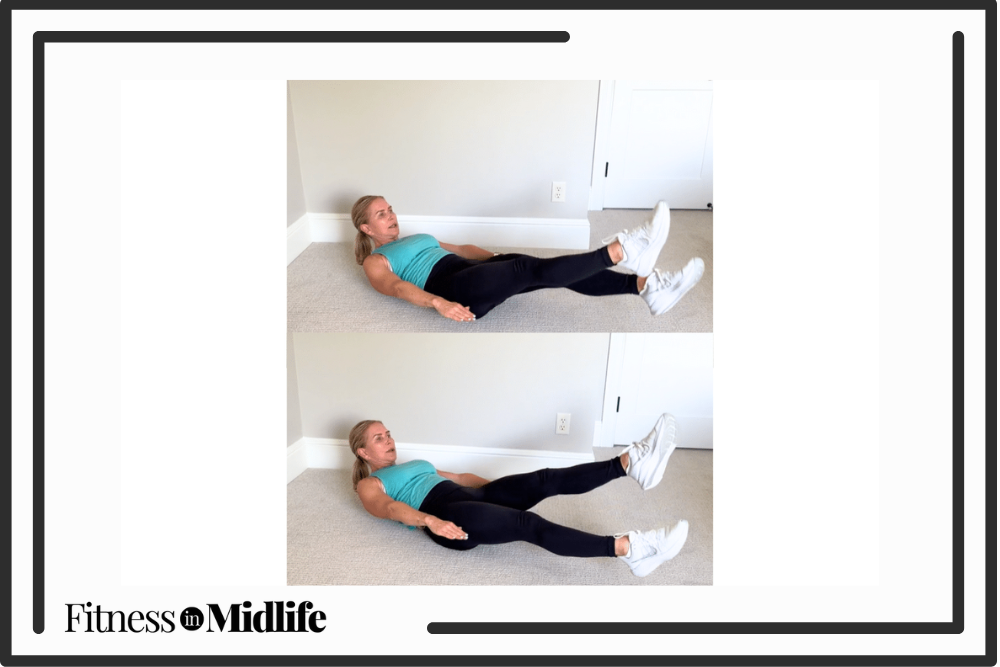
12. Flutter Kicks

Chris Freytag doing a flutter kick exercise for lower abs.

Photo Credit: Get Healthy U

You’ll definitely feel these flutter kicks in your lower abs!

How to perform flutter kicks: 

  • Start lying on your back, legs extended at a 45-degree angle, with your arms down at your sides and your legs off the ground.
  • Slightly lift your head, shoulders, and neck off the ground.
  • Start kicking (or fluttering) your legs up and down, alternating as you go. Your flutters should be at a pace you can maintain while still keeping your core still.
  • Try to flutter for at least 30 seconds, or as long as you can!

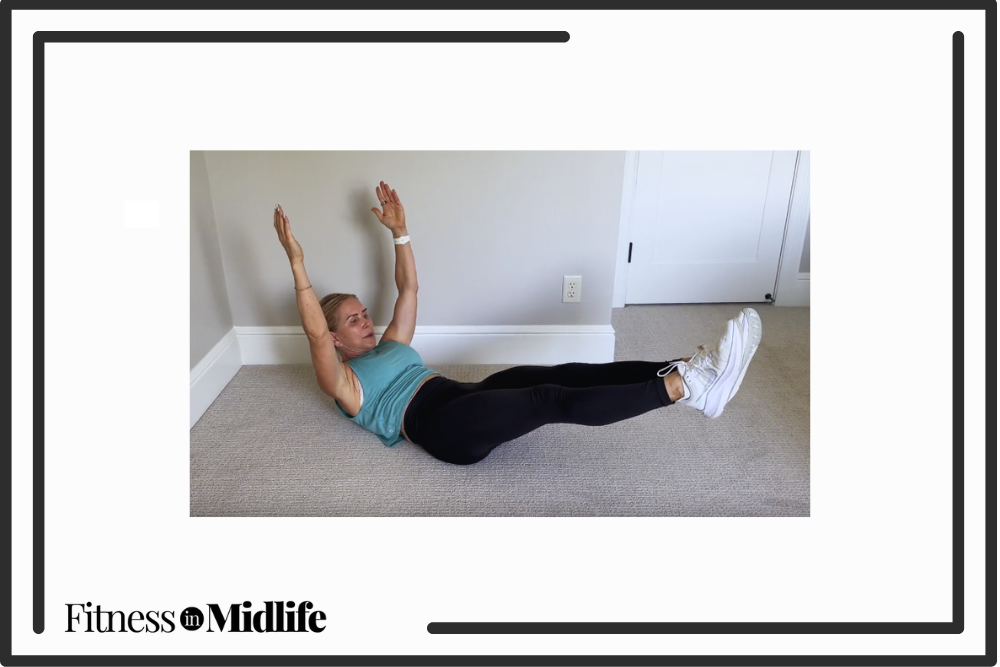
13. Hollow Body Hold

Chris Freytag doing a hollow body hold exercise for lower abs.

Photo Credit: Get Healthy U

The hollow body hold can certainly be challenging, but your core will thank you for it!

How to perform a hollow body hold: 

  • Start lying on your back with your arms extended overhead and your legs straight, resting on the floor.
  • At the same time, with control, lift your arms, head, shoulder blades, and legs off the floor.
  • Hold for 20 to 30 seconds (or as long as you can), then return to the starting position. 

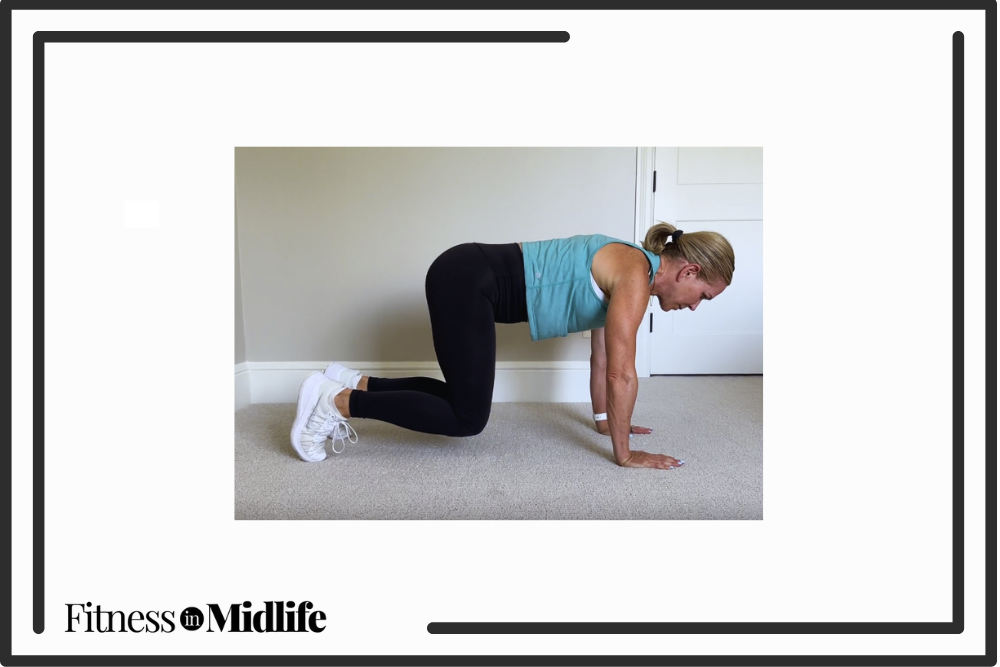
14. Bear Crawl Hold

Chris Freytag doing a bear crawl hold exercise for lower abs.

Photo Credit: Get Healthy U

The bear crawl hold is another challenging move, but it’s perfect for activating your core, shoulders, quads, back, and hips.

How to perform a bear crawl hold: 

  • Start on all fours and lift your knees so that they’re at a 90-degree angle and hovering an inch off the ground. Only your palms and toes should be touching the floor.
  • Keep your back flat, core engaged, legs hip-width apart, and arms shoulder-width apart. 
  • Hold this position for 20 to 30 seconds, or as long as you can!

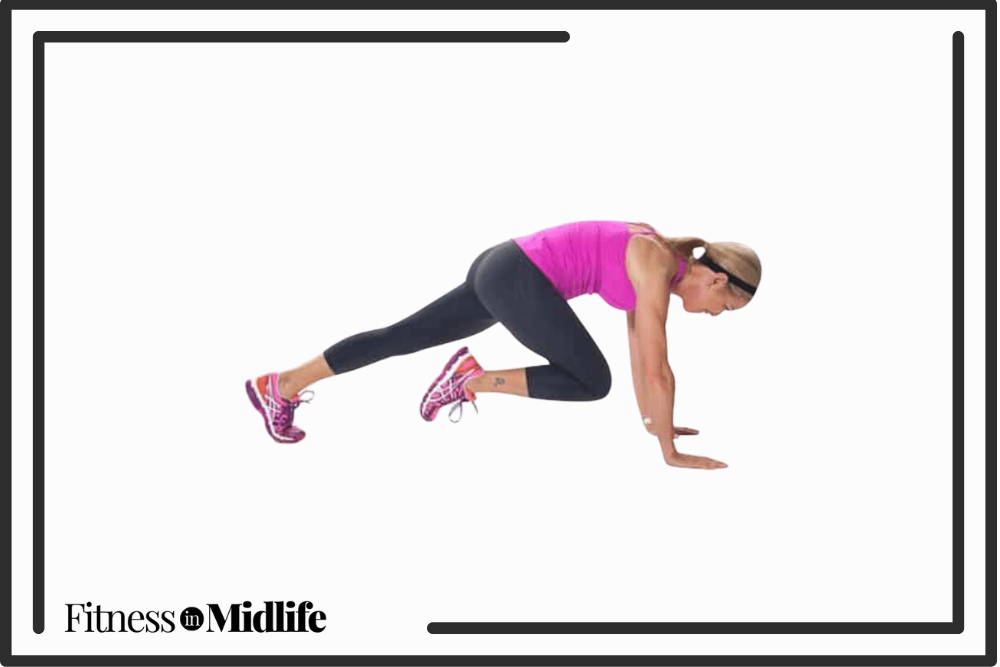
15. Mountain Climbers

Chris Freytag doing a mountain climber exercise for lower abs.

Photo Credit: Get Healthy U

Think of mountain climbers as a more advanced version of the plank that works nearly every muscle group in the body!

How to perform mountain climbers: 

  • Start in a plank position with arms and legs long. Keep your abs pulled in and your body straight. 
  • Pull your right knee into your chest.  As the knee draws to the chest, pull your abs in even tighter to be sure your body doesn’t sag or come out of its plank position.
  • Quickly switch and pull the left knee in. At the same time you push your right leg back, pull your left knee into the chest using the same form.
  • Continue to switch knees. Pull the knees in right, left, right, left—always switching simultaneously so that you are using a “running” motion.

Stay Fit With Bad Knees Using This Quick, Low-Impact Workout

If you struggle with knee pain, exercising may seem impossible—but with the right workout, it’s not!

This workout falls under the category of high-intensity interval training (HIIT), but don’t let that alarm you. High intensity does not have to mean jumping. You can still do a high-intensity workout while performing low-impact exercises that don’t aggravate your knees!

Even though this low-impact HIIT workout doesn’t include any deep squats, lunges, or jumping, it will still help you reap the benefits that high-intensity interval training provides, such as:

  • A higher rate of fat burn both during and after the workout
  • Building your cardiovascular endurance
  • Raising your metabolic rate
  • Working smarter, not longer

This workout was designed using moves that protect bad knees. Some of these include holding dumbbells to give you that extra push of high intensity. Because it is low-impact, you could do a workout like this daily. 

Workout Instructions:

  • Perform each move as hard as you can for 30 seconds, rest for 15 seconds, and repeat.
  • Continue this pattern for all eight exercises, doing them each twice.
  • For an extra challenge, rest for a few minutes and repeat all of the exercises again!

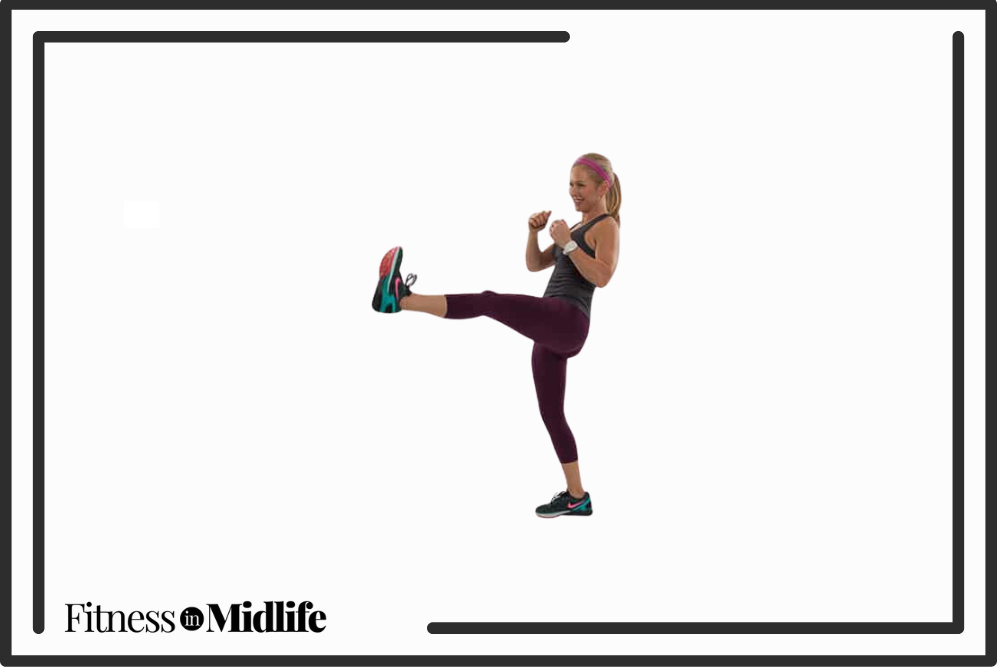
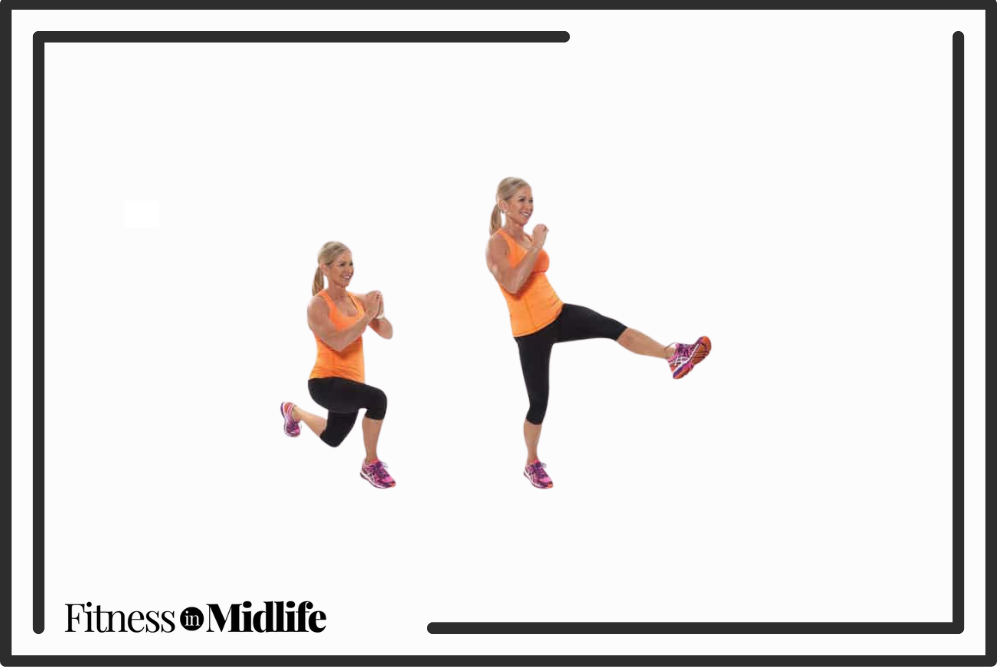
1. Front Kicks

Chris Freytag doing front kicks.

Photo Credit: Get Healthy U

Doing front kicks improves leg strength and flexibility while providing a cardiovascular workout.

How To Perform Front Kicks:

  • Stand with feet hip-width apart and arms bent and held in front of you.
  • Lift right leg up, bending knee slightly, and kick right foot forward. Keep ankle flexed and push through your heel.
  • Place the right foot down and switch to the left.
  • Continue to repeat kicking with intensity and speed.

Go for 30 seconds. Transition to next exercise in 15 seconds.

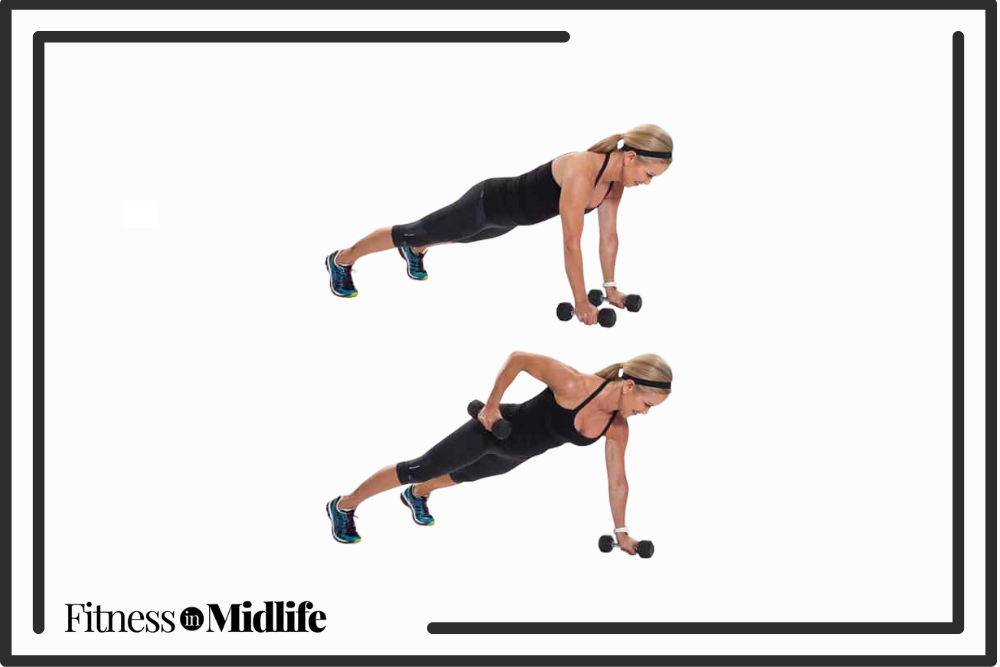
2. Renegade Rows

Chris Freytag doing a renegate row exercise using dumbbells.

Photo Credit: Get Healthy U

Performing renegade rows strengthens your upper body and core, enhancing muscle tone and stability.

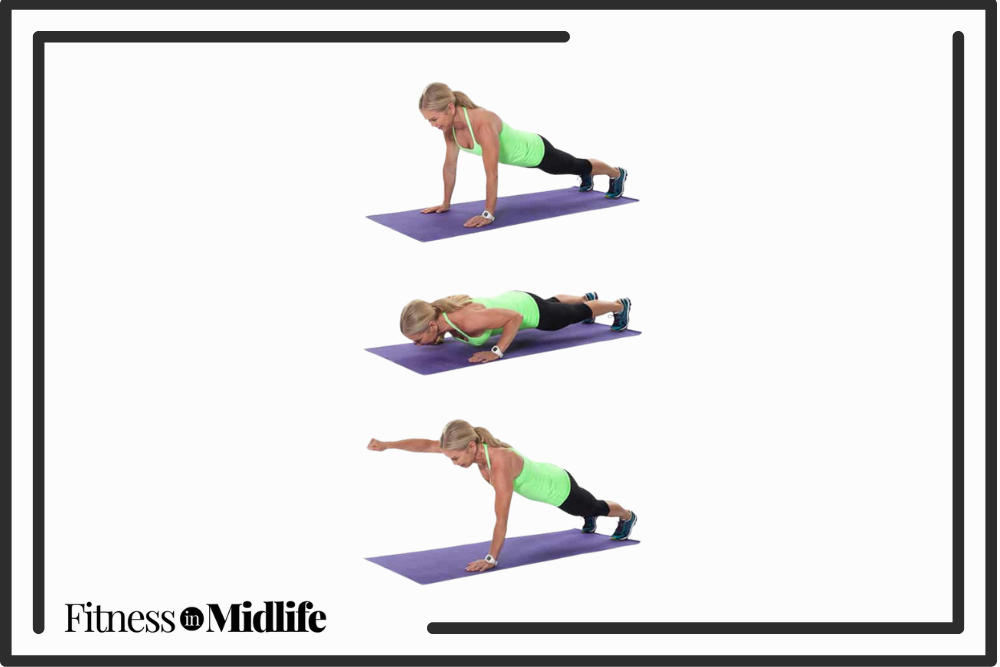
How To Perform Push-Up Renegade Rows:

  • Begin in a full plank with dumbbells in hands, arms extended, and on toes. (Drop to your knees if you aren’t comfortable doing a full plank). Engage your abdominals by drawing the belly inward towards your spine.
  • Lower your body in a straight line toward the ground to a low plank without sagging your back, then push back up to plank.
  • Pull right dumbbell up toward right hip bone, keeping weight close to your side. Slowly return it to the floor. Repeat the push-up and pull the left dumbbell to the left hip bone. Continue the push-up row alternating sides.

Go for 30 seconds. Transition to next exercise in 15 seconds.

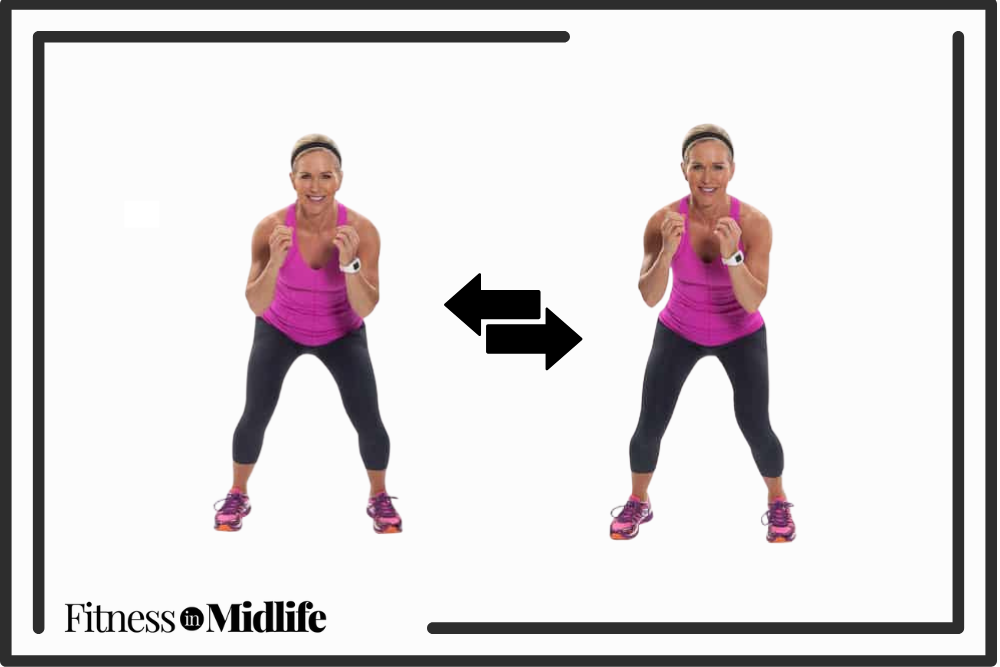
3. Lateral Shuffle

Chris Freytag doing a lateral shuffle exercise for bad knees.

Photo Credit: Get Healthy U

The lateral shuffle boosts cardiovascular endurance and agility, targeting the lower body and core.

How To Perform a Lateral Shuffle:

  • Start standing with feet hip distance apart, slightly bend knees and sink your weight back into your heels so you don’t feel it in your knees.
  • Bring both hands in front of the chest in guard position.
  • Start with right foot moving right and left foot following. Shuffle right for four right-left steps, then move left for four left-right steps. Continue shuffling right/left for the desired amount of time.

Go for 30 seconds. Transition to next exercise in 15 seconds.

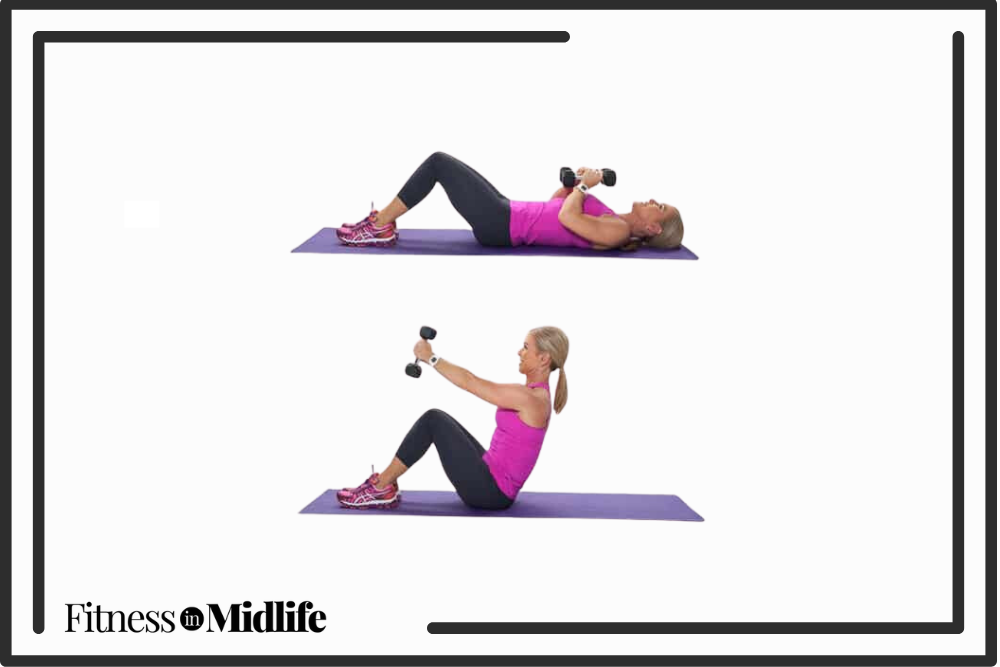
4. Sit-Up Press

Chris Freytag doing a sit up press exercise using dumbbells.

Photo Credit: Get Healthy U

The sit-up press engages your core and upper body muscles, promoting strength and coordination.

How To Perform a Sit-Up Press:

  • Start on back with bent knees and feet on the mat. Elbows are bent and dumbbells are resting above the chest.
  • Bring the head, neck, and shoulders off the mat sitting up, and extend the arms out long pressing the dumbbell forward. Return back to the mat with control.

Go for 30 seconds. Transition to next exercise in 15 seconds.

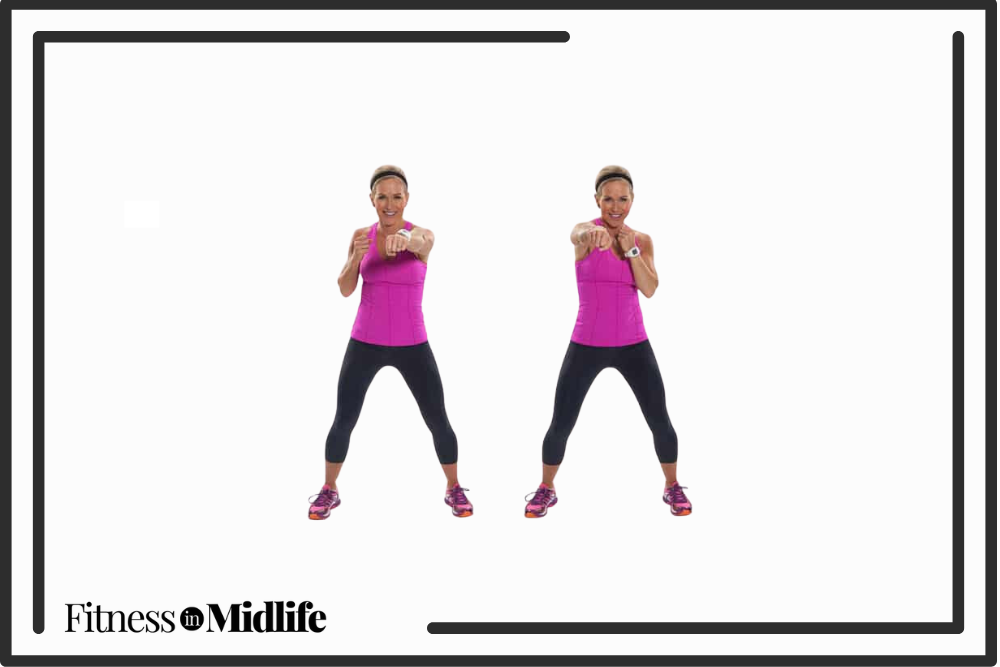
5. Punching

Chris Freytag doing a punching exercise.

Photo Credit: Get Healthy U

Doing this punching exercise increases cardiovascular fitness and upper body strength while improving hand-eye coordination.

How To Do Punching:

  • Stand with feet slightly wider than shoulder-distance apart and bend knees slightly. Tighten the core to keep your center still.
  • Punch out one arm at a time at a steady, intense pace.

Go for 30 seconds. Transition to next exercise in 15 seconds.

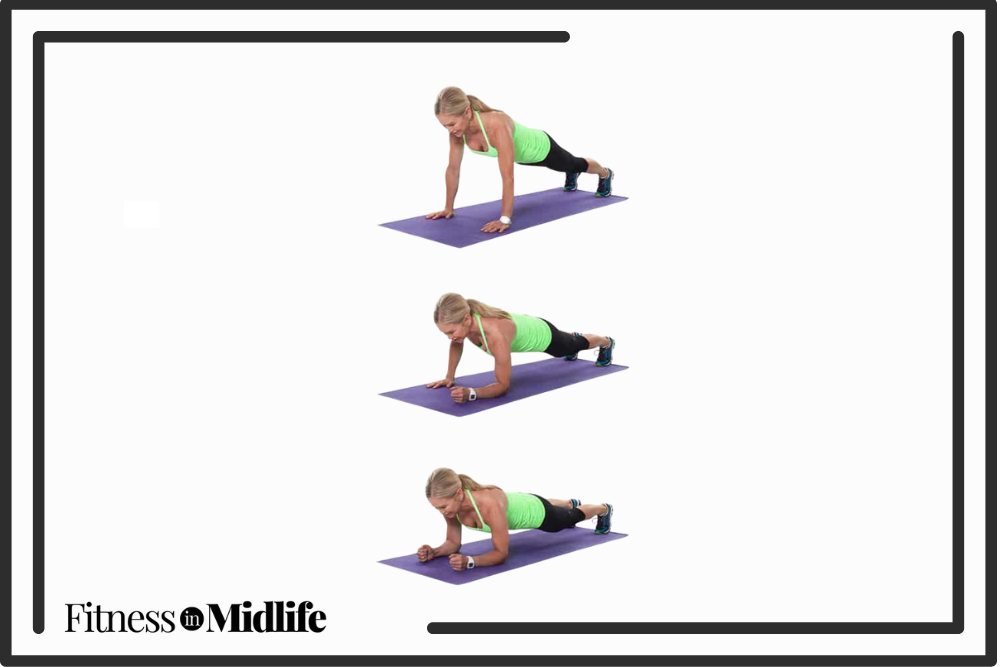
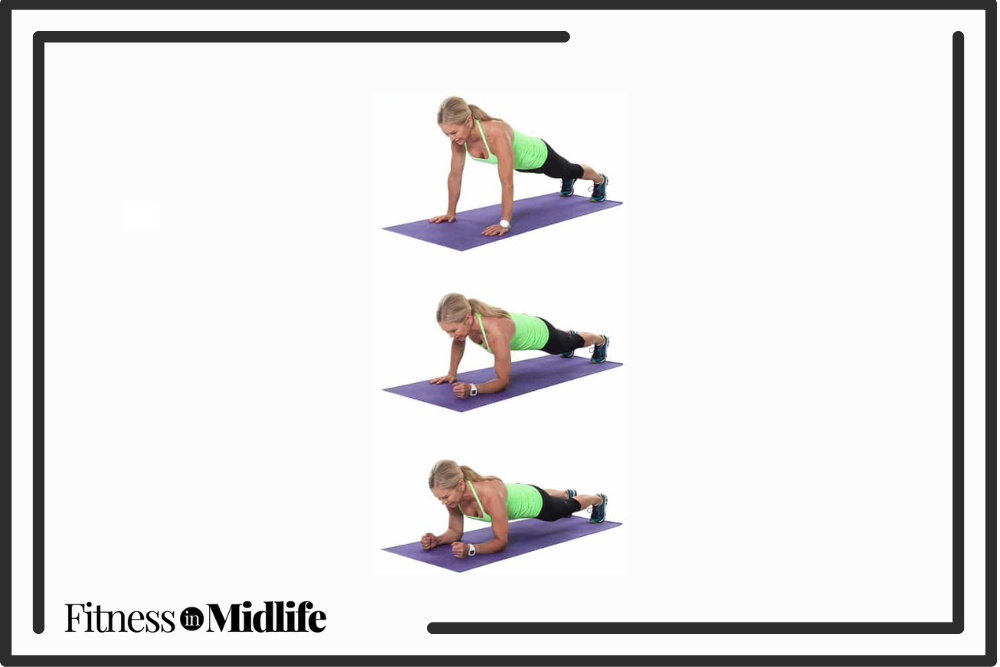
    6. Army Crawl

    Chris Freytag doing an army crawl exercise for bad knees.

    Photo Credit: Get Healthy U

    The army crawl strengthens the core, shoulders, and upper body, improving overall muscular endurance.
    Note: For a modified version, try this modified army crawl plank.

    How To Perform An Army Crawl:

    • Begin in a plank position with your shoulders over your wrists, your feet together, and your body in a straight line.
    • Bend your left arm so that it is now in forearm plank position.
    • Then bend your right arm so you are in a full forearm plank position.
    • Lift your left hand and place it on the mat directly below your shoulder as you push through your palm to lift yourself.
    • As you reach the top, place your right palm on the floor under your right shoulder and push back into a full plank. Repeat, leading with the right arm.

    Go “forearm forearm hand hand” for 30 seconds, moving at an intense pace. Transition to next exercise in 15 seconds.

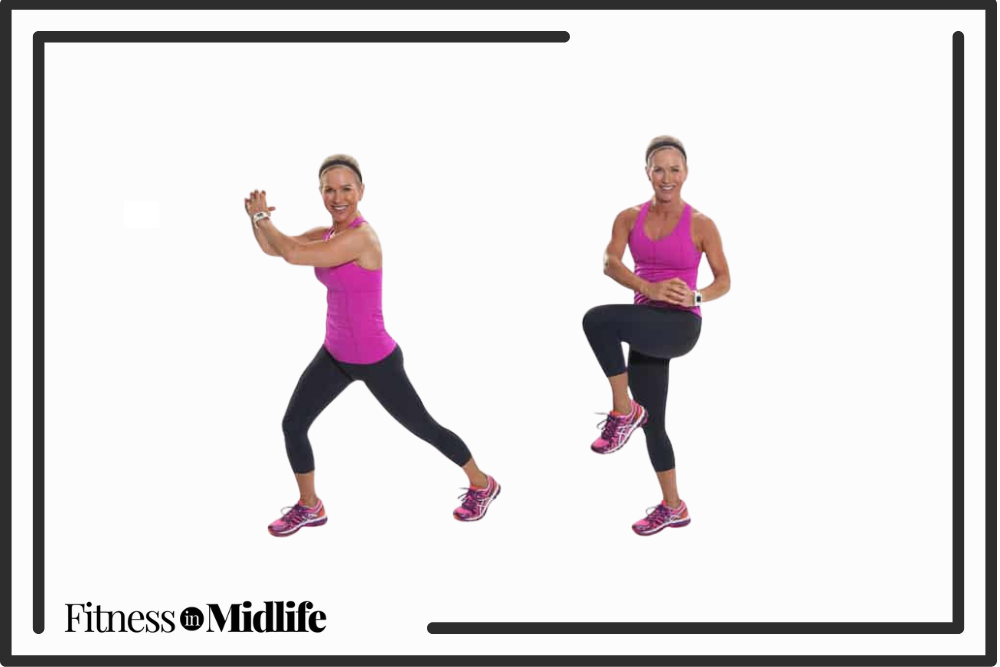
    7. Knee Thrust

    Chris Freytag doing a knee thrust exercise for bad knees.

    Photo Credit: Get Healthy U

    Performing knee thrusts activates the core and lower body muscles, boosting cardiovascular fitness and agility.

    How To Perform Knee Thrusts:

    • Start standing with feet wider than shoulder distance apart and turn both feet in one direction allowing the hips to follow like you’re in a shallow lunge.
    • The front knee is a 90-degree angle and the back heel lifted. Arms are in guard position in front of the chest.
    • Drive the back knee up to hip height towards the hands, and hands in towards the thigh. Return the foot to floor and repeat.

    Go for 30 seconds.

    If you’re looking for an extra challenge, rest for one minute, and then complete the entire low-impact HIIT workout for bad knees again!

    More Low-Impact Workouts That Deliver Big Results:

    10 Foods You May Not Realize Are Packed With Sodium

    When you think about foods high in sodium, snacks like chips and pretzels likely come to mind. However, many everyday foods that seem healthy or harmless can actually pack a surprising amount of sodium!

    The FDA states that a person’s daily sodium intake should be no more than 2,300 mg, with the ideal amount around 1,500 milligrams (or 0.75 teaspoons/3.75 grams). However, most Americans consume around 3,400 mg daily.

    Unfortunately, excessive sodium intake can lead to health issues such as high blood pressure and heart disease. 

    To help you cut back on your sodium intake, we’ve compiled a list of 10 foods you may not realize are high in sodium. 

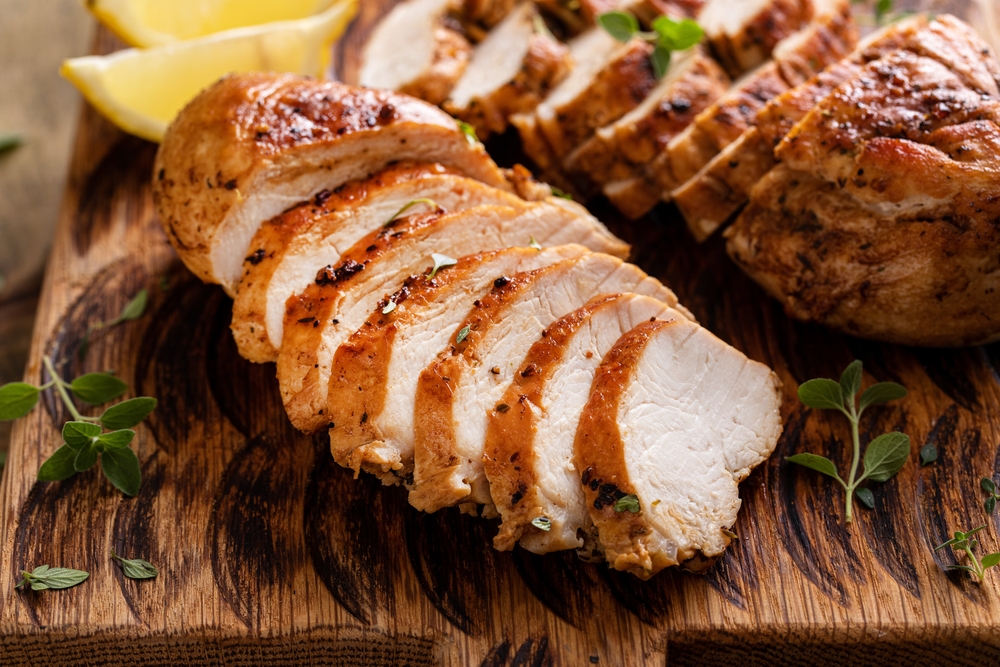
    1. Chicken Breast

    Grilled or roasted chicken breast, whole and sliced on a wooden serving plate.

    Photo Credit: Shutterstock

    While chicken breast itself is low in sodium, manufacturers often inject it with a saline solution during processing to improve its taste and keep it juicy. Just 4 oz of boneless, skinless chicken breast can contain around 400 mg or more of sodium.

    Check food labels carefully when choosing your chicken breast—you can always add herbs and spices at home (and skip the salt)!

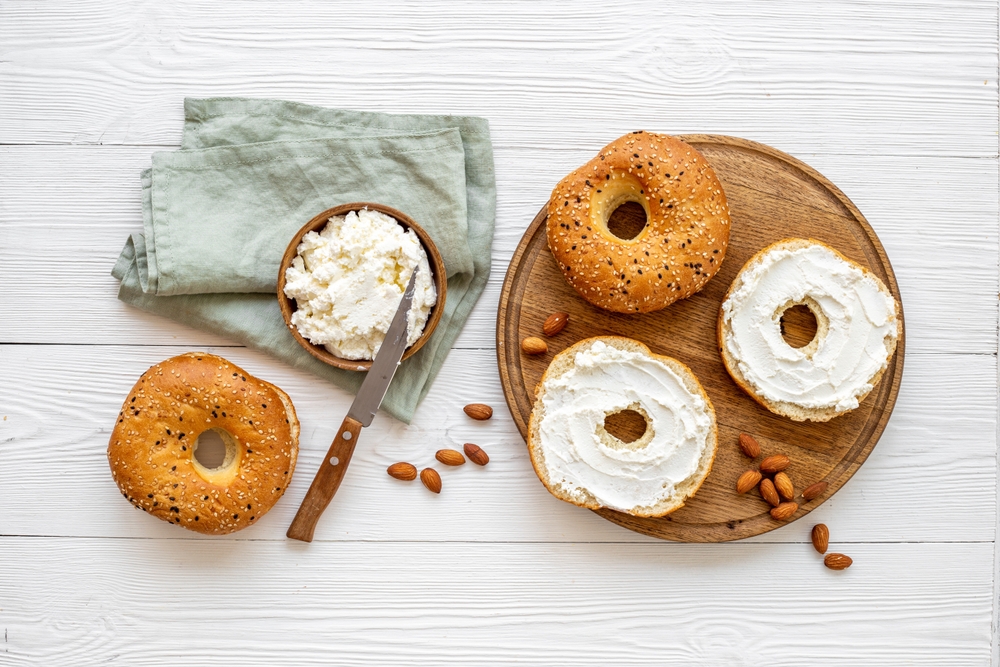
    2. Bread, Bagels, and Tortillas

    Fresh baked bagels with cream cheese on board, top view.

    Photo Credit: Shutterstock

    Starchy foods often contain a lot of sodium, and here’s the proof: One slice of bread can contain 200 mg or more of sodium, one tortilla about 900 mg, and one plain bagel around 500 mg. (Yikes.)

    If you’re eating a sandwich, that’s around 400 mg just from the bread! Add on toppings and condiments, and you’ll get the majority of your daily recommended sodium intake from one meal.

    3. Baked Beans

    Closeup of a bowl of baked beans.

    Photo Credit: Shutterstock

    This barbecue staple may be a fiber and protein-rich option, but just one cup of baked beans contains 1020 mg of sodium.

    If you’re making them at home with canned beans, here’s a tip: Rinse the beans and drain them to significantly reduce the sodium content.

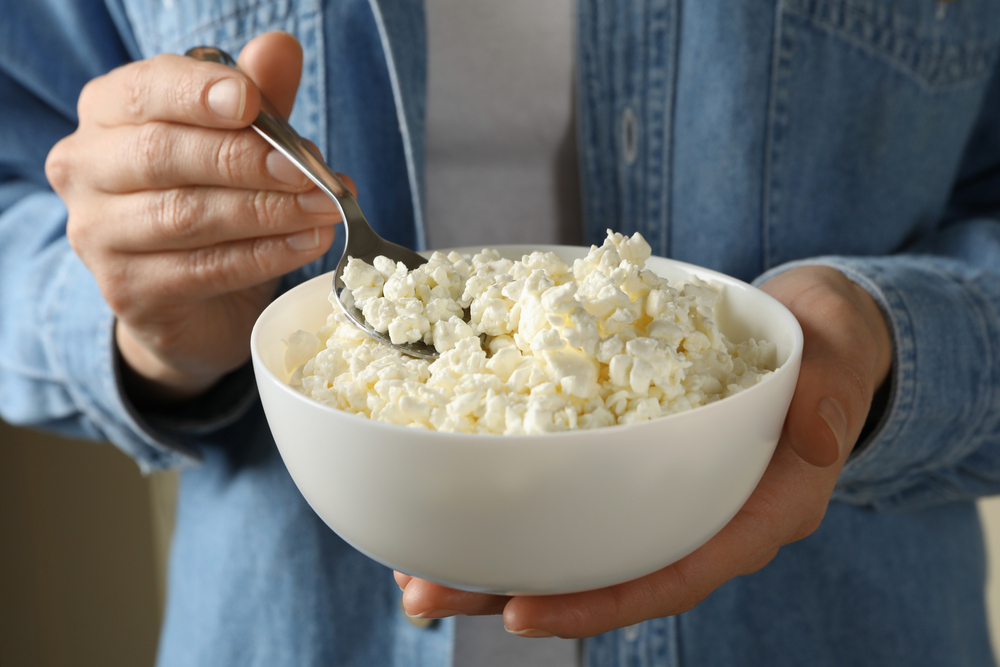
    4. Cottage Cheese

    A person holding a bowl of cottage cheese.

    Photo Credit: Shutterstock

    Although cottage cheese may be a great source of protein and calcium, one cup packs around 700 mg of sodium. 

    Giving it a good rinse might help—a study published in the Journal of the Academy of Nutrition and Dietetics found that rinsing cottage cheese with water for three minutes and then draining it may reduce the sodium content by around 63 percent.

    5. Jarred Pasta Sauce

    Closeup of spaghetti in a black bowl topped with marinara sauce.

    Photo Credit: Shutterstock

    Grabbing store-bought pasta sauce is certainly convenient (and no one would knock you for that!), but be careful with your portion size—most jarred options contain over 400 mg per half-cup serving.

    6. Sauerkraut

    Homemade sauerkraut with black pepper and parsley in wooden bowl on rustic background.

    Photo Credit: Shutterstock

    Although rich in fiber, vitamins, and minerals, just one cup of sauerkraut packs over 920 mg of sodium.

    Since this probiotic-rich vegetable is still considered a great option for gut health, you’ll have to enjoy it in moderation!

    7. Store-Bought Vegetable Juice

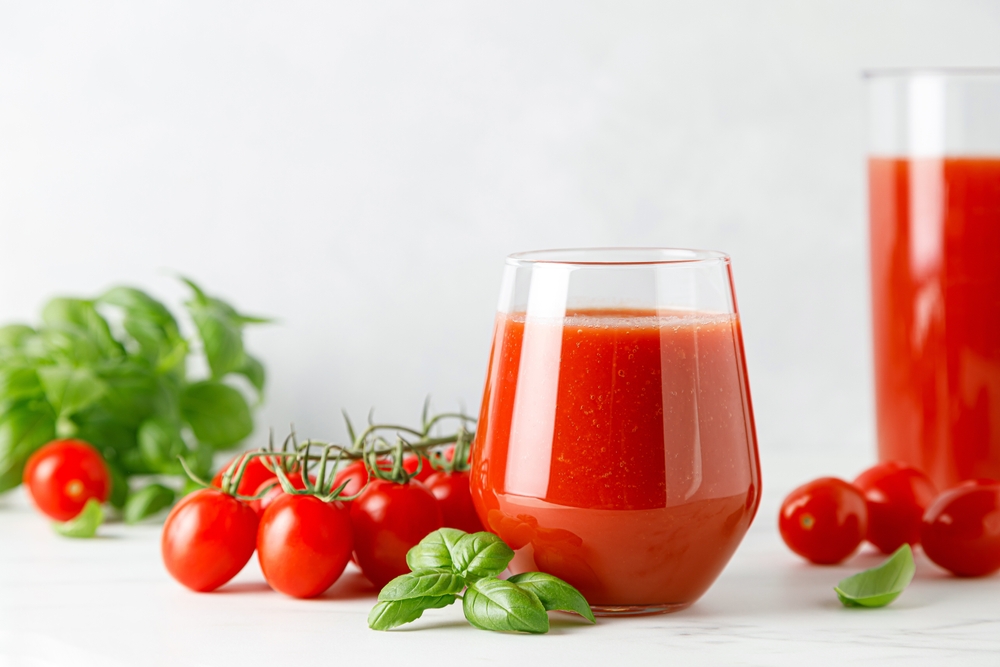
    A glass of tomato juice next to small tomatoes on the vine.

    Photo Credit: Shutterstock

    Although they may appear healthy, store-bought vegetable juices actually contain an alarming amount of sodium. Take V8’s original vegetable juice, for example—it contains over 600 mg of sodium.

    Keep an eye out for low-sodium vegetable juice options on your next grocery shopping trip!

    8. Processed American Cheese

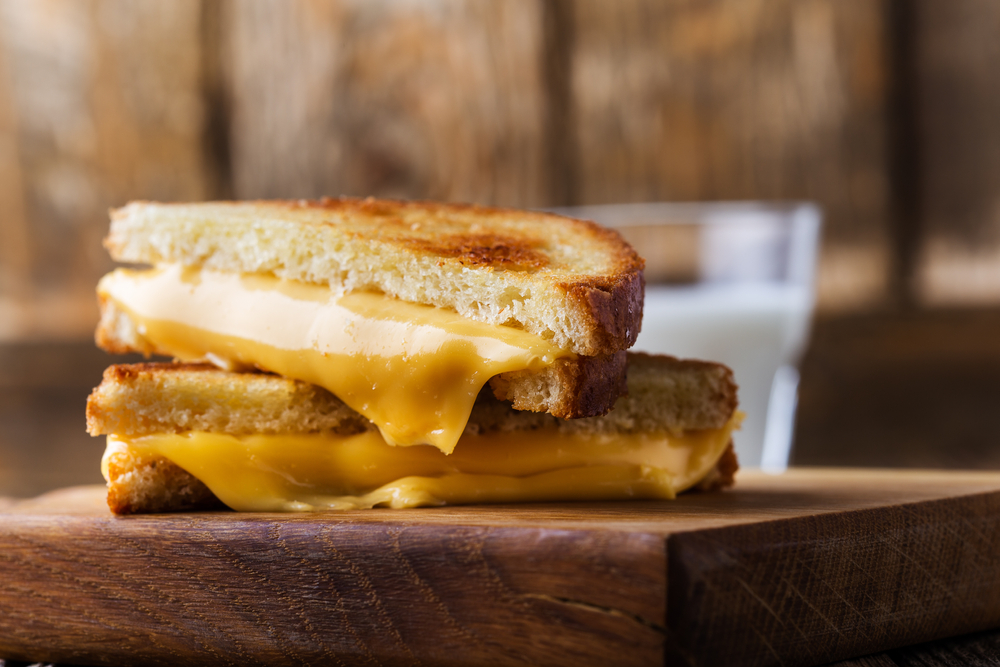
    Two halves of a grilled cheese stacked on top of each other.

    Photo Credit: Shutterstock

    Certain cheeses are saltier than the rest, with processed cheese topping the list.

    A study published in the Journal of Dairy Science found that the average sodium content in a slice of processed American cheese was around 1200 mg, followed by string cheese, packing around 700 mg in one stick. 

    9. Canned Soups

    Top view of a bowl of chicken noodle soup with veggies.

    Photo Credit: Depositphotos

    A bowl of chicken noodle soup is the perfect remedy for the cold or flu, but unfortunately, its sodium content is off the charts. For example, a can of Campbell’s chicken noodle soup packs over 1800 mg of sodium.

    Whenever possible, homemade soup is the way to go! 

    10. Veggie Burgers

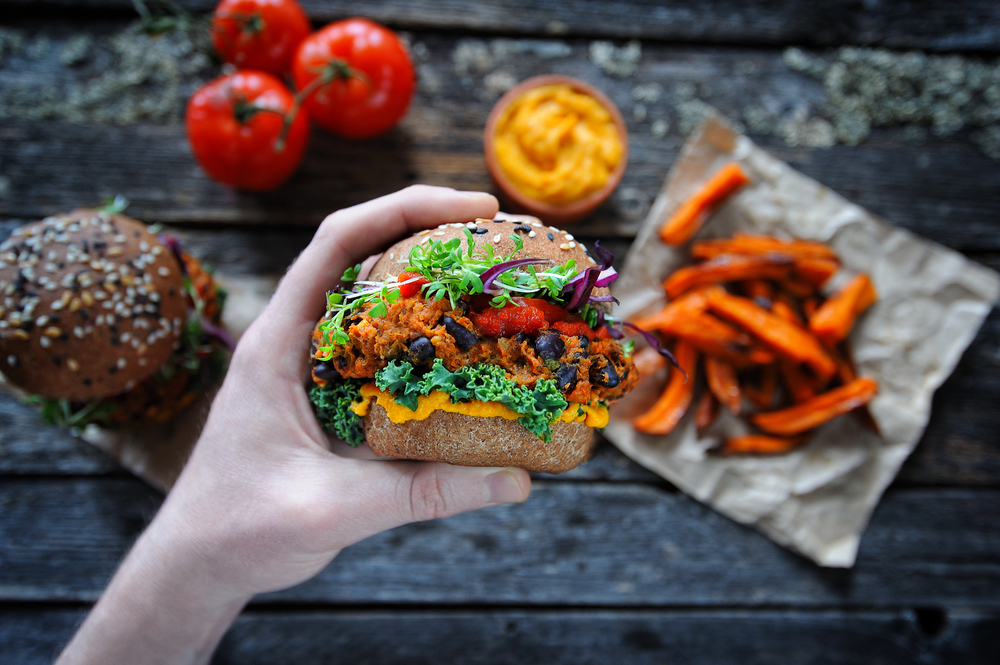
    A hand holding a veggie black bean burger.

    Photo Credit: Shutterstock

    Veggie burgers are often chosen as a healthier alternative to red meat, but just one patty can contain over 500 mg of sodium. (Even more when you add a bun and condiments!)

    As with any high-sodium food, always check nutrition labels to find the best options.

    The Viral Chicken Caesar Salad Pizza: Is It Worth the Hype?

    We love a good mashup, so when we came across the viral chicken crust Caesar salad pizza on Instagram, we knew we had to try it ourselves! Caesar salad with grilled chicken is one of our favorites. It’s salty, creamy, cheesy, and filling. Served up in a bowl or wrap, it’s the perfect healthier lunch option.

    This unconventional pizza-salad mash-up recipe is a grain-free and high-protein pizza that uses cooked chicken, egg, and cheese to create a pizza “crust.” To serve, you’ll pile it high with a homemade Caesar salad. 

    So, is it worth the hype? Absolutely! Here are all the steps to make this viral Chicken Caesar Salad Pizza, plus the full recipe.

    Ingredients for the Chicken Caesar Salad Pizza

    Top view of the ingredients for the viral chicken caesar salad pizza.

    Photo Credit: Get Healthy U

    These simple ingredients create a satisfying pizza you’ll crave over and over:

    • Canned Chicken: Reduce the prep-work needed for this pizza recipe by using canned chicken. It’s pre-cooked so you can just drain and add to the food processor to make the pizza dough for the crust. You can also use 1 lb cooked boneless skinless chicken breasts. 
    • Egg: The egg is important because it helps bind the pizza crust together since there is no flour in this one. 
    • Parmesan Cheese: The quintessential cheese for caesar salad! The cheese adds some flavor and structure to the crust of this chicken caesar pizza. You’ll also use some in the dressing and as a garnish. We prefer to grate the parmesan cheese ourselves for the freshest flavor.
    • Garlic and Onion Powder: Adds delicious flavor to the simple high protein crust. 
    • Plain Greek Yogurt: Adds creaminess and extra protein to the healthy Caesar dressing on this pizza. 
    • Lemon Juice and Dijon Mustard: This combination of ingredients adds tanginess to the dressing. For the best flavor, use fresh-squeezed lemon juice rather than bottled lemon juice. 
    • Anchovy Paste: All classic Caesar salad dressings contain anchovies, and we used just a bit of anchovy paste. We like the paste because you don’t have to worry about using up the rest of the can of anchovies after making the dressing.
    • Romaine Lettuce: We love the crunch of romaine lettuce—the go-to lettuce for Caesar salad.

    Recipe Variations

    Top view of the viral chicken Ceasar salad pizza on a sheet pan.

    Photo Credit: Get Healthy U

    Here are a few ways to switch up this recipe:

    • Use a Caesar Salad Kit: To make it even easier to prep this pizza, top the chicken crust with a grocery store Caesar salad kit instead of making a homemade dressing and salad.
    • Add Croutons: We like adding a few croutons on top of the pizza for crunch. 
    • Add Sun-dried Tomatoes, Red Onion, or Olives: If you want to add more toppings, we suggest some sun-dried tomatoes, thinly sliced red onion, or chopped kalamata olives. 
    • Add Some Heat: Top the finished pizza with a sprinkle of red pepper flakes or sliced pepperoncini peppers.

    How to Make the Caesar Salad Pizza with Chicken Crust

    Side by side photos of the three steps for making the viral Chicken Caesar Salad Pizza.

    Photo Credit: Get Healthy U

    Follow these simple steps to make your new favorite pizza lunch:

    Make the Healthy Caesar Salad Dressing: Add the yogurt, parmesan, olive oil, lemon juice, dijon, Worcestershire, anchovy, and garlic to a blender cup and blend until smooth. 

    Assemble and Serve: There are a couple of options for serving this pizza: 1) Toss the salad and dressing together in a bowl and pile on top of the crust or 2) Add the salad ingredients to the crust and drizzle with dressing. 

    Recommended Tools:

    Meal Prep and Storage

    Side by side photos of the viral chicken Caesar salad pizza.

    Photo Credit: Get Healthy U

    A couple of tips for meal prepping and storing this Chicken Caesar Salad Pizza:

    Meal Prep: You can bake the chicken pizza crust in advance and store it in the fridge in an airtight container for 1-2 days. The salad dressing can also be prepped 2-3 days in advance and stored in a mason jar until ready to use. 

    Storage: the prepped pizza can be stored in an airtight container in the fridge for 2-3 days. Enjoy the pizza cold from the fridge, or remove the salad before reheating the crust in the microwave and reassembling.

    Full Recipe: Viral Chicken Caesar Salad Pizza

    Overhead view of the viral chicken Caesar salad pizza cut into slices on a sheet pan.

    Photo Credit: Get Healthy U

    Total Time: 55 minutes

    Yield: 5 serving(s)

    Ingredients

    For the Crust:

    • 20 oz canned chicken, drained and rinsed well
    • 1 large egg
    • ⅔ cup grated parmesan cheese
    • 1 teaspoon garlic powder
    • ½ teaspoon onion powder
    • Salt and pepper

    For the Dressing:

    • ½ cup plain, unsweetened Greek yogurt
    • ¼ cup shredded parmesan cheese
    • 2 tablespoons olive oil
    • 2 tablespoons lemon juice
    • 2 teaspoons Dijon mustard
    • 1 teaspoon anchovy paste
    • 1 teaspoon Worcestershire sauce
    • 1 clove garlic
    • Salt and pepper, to taste

    For the Salad:

    • 1 head romaine lettuce, chopped
    • Parmesan cheese
    • Handful croutons (omit for gluten-free)

    Directions

    • Preheat the oven to 375 degrees Fahrenheit and line a baking sheet with parchment paper. Set aside.
    • Add all of the ingredients to make the chicken pizza crust (canned chicken, egg, parmesan, garlic, and onion powder) to a food processor and pulse until combined.
    • Transfer to the baking sheet and press the ingredients in a circle, about ¼ inch thick. If sticky, add a little oil to the palm of your hands when spreading.
    • Bake for 40-45 minutes or until the crust is golden brown and firm to the touch. Allow to cool.
    • While the crust is in the oven, make the dressing by pureeing in a blender until smooth.
    • Wash and chop the romaine and add it to the top of the pizza crust and drizzle with dressing then garnish with croutons, extra parmesan cheese, and black pepper.

    Nutrition Information Per Serving

    Serving Size: 1 slice

    Calories: 420

    Protein: 40 gram(s)

    Fat: 22 gram(s)

    Carbohydrates: 13 gram(s)

    Fiber: 3 gram(s)

    Sugar: -2 gram(s)

    From the kitchen of: 

    7 Beginner Upper Body Exercises for Every Age

    Starting a fitness routine can be both exciting and overwhelming, especially when you’re not sure where to start! Incorporating upper body exercises is a fantastic way to build strength and boost overall health, no matter your age.

    Here, we’ve rounded up 7 beginner-friendly upper body exercises that are perfect for every age and fitness level. Get ready to work your shoulders, biceps, triceps, and more!

    Upper Body Workout Tips

    Older women doing HIIT exercises outdoors.

    Photo Credit: Depositphotos

    To get the most out of your upper body workout, it’s helpful to keep the following tips in mind: 

    • Always warm up and cool down: Start each workout with a brief warm-up, and end with a cool-down for at least five to ten minutes.
    • Maintain good posture: Proper form during each exercise delivers the best results while helping you avoid injury. (It’s not about speed!)
    • Remember to breathe: Exhale whenever you lift, push, or pull, and inhale as you release.
    • Give your muscles a break: Exercise causes tiny tears in the muscles, which need time to heal. (Your muscles grow stronger as they do!) A good rule of thumb is to allow yourself 24 to 72 hours to recover after a workout, depending on its intensity.
    • Try to Challenge Yourself: Start with lighter weights if you are just starting out. As your workouts start to feel easier, try using heavier weights to give yourself (and your muscles) more of a challenge.

    Workout Instructions: Go through each of the following exercises and aim to perform 10-12 repetitions per move. Make sure your weights are heavy enough that you struggle to finish your last couple of reps. The key to building strength is lifting weights that challenge you! (If it’s too easy, try heavier weights.) Once you complete all seven exercises, take at least five minutes to stretch and cool down.

    Let’s get started!

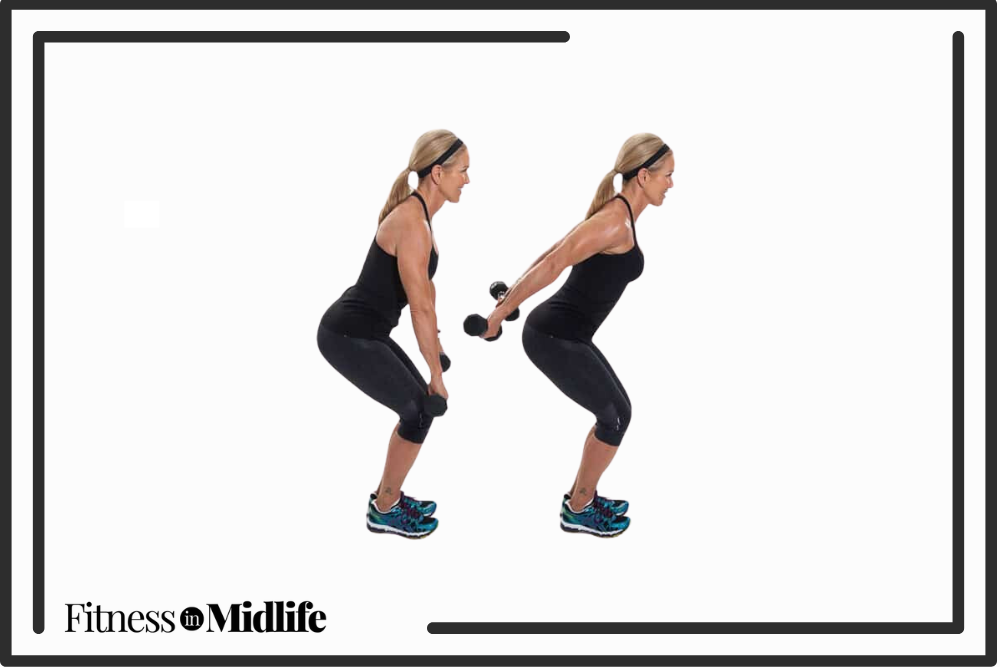
    1. Press-Back

    Chris Freytag doing a press-back exercise using dumbbells.

    Photo Credit: Get Healthy U

    Work your upper back and triceps:

    • Start with your feet hip-width apart. Engage your abdominals and sit back into a slight squat. Dumbbells start at the sides of the knees.
    • Keeping your core engaged, press the dumbbells past your hips and return with control. Avoid swinging the arms or bending the elbows. Try to finish 12 reps.

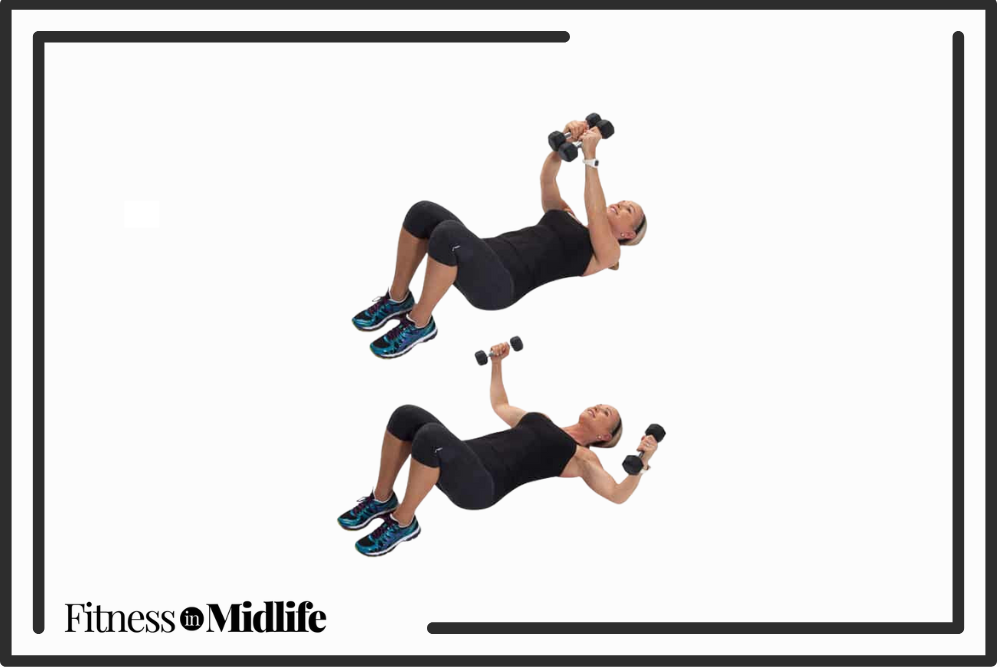
    2. Chest Fly 

    Chris Freytag doing a chest fly exercise with dumbbells.

    Photo Credit: Get Healthy U

    Work your triceps, chest, and shoulders:

    • Lie on your back with your knees bent and feet on the floor. Hold dumbbells straight up over your chest.
    • With a slight bend in the elbow, slowly open your arms wide out to the side. Squeeze your chest as you bring the weights back together at the top. Repeat for 10-12 repetitions.

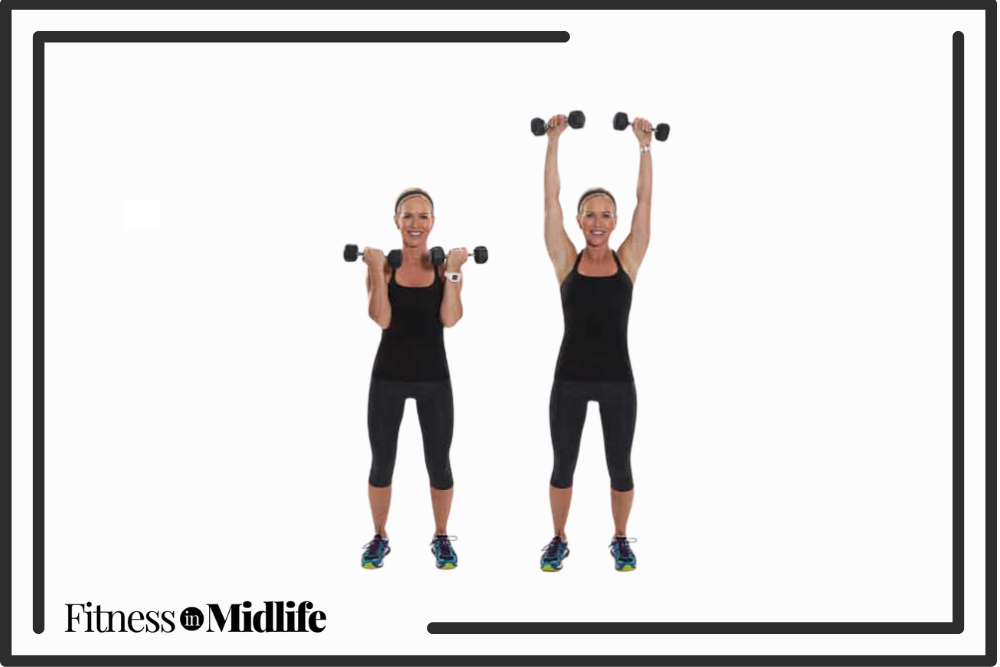
    3. Arnold Press 

    Chris Freytag doing an Arnold press upper body exercise using dumbbells.

    Photo Credit: Get Healthy U

    Strengthen your shoulders, arms, and chest:

    • Stand with feet hip-width apart, holding dumbbells at shoulder height. Keep your arms tight to the body and palms facing in.
    • Rotate your wrists out, extend your arms overhead, and return to the starting position with control. Try 10-12 reps.

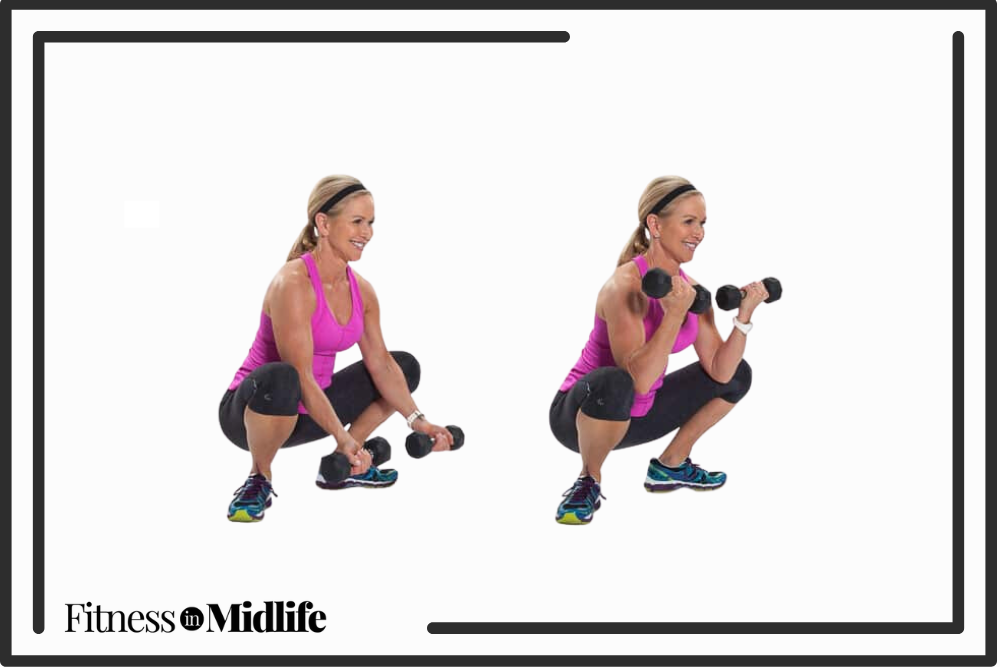
    4. Yogi Squat with Concentration Curls

    Chris Freytag doing a yogi squat with concentration curls using dumbbells.

    Photo Credit: Get Healthy U

    Work your hips, glutes, quads, and biceps:

    • Stand with your feet heels in/toes out and slightly wider than your hips. Bend your knees and lower your seat toward the floor. Keep going until your hips are lower than your knees, and keep your spine as vertical as possible.
    • Relax your shoulders and keep your feet flat on the floor. (If your heels come off the floor, you likely have tight calves.)
    • Anchor your elbows to the inside of your thigh and curl towards your chest, working your biceps. Control as you lower back down. Try to complete 10-12 repetitions.

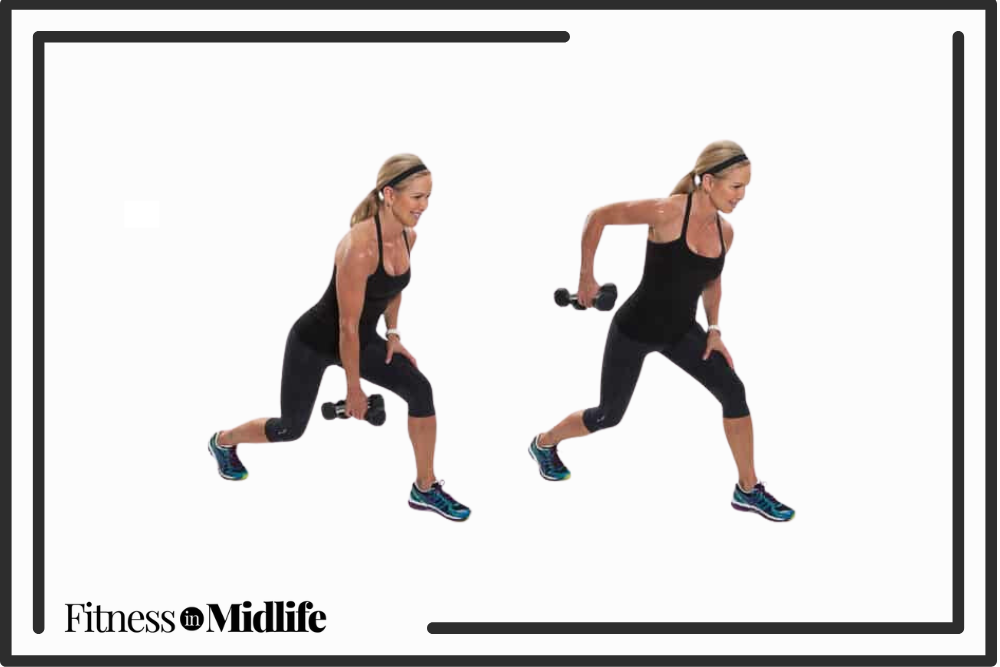
    5. Single Arm Row

    Chris Freytag doing a single arm row upper body exercise with dumbbells.

    Photo Credit: Get Healthy U

    Strengthen your shoulders and upper back:

    • Stand in a split stance with your right foot forward and the dumbbell in your left hand. Slightly hinge over from your hip flexors, keeping your abdominals engaged to protect your lower back.
    • Pull the elbow straight back past your hip (keep arms close to the body—don’t let your elbow wing out.) Engage and squeeze your back muscles, then lower the dumbbell back to start position with control. Perform 12 reps, then repeat with the dumbbells in your right hand.

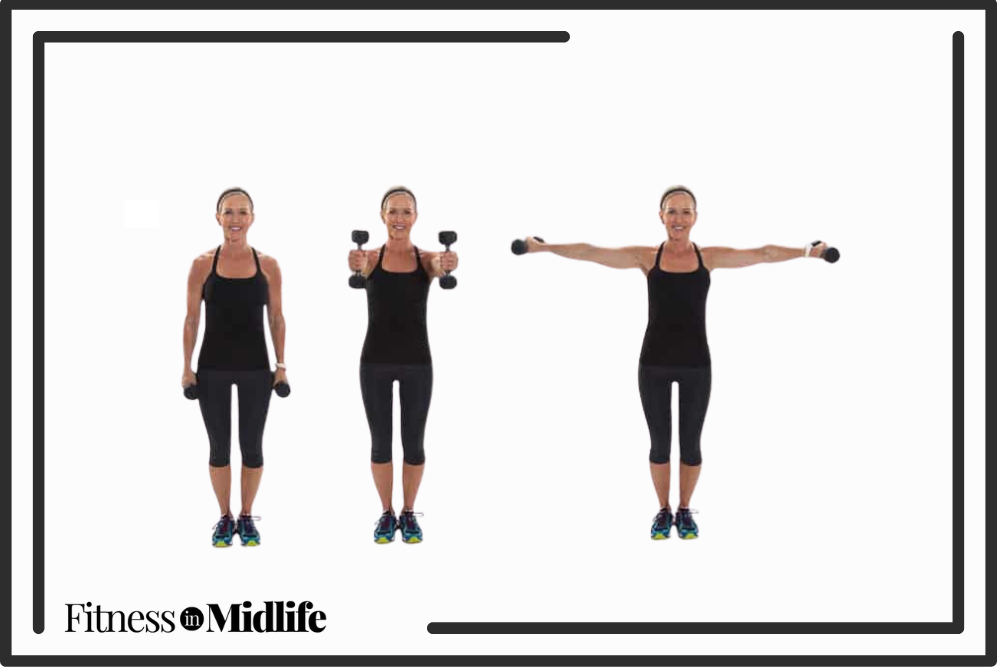
    6. Shoulder T 

    Chris Freytag doing a shoulder T upper body exercise using dumbbells.

    Photo Credit: Get Healthy U

    Work your triceps, shoulders, and upper back:

    • Start with your feet together and dumbbells at your sides with palms facing in.
    • Engage your abs and lift dumbbells in front of your body to shoulder height. Open arms out to sides, rotating dumbbells parallel to the floor.
    • Slowly lower the dumbbells down to your sides, then return them to the front of your body. Repeat 10-12 times.

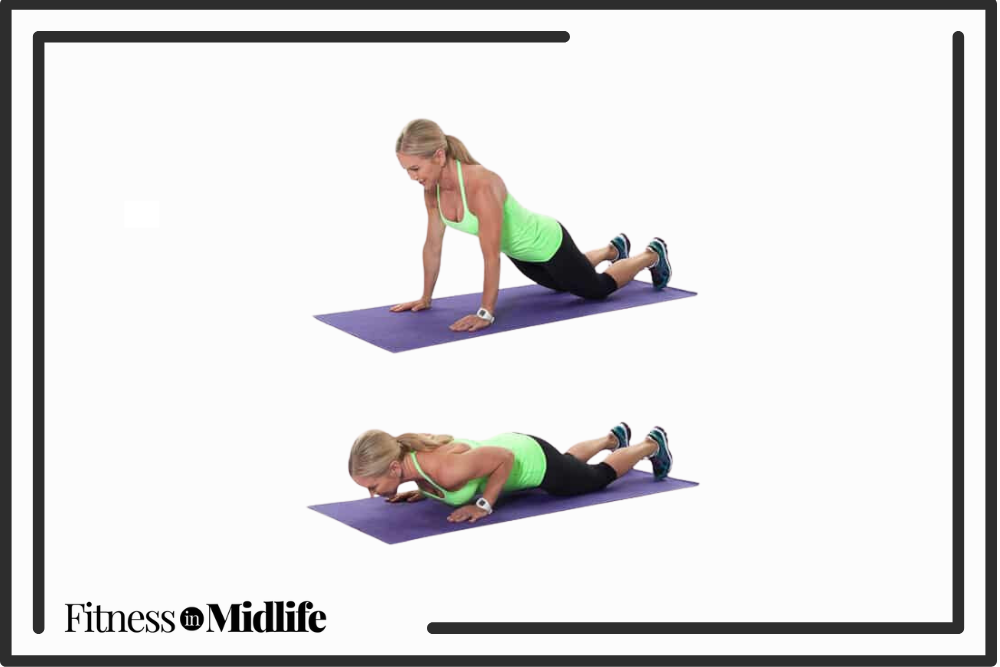
    7. Chaturanga Push-Up On Knees 

    Chris Freytag doing a modified push-up on her knees.

    Photo Credit: Get Healthy U

    Works your arms, chest, shoulders, and abs:

    • Begin in a kneeling plank position, arms directly below shoulders, and body in a straight line back to knees.
    • Lower your chest 2 inches from the floor, keeping your elbows close to your side. Exhale and slowly push back to the starting position. Repeat 10-12 reps.

    Now it’s time to stretch! Well done!

    7 Reasons You’ll Love Adding a Step Platform to Your Workout

    If you were exercising in the 1990s, you might have considered a step platform a tool for step aerobics. Remember all the repeater knees, v-steps, and straddle steps?

    Flash forward 30 years, and the step platform is still an effective and versatile piece of equipment used for a variety of workouts! Check out the benefits to see if you’re missing out on this useful tool.

    With decades of experience training women, fitness guru Chris Freytag breaks down the top seven reasons you’ll love adding a step platform to your workouts!

    1. It’s a Versatile Training Tool

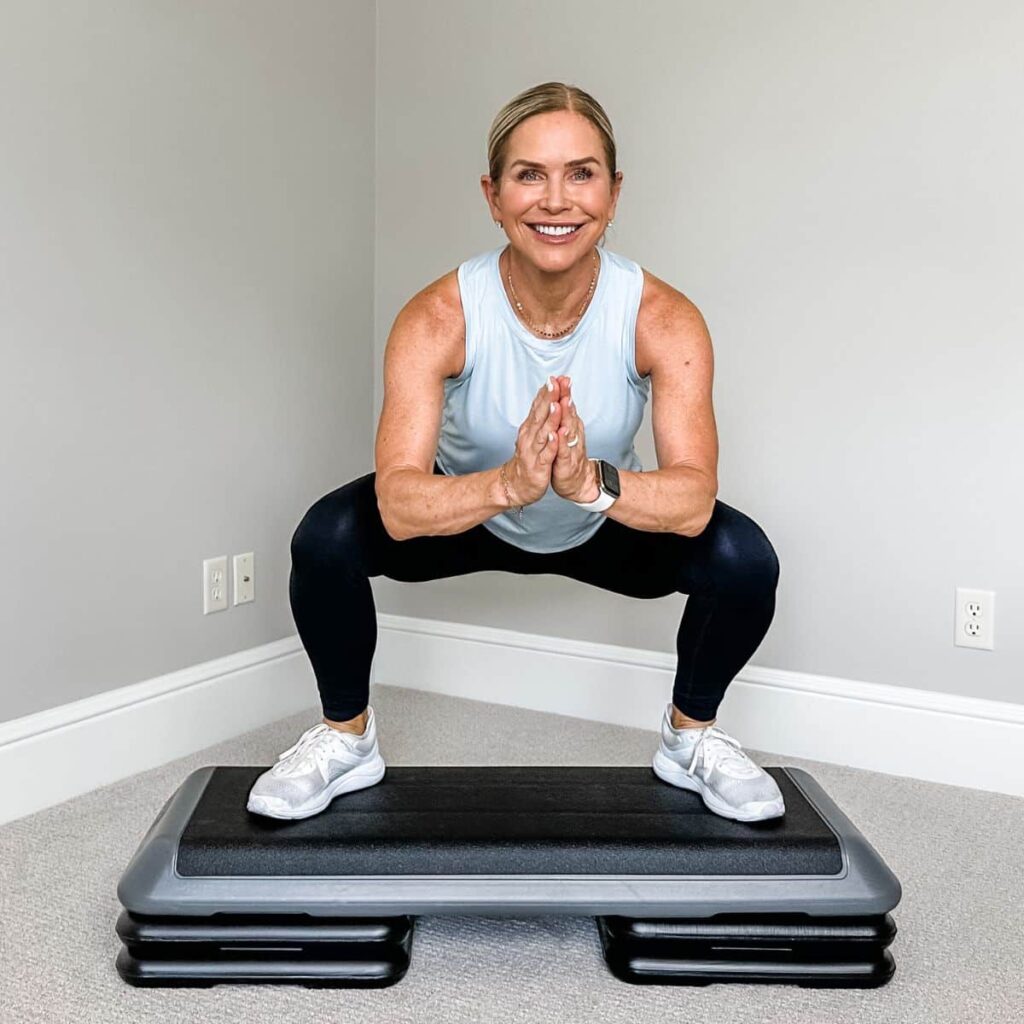
    Chris Freytag doing squats on a step platform.

    Photo Credit: Get Healthy U

    Step platforms came on the aerobics scene in the late 1980s. While they’re still used for step aerobics, they’ve evolved into a far more versatile training tool that can be used to build muscle strength and deepen stretches.

    2. You Can Adjust Your Workout Intensity

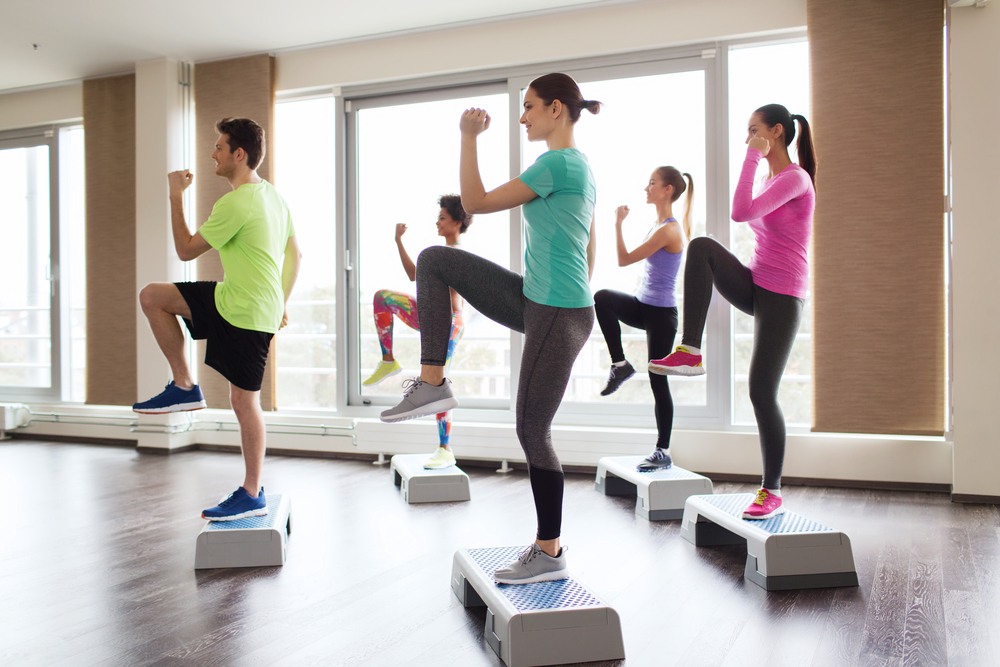
    A group fitness class use step platforms.

    Photo Credit: Shutterstock

    By adding risers, you can create different heights to make strength exercises easier or harder. Can’t do a full pushup yet? Elevate your hands on the step platform.

    Want to intensify a plyometric exercise like the jump squat? Jump onto the exercise step!

    3. It Doubles as an Exercise Bench

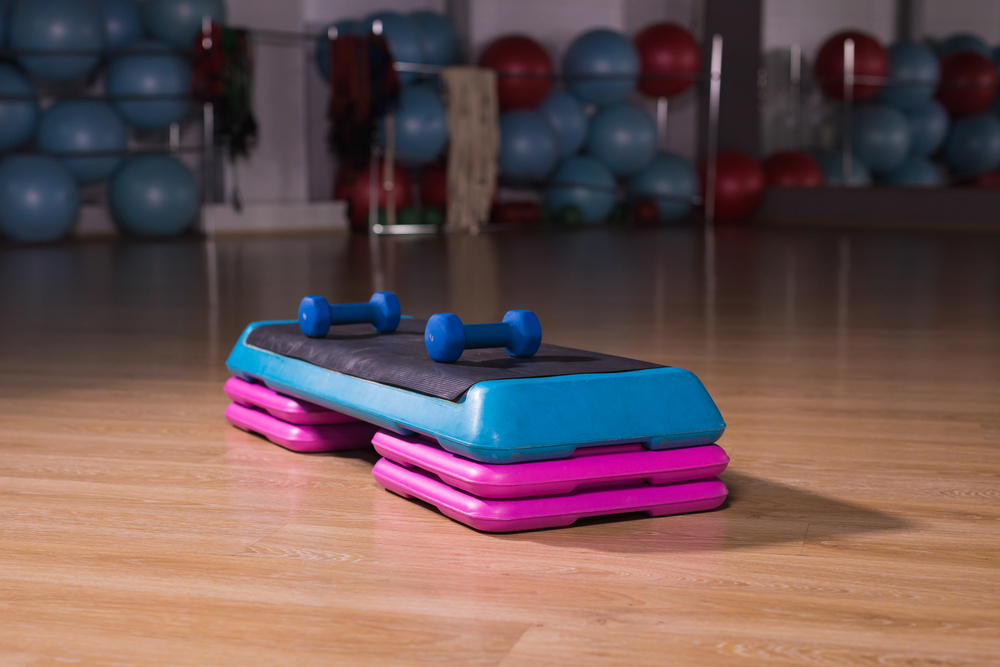
    A bright pink and blue aerobics step platform with dumbbells set on top.

    Photo Credit: Shutterstock

    The platform doubles as a strength training bench for upper body moves like chest presses and core exercises like bicycle twists. It also works for lower body moves like reverse lunges and even stretches like the seated toe touch.

    You can easily create total-body workouts right in your living room.

    4. It Can Help You Lose Weight

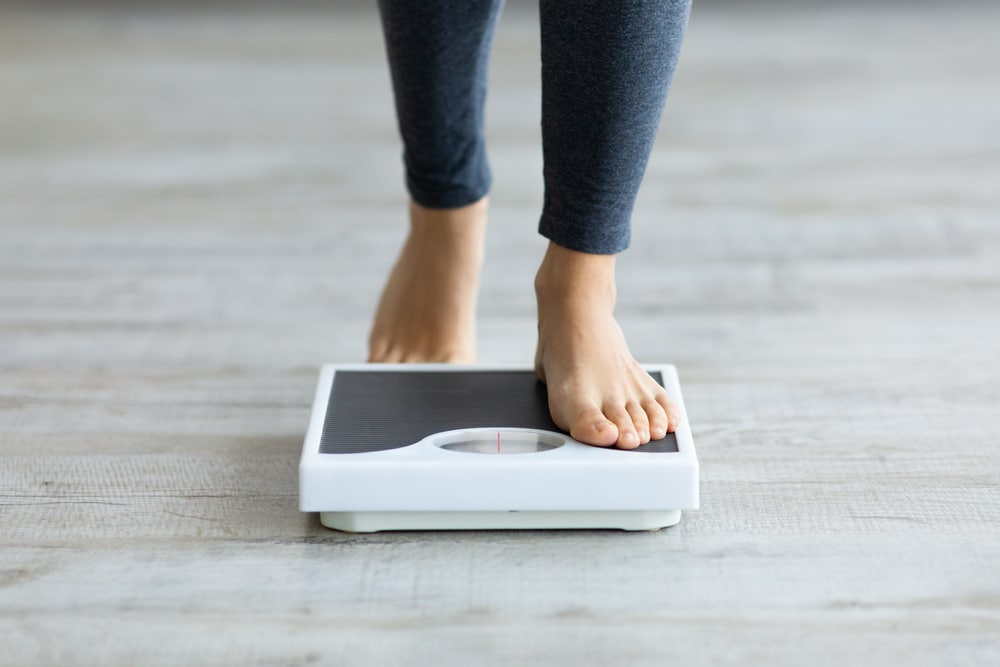
    A person's feet stepping onto a floor scale.

    Photo Credit: Shutterstock

    Step platforms are a great way to burn calories. Stepping up and down gets your heart pumping—think of how you feel after climbing a flight of stairs! Adding a high-intensity step aerobic workout to your schedule can help with weight loss when combined with a healthy diet.

    5. It’s a Safe Choice for Older Adults

    Senior woman doing mobility exercises outdoors.

    Photo Credit: Shutterstock

    A step platform can be used to create low-impact workouts, which is ideal for older adults. It helps build balance and coordination while strengthening your bones.

    6. It’s Convenient and Easy to Use

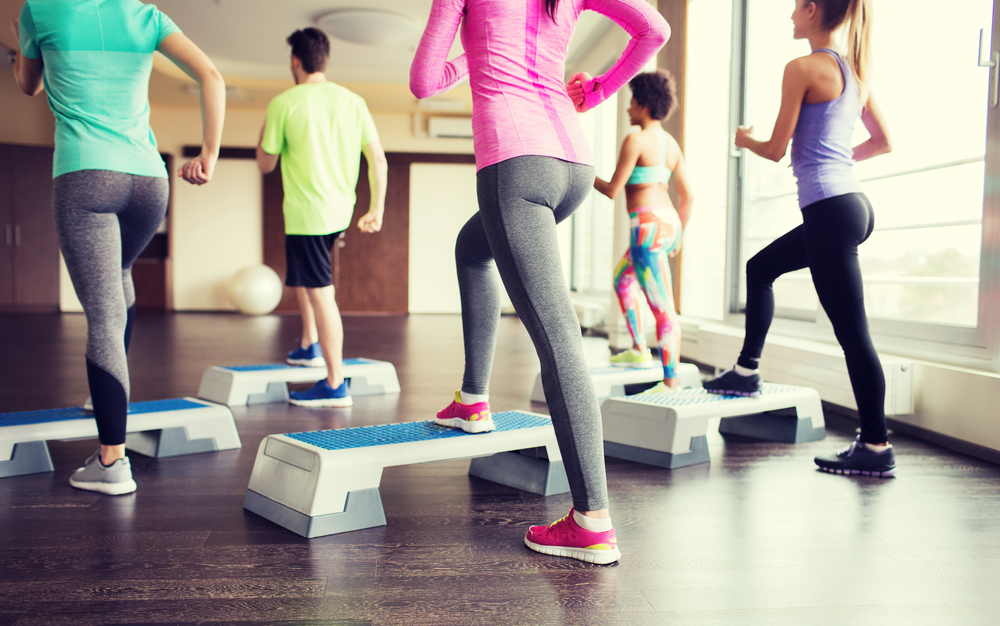
    Back view of a group fitness class using step platforms.

    Photo Credit: Shutterstock

    Exercise steps are a great piece of home gym equipment because they’re lightweight and easy to move. Simply set them aside to save space when you’re done using them.

    Plus, it’s easy to adjust the height of the step by adding or removing risers. 

    7. It Creates a Fun Workout

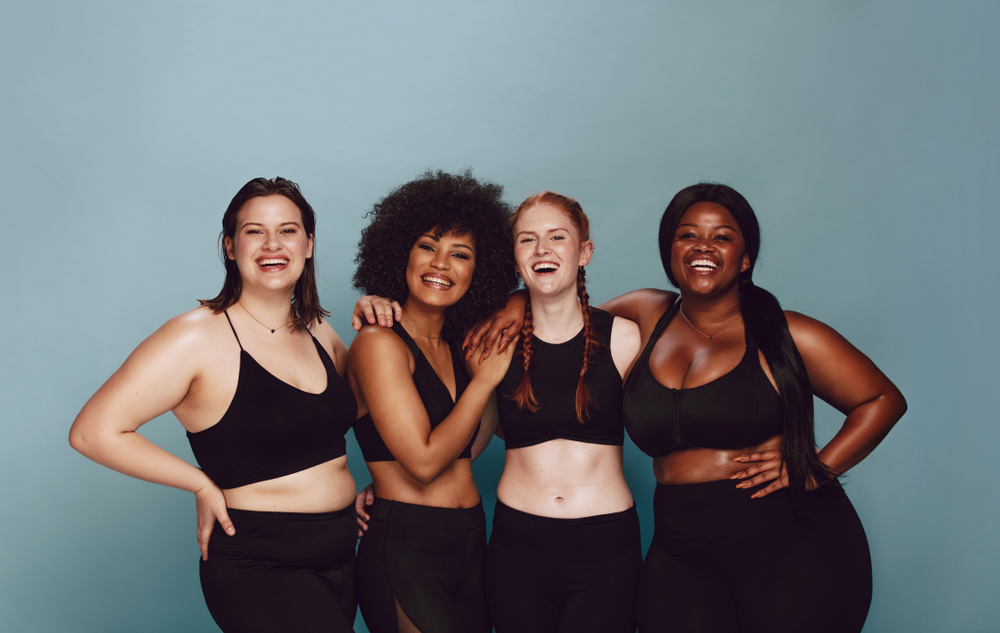
    Group of women with different metabolic body types posing together in sportswear against a gray background.

    Photo Credit: Shutterstock

    Last but not least, step platforms provide the perfect way to change up your workouts. To keep things fresh, try a few of the best step exercises linked below. More possibilities equals more fun!

    Check out Chris’s 33 Favorite Step Exercises for At-Home Workouts to get started!

    Here’s the Recipe for the Viral Jennifer Aniston Salad

    The viral Jennifer Aniston Salad on TikTok is worth the hype! 

    This famous salad is simple to make with just a handful of pantry staples like quinoa, chickpeas, pistachios and feta that are tossed in a simple lemon vinaigrette.

    Read on to learn the story behind this viral salad and how to make it, plus the full recipe.

    Where Did the Famous Jennifer Aniston Salad Come From?

    Yellow frame from the Friends tv show which was used around Monica's peephole on a purple door.

    Photo Credit: Shutterstock

    Originally, this quinoa and chickpea salad was believed to be the salad that Jennifer Aniston ate for lunch every day on the set of Friends. However, that was debunked in an interview that Courtney Cox did with the LA Times. Cox says that they all ate a variation on a Cobb salad that Jennifer “doctored up” with turkey bacon and chickpeas every day when filming.

    The famous “Jennifer Aniston salad” from social media is actually based on a salad Aniston made for an old Instagram takeover with Living Proof —calling it “my perfect salad.”

    Although she didn’t share the exact recipe, she did mention that some of the ingredients were bulgur, cucumbers, parsley, mint, red onion, garbanzo beans, feta cheese, and pistachios.

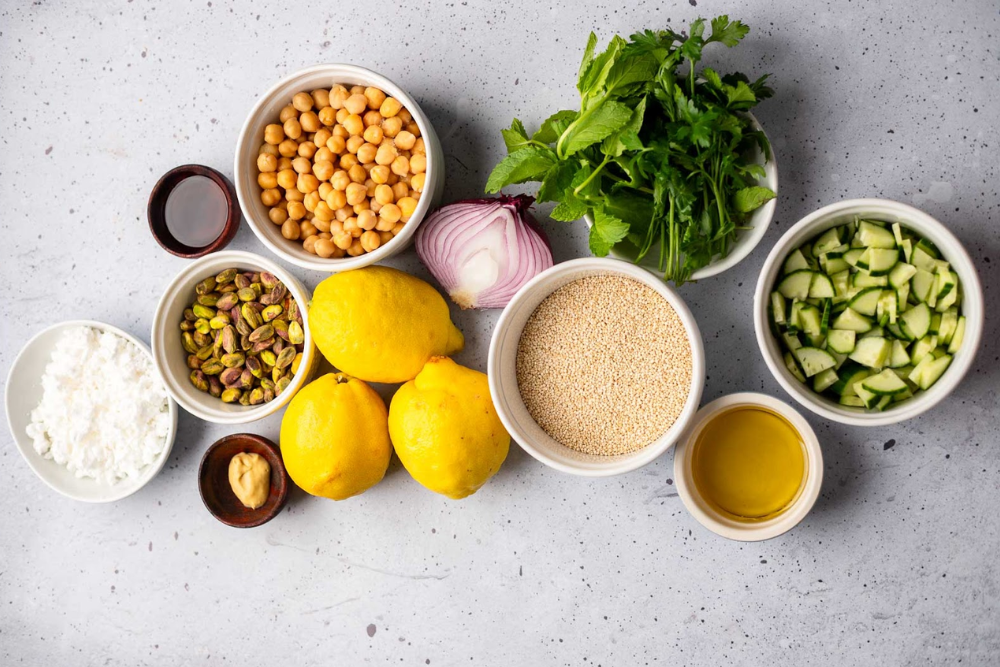
    Ingredients for Jennifer Aniston Salad

    The Jennifer Aniston Salad ingredients, including chickpeas, quinoa, feta cheese and pistachios.

    Photo Credit: Get Healthy U

    Use these simple and fresh ingredients packed with nutritional value to make your new favorite healthy salad:

    • Quinoa: Although the original recipe used bulgur, we swapped it for quinoa since that’s what we had in the pantry. However, you can substitute with bulgur or brown rice. For added flavor, cook your quinoa in broth instead of water. 
    • Red Onion, Cucumber: Add crunch and flavor to this easy salad. 
    • Chickpeas: We always keep a can or two of chickpeas on hand in the pantry as an easy way to add fiber and protein to salads like this one. You can omit or use white beans or chopped cooked chicken instead.
    • Fresh Parsley & Fresh Mint: Use fresh herbs for the most flavor.  
    • Pistachios: Add a nice crunch, healthy fats and protein to this recipe. You can substitute with another nut like chopped almonds or walnuts. Sunflower seeds or pumpkin seeds would also be great substitutes for pistachios.  
    • Feta Cheese: Adds some saltiness and creaminess to this recipe. If you don’t like feta, use crumbled goat cheese instead. 
    • Olive Oil: Adds healthy fat to the salad dressing. Use extra virgin olive oil if you have it.
    • Lemon: Use fresh-squeezed lemon juice for the best flavor. You’ll also need lemon zest for the dressing so it’s worth picking up a fresh one. 
    • Dijon Mustard: Can substitute with brown mustard instead. 
    • Maple Syrup: Can substitute with honey if you prefer. 

    How to Make the Jennifer Aniston Salad

    ingredients in bowl for jennifer aniston salad recipe

    Photo Credit: Get Healthy U

    The steps for making this salad are pretty simple:

    • Cook the Quinoa: Rinse the quinoa in a fine mesh strainer under cold water. Add quinoa, water, and a pinch of salt to a small pot and bring to a boil. Reduce to a simmer, cover and cook for 15 minutes. Fluff with a fork and let cool for 5-10 minutes.
    • Prep Fresh Salad Ingredients: Meanwhile, add minced red onion to a bowl of cold water and let soak for 10 minutes, then drain. (This helps to tame down the onion.) Chop the cucumber, parsley, mint, and pistachios, and set aside. 
    • Make the Lemon Dressing: Add all the salad dressing ingredients to a bowl and whisk to combine. You can also add them to a mason jar and shake to combine. 
    • Assemble: Add the cooled quinoa, red onion, cucumber, parsley, mint, pistachios, and chickpeas to a large bowl. Pour the dressing over top and toss everything together to combine. Add more salt or pepper to taste. 

    And here are the tools we used to make the Jennifer Aniston salad: 

    • Cutting board
    • Chopping knife
    • Medium Saucepan
    • Mixing bowl
    • Mason Jar

    How to Store the Jennifer Aniston Salad

    prepared viral jennifer aniston salad in bowl

    Photo Credit: Get Healthy U

    Store any leftover salad in an airtight container in the refrigerator for up to 3 to 4 days. The flavor of this salad got even better with time, making it perfect for meal prepping!

    Jennifer Aniston Salad: Full Recipe

    Overhead view of the viral Jennifer Aniston chickpea salad.

    Photo Credit: Get Healthy U

    Jennifer Aniston Salad Recipe

    Total Time: 30 minutes

    Yields: 6 serving(s)

    Ingredients:

    • 1 cup quinoa, uncooked (or bulgur wheat, uncooked)
    • ½ small red onion, diced
    • 1 ½ cups English cucumber, chopped
    • 1/2 cup chopped parsley
    • 1/2 cup chopped mint
    • 1/2 cup chopped pistachios
    • 1 (15-oz) can chickpeas, drained and rinsed
    • 1/2 cup crumbled feta
    • For the Dressing
    • 1/4 cup olive oil
    • 3 tablespoons lemon juice
    • 1 tablespoon Dijon mustard
    • 1 teaspoon maple syrup
    • 1/4 teaspoon sea salt
    • 1/4 teaspoon ground black pepper
    • Zest from 1 lemon

    Directions:
    Rinse and drain quinoa. Add quinoa, 2 cups of water (or broth) and a pinch of salt to a small pot and bring to a boil. Reduce to a simmer, cover and cook for 15 minutes. Fluff with a fork and let cool for 5-10 minutes.

    Meanwhile, add minced red onion to a bowl of cold water and let soak for 10 minutes, then drain. (It helps mellow the raw onion flavor.)

    Add the dressing ingredients to a bowl and whisk well to combine, or add to a mason jar and shake well.

    Add the cooled quinoa, red onion, cucumber, parsley, mint, pistachios, and chickpeas. Toss to combine and season with additional salt and pepper and lemon juice, to taste.


    Nutrition Information Per Serving:
    Serving Size: 1 of 6 salad servings (about 1 1/4 cup)

    Calories: 355

    Protein: 12 gram(s)

    Fat: 19 gram(s)

    Carbohydrates: 36 gram(s)

    Fiber: 7 gram(s)

    Sugar: 4 gram(s)

    A Quick, Low-Impact Home Workout For Any Fitness Level

    Low-impact exercise, which keeps at least one foot on the ground and avoids jumping, can still deliver a high-intensity experience without adding stress on joints and bones. Walking workouts, step aerobics, cardio-dance, and even no-impact activities like swimming and spin class are all excellent choices.

    Here, we’ve crafted a fantastic low-impact workout that you can easily do at home. It’s quick, easy, and perfect for all fitness levels. Grab a light set of dumbbells, and let’s get started! (No dumbbells? Use water bottles, cans of food, or any other safe, weighted objects.)

    Workout Instructions:

    • Complete each exercise for one minute straight. 
    • Take minimal rest in between each one.
    • Remember to breathe and stretch at the end!

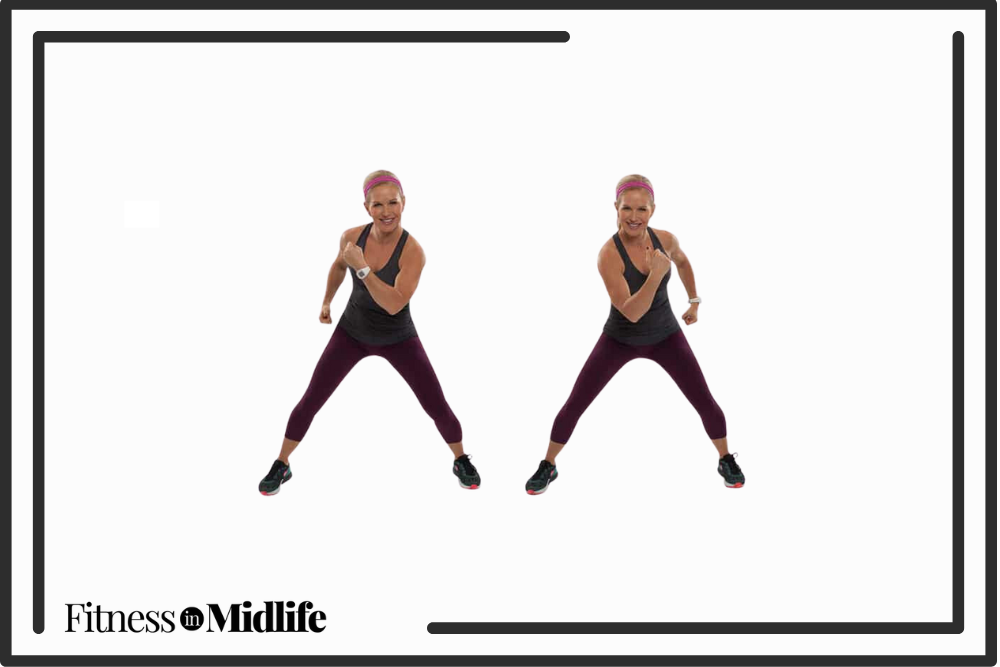
    1. Punching

    Chris Freytag doing a punching exercise.

    Photo Credit: Get Healthy U

    The punching move is a low-impact exercise that enhances cardiovascular fitness and upper body strength while maintaining minimal joint stress, making it ideal for an effective workout without high-impact movements.

    How to Perform Punching:

    • Stand with feet slightly wider than shoulder distance apart and bend your knees slightly. Tighten the core to keep your center still.
    • Punch out one arm at a time at a steady pace.

    2. Kick-Through Lunges

    Chris Freyag doing kick through lunges while holding dumbbells.

    Photo Credit: Get Healthy U

    Performing kick-through lunges will engage multiple muscle groups and improve balance and flexibility with low impact on the joints, providing a comprehensive workout that strengthens the lower body and core while minimizing strain.

    How to Perform Kick-Through Lunges:

    • Stand tall with your feet hip-distance apart. With the right foot, take a large step backward and lower your body toward the floor. At the bottom of the lunge, both legs should be bent at a 90-degree angle.
    • Straighten your left leg and kick your right foot forward to hip height or higher if possible. Repeat for the desired number of reps, then switch legs.

    3. Army Crawl Planks

    Chris Freytag doing an army crawl plank on a purple workout mat.

    Photo Credit: Get Healthy U

    The army crawl plank exercise challenges your core stability and strength with minimal impact on your joints, effectively engaging your abdominal muscles and improving overall body control.

    How to Perform Army Crawl Planks:

    • Begin in a plank position with your shoulders over your wrists, your feet together, and your body in a straight line.
    • Bend your left arm so that it is now in the forearm plank position.
    • Then bend your right arm so you are in a full forearm plank position.
    • Lift your left hand and place it on the mat directly below your shoulder as you push through your palm to lift yourself.

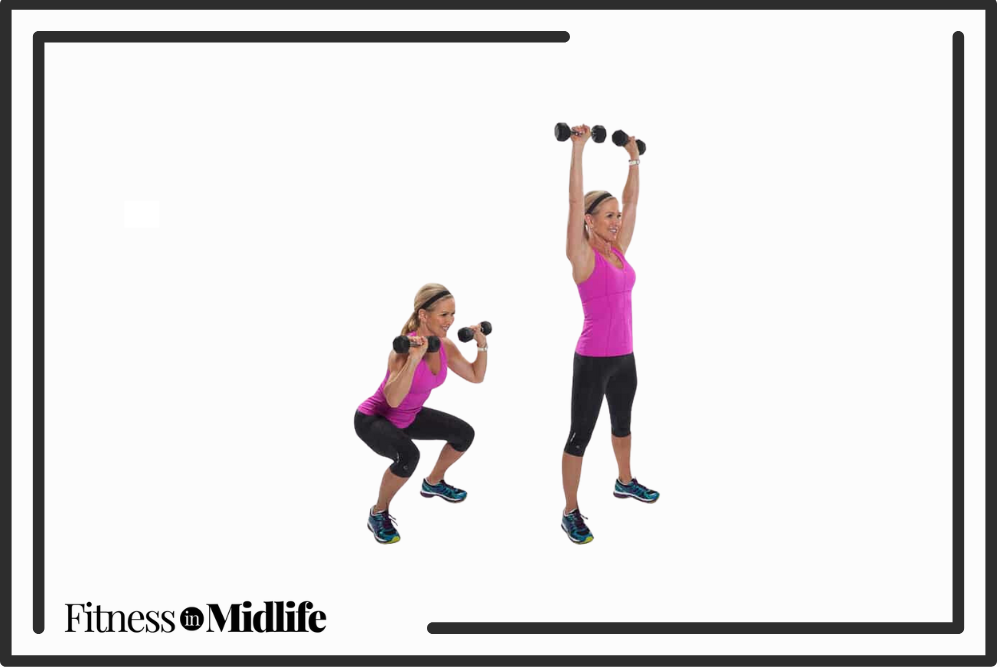
    4. Squat Thruster

    Chris Freytag doing a squat thruster exercise with dumbbells.

    Photo Credit: Get Healthy U

    The squat thruster move combines squats with an overhead press to boost lower body strength and cardiovascular endurance, offering a low-impact alternative that maximizes calorie burn and muscle engagement.

    How to Perform Squat Thrusters:

    • Start standing with feet hip-distance apart and lower into a squat position by bending the knees. Keep the spine straight, chest lifted, and knees behind toes. The elbows are bent, and dumbbells are at shoulder height.
    • Using the lower body, thrust up to standing and press the dumbbells overhead, extending the arms long. Then, lower back to the starting position.

    5. Front Kicks

    Chris Freytag doing front kicks.

    Photo Credit: Get Healthy U

    Performing front kicks targets the lower body muscles, including the glutes and quadriceps, with low impact on the joints. This enhances strength and flexibility while providing a dynamic, low-impact cardio option.

    How to Perform Front Kicks:

    • Stand with feet hip-width apart and arms bent and held in front of you.
    • Lift the right leg up, bend the knee slightly, and kick the right foot forward. Keep your ankle flexed and push through your heel.
    • Place the right foot down and switch to the left.
    • Continue to repeat for the desired amount of time or number of repetitions.

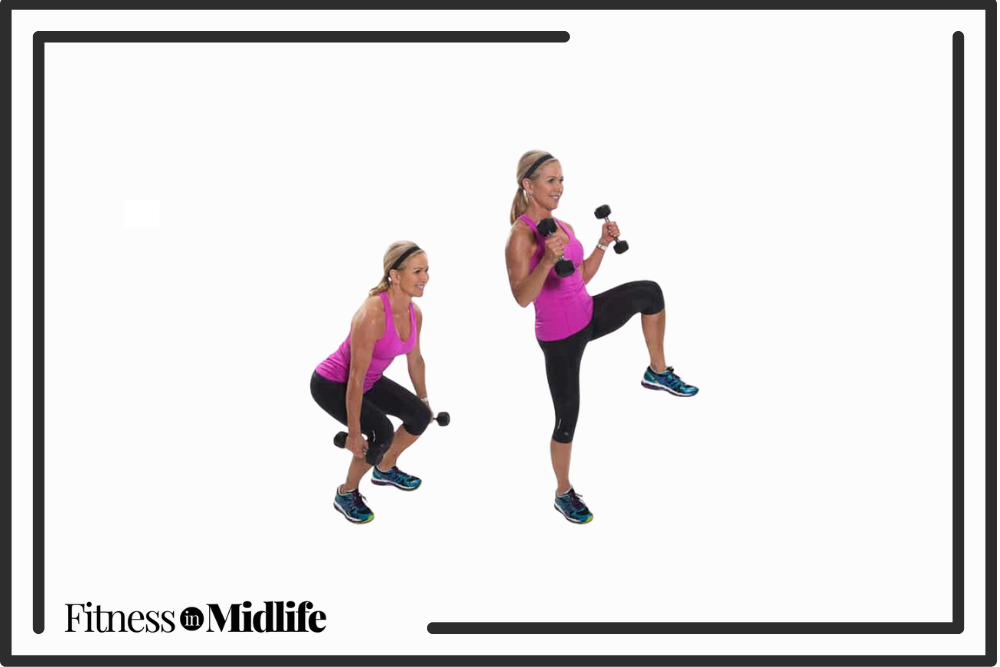
    6. Squat Curl With Alternating Knee Lifts

    Chris Freytag doing squat curls with alternating leg lifts while holding dumbbells.

    Photo Credit: Get Healthy U

    This exercise blends squats, bicep curls, and knee lifts, delivering a full-body workout with minimal joint strain, promoting muscle toning and coordination.

    How to Perform Squat Curl With Alternating Knee Lifts:

    • Start in a squat position, weight back on heels and arms long next to the side holding dumbbells.
    • Squeeze your glutes to press up and lift your right knee as you curl the weights to your shoulders.
    • Slowly lower the weights back down and return to a squat position.  Repeat with left knee.

    7. Uppercuts

    Chris Freytag doing upper cut punches.

    Photo Credit: Get Healthy U

    Uppercuts are a low-impact exercise that enhances upper body strength and coordination while keeping joints protected, making it an effective way to build arm and shoulder muscles.

    How to Perform Uppercuts:

    • Stand with feet shoulder-width apart and knees slightly bent.
    • Make two fists and hold arms next to the side with elbows bent.
    • Punch the right fist in upward motions, stopping firmly at chin level.
    • Switch to left fist.
    • Continue to switch right and left until you are at a fast, rhythmic pace, always stopping at chin level as if you are punching a target.

    8. Sit-Up Press

    Chris Freytag doing a sit up press exercise using dumbbells.

    Photo Credit: Get Healthy U

    The sit-up press move combines traditional sit-ups with an overhead press. It is a low-impact approach that targets the core and upper body and improves core strength and shoulder stability.

    How to Perform a Sit-Up Press:

    • Start on the back with bent knees and feet on the mat. Bend your elbows, and rest the dumbbells above your chest.
    • Sitting up, bring the head, neck, and shoulders off the mat, extend the arms out long, and press the dumbbell forward. Return back to the mat with control.

    9 Reasons Walking is One of the Best Exercises for Older Adults

    As we get older, staying active becomes essential for staying healthy and independent. There are plenty of exercises to choose from, but walking stands out as one of the best for aging adults! It’s simple, low-impact, accessible, and offers plenty of health benefits. 

    Here, we’ll look at 10 compelling reasons why walking is the ultimate exercise for staying active and healthy into your 50s, 60s, and beyond.

    1. It’s Low-Impact

    Two happy women walking outside.

    Photo Credit: Shutterstock

    Walking is a great way to exercise without putting too much pressure on your joints. Unlike running or jumping, walking uses smooth, controlled movements that are gentle on your joints, which reduces the risk of injury.

    You can easily adjust your pace to your comfort level, making it the perfect option for all fitness levels.

    2. It Boosts Heart Health

    Senior woman doing mobility exercises outdoors.

    Photo Credit: Shutterstock

    As a cardio exercise, walking strengthens the heart and improves its efficiency. Regular walking increases lung capacity and enhances the body’s ability to utilize oxygen, leading to better cardiovascular health.

    Even better? Regular walking can help lower bad cholesterol levels while increasing good cholesterol, which can significantly reduce the risk of heart disease.  

    3. It Helps Maintain Bone and Muscle Strength 

    Senior couple in workout clothes walking in the park.

    Photo Credit: Shutterstock

    Walking is a weight-bearing exercise that helps build muscle and keep bones strong. It also improves balance and coordination, reducing the risk of falls and bone fractures.  

    Weight-bearing exercise, in particular, helps slow bone loss and decreases the risk of osteoporosis. 

    4. It Lowers Your Diabetes Risk

    Senior couple walking in the park.

    Photo Credit: Shutterstock

    Walking helps to regulate blood sugar levels by improving insulin sensitivity, which can reduce the risk of developing type 2 diabetes.

    For those already managing diabetes, walking can be a powerful tool in maintaining blood sugar control, among other tactics like eating foods that help lower blood sugar naturally.

    5. It’s a Mood Booster

    A senior couple power walking outdoors.

    Photo Credit: Depositphotos

    Physical activity like walking helps boost mood by stimulating the production of serotonin and dopamine, neurotransmitters associated with happiness and well-being.

    Walking can lift your spirits and foster a positive outlook on life. Whether you walk with friends, listen to a podcast, or put on an uplifting playlist, your mood is guaranteed to change!

    6. It Helps Maintain a Healthy Weight 

    A woman walking on a walking pad in her home.

    Sporty woman training on walking treadmill at home, closeup

    Walking is an effective way to manage weight because it burns calories and helps boost your metabolism. To maximize weight loss, try power walking! Depending on the speed, a power walk can burn anywhere from 200 to 400 calories per hour or more. If you add a weighted vest for walking, you can burn even more.

    Consistent daily walking, combined with a balanced diet, can prevent obesity and promote weight loss. These walking workouts for weight loss are a great place to start!

    7. It Helps You Feel Energized

    A woman power walking on an outdoor trail.

    Photo Credit: Shutterstock

    Contrary to what one might think, physical activity like walking actually boosts energy levels because it improves blood circulation and oxygen supply to muscles and organs.

    This leaves you feeling more energized and less fatigued!

    8. It Promotes a Healthy Blood Pressure

    woman power walking for weight loss outdoors

    Photo Credit: Shutterstock

    Walking is an excellent way to manage blood pressure. It helps to lower systolic and diastolic blood pressure, keeping it within a healthy range.

    This reduces the strain on the heart and lowers the risk of hypertension-related complications.

    9. It Helps You Sleep Better

    Older woman power walking in the woods with headphones on.

    Photo Credit: Shutterstock

    Regular physical activity, such as walking, can improve sleep patterns. It helps to regulate the circadian rhythm, making it easier to fall asleep and enjoy a restful night.

    Better sleep quality translates to improved overall health. If sleep is something you struggle with, check out my tips for getting better sleep at night.

    9 Cardio Exercises That Will Help You Burn More Calories

    Cardio exercise is a fantastic way to lose weight while improving overall health. While strength training is important to boost your metabolism, cardio workouts are also necessary for weight loss.

    People often think of running as the best form of cardio—but the good news? There are plenty of other options that torch calories while taking it easy on your joints. 

    Here, we’ll take a look at the 9 best cardio workouts that will burn the most calories and kickstart your weight loss journey.

    1. Walking [Burns 300-400 calories/hour]

    woman ready to walk on track with jug of water

    Photo Credit: Shutterstock

    Perhaps the most straightforward and accessible exercise, walking is not only a great way to burn calories but also a low-impact workout that most people can stick with.

    However, a leisurely evening stroll won’t make the cardio cut. To burn fat, you need a brisk, moderately fast pace. Regular brisk walking can help you:

    • Maintain a healthy weight
    • Prevent or manage various conditions, including heart disease, high blood pressure, and type 2 diabetes
    • Strengthen your bones and muscles
    • Improve your mood
    • Improve your balance and coordination

    The faster, farther, and more frequently you walk, the greater the benefits. You can walk outdoors on the sidewalk, go for a hike, hit the treadmill at the gym, or even use a walking pad.

    Tip: If you’re using a treadmill, try adding an incline to torch more calories and tone your glutes and thighs. 

    2. Climbing Stairs [Burns 1000 calories/hour]

    Run the stairs as a way to burn calories.

    Photo Credit: Shutterstock

    This challenging exercise can be done at home, in a gym, or even on outdoor stadium steps, making it a versatile option for any fitness routine.

    Here are a few tips to help you get started with climbing stairs for cardio exercise:

    Proper Form and Techniques

    When stair climbing, proper form is essential to maximize the benefits and prevent injuries. Keep your back straight, engage your core muscles, and step up one step at a time.

    Avoid using the railing for support, and try pushing off with your toes to engage your calf muscles. As you progress, you can increase your speed and step height or try skipping one or two stairs.

    Progressive Overload

    Just like with other exercises, it’s crucial to gradually increase the workload to keep challenging your body and avoid plateauing. Start with a few flights of stairs and gradually increase the duration and intensity of your workout.

    You can also add weight by wearing a backpack or carrying dumbbells to make the climb more challenging.

    3. Kettlebells [Burns 800-900 calories/hour]

    woman lifting kettlebell

    Photo Credit: Shutterstock

    A kettlebell is a cannonball-shaped weight that produces a powerful, effective workout. Kettlebell workouts combine strength training with cardio and can help you burn up to 20 calories per minute (the equivalent of running a 6-minute mile.)

    Now that’s getting the most from your workout time!

    According to the American Council on Exercise, kettlebells can provide a higher-intensity workout than the usual strength training routine in a shorter amount of time. This is because kettlebell training simultaneously works your cardio endurance while building muscle strength, balance, and flexibility.

    4. Jumping Rope [Burns 600 calories/hour]

    Woman jump roping outdoors.

    Photo Credit: Shutterstock

    Aside from being a fun pastime, jumping rope is an effective cardio workout that can help you lose weight. By engaging your whole body, it burns a significant amount of calories and improves coordination, balance, and agility.

    One of the best cardio exercises for weight loss is jumping rope. It’s not only a calorie-blaster but also helps build bone density, strengthens your legs, strengthens your heart, and improves coordination, balance, and agility.

    Moreover, it is a low-cost activity that can be done almost anywhere.

    Jumping rope is also a great form of plyometric workout, where both feet are off the ground. Plyometrics get your heart pumping and burn calories quickly and effectively.

    Other forms of plyometrics include exercises like:

    • Jumping jacks
    • Split jumps
    • Box jumps (you can use any step or safe, elevated platform)

    5. High-Intensity Interval Training (HIIT) [Burns 600 calories/hour]

    A woman holding dumbbells while doing squats in her living room.

    Photo Credit: Shutterstock

    If you’re short on time but still want to burn calories and get in shape, HIIT is the way to go. This popular cardio workout technique involves short bursts of high-intensity exercise followed by brief rest periods.

    Once used to train only elite athletes, High-Intensity Interval Training (HIIT) is now mainstream and can be incorporated into many workout routines.

    These workouts can be done in as little as 20 minutes and are known for burning calories not just during the workout but even after, thanks to the “afterburn effect.” HIIT workouts also train and condition your aerobic and anaerobic energy systems.

    HIIT exercises can range from bodyweight movements, such as burpees and jump squats, to using equipment such as kettlebells and resistance bands. The training can also be done with treadmills, outdoor walking, swimming, cycling, and elliptical machines.

    Most programs require you to push hard for a work session (20-30 seconds), with a short 10-20-second rest in between. The key is to push yourself to your maximum effort during the high-intensity work portion and then allow your body to recover during the rest periods.

    With HIIT, a lack of time is no excuse: a 20-minute HIIT session is more effective at burning calories and fat overall than a 60-minute jog.

    6. Cycling [Burns 500-600 calories/hour]

    Pink tennis shoes locked into spin bike

    Photo Credit: Shutterstock

    Cycling is a low-impact exercise that improves heart health, strengthens leg muscles, and burns some serious calories.

    If you’re looking for an effective workout that can help you lose weight while being gentle on your joints, cycling might be the perfect fit. This low-impact cardio exercise can be done indoors or outdoors and is suitable for different fitness levels.

    When cycling, you target your lower body muscles, such as your glutes, quads, and hamstrings, and you also improve your cardiovascular health. According to Harvard Health Publishing, the average person burns between 250 and 300 calories per 30-minute session of cycling exercise.

    7. Rowing [Burns 500-600 calories/hour]

    using an indoor rowing machine

    Photo Credit: Shutterstock

    Indoor rowing machines, also called “ergs” or “ergometers,” have long been used by crew teams who want to maintain their training during the winter months. But over the years, they’ve also gained popularity with other people—anyone who wants a total-body workout that’s low-impact and gets your heart rate up.

    Benefits of Rowing for Cardio Exercise

    • Low impact
    • Full body workouts
    • Meditative
    • Simple
    • High-calorie burn

    Most gyms have a rowing machine section, and there are even some group fitness rowing classes.

    Rowing typically burns between 250 to 300 calories in a 30-minute session. 

    8. Dancing [Burns 460-1,000 calories/hour]

    Female athletes doing aerobics exercises or Zumba dance workout.

    Photo Credit: Shutterstock

    Are you tired of the usual workouts and looking for a fun and engaging way to shed those extra pounds? Look no further than dance workouts!

    Dancing not only burns calories but also helps improve endurance, coordination, and flexibility. Some popular dance styles for weight loss include Zumba, hip-hop, and salsa.

    You don’t need to be a professional dancer to benefit from dance workouts. Many classes cater to beginners and offer modifications to suit different fitness levels. You can also do these cardio sessions right in the comfort of your own home!

    The amount of calories you’ll burn depends on the intensity of your workout and the type of dance:

    • Zumba (460-920 calories/hour)
    • Hip Hop (500-1,000 calories/hour)
    • Salsa (400-800 calories/hour)

    Dance workouts are effective workouts, but they are also a great way to have fun and socialize. Grab a friend or join a class to add some excitement to your fitness routine.

    9. Swimming [Burns 250-900 calories/hour]

    Photo Credit: Shutterstock


    Swimming is an excellent low-impact cardio workout that provides a full-body workout without putting stress on your joints. The resistance of the water works nearly every major muscle group in your body, which can lead to improved muscle tone and overall fitness levels.

    Additionally, swimming helps to improve your cardiovascular endurance, making it a great form of aerobic exercise that can aid in weight loss.

    There are several different swimming strokes that you can try, including:

    • Freestyle (400-700 calories/hour)
    • Breaststroke (400-600 calories/hour)
    • Backstroke (250-400 calories/hour)
    • Butterfly (600-900 calories/hour)

    *Calories burned per hour are based on an average weight of 155 pounds (70 kg) and vary depending on several factors, including body weight, swimming intensity, and stroke.

    Each stroke targets a different set of muscles, allowing you to vary your workout and keep things interesting. For beginners, starting with the freestyle stroke is often the easiest to learn and most effective for burning calories.

    If laps aren’t your thing, you can try this 30-minute pool workout, which includes simple but effective exercises for any age.

    The Best Low-Impact Exercises for Sciatica Pain Relief

    Dealing with sciatica pain can be a daily struggle, affecting your ability to move comfortably and perform everyday tasks. Incorporating low-impact workouts into your routine can provide significant relief!

    Here, we’ll explore a range of gentle yet effective exercises designed to alleviate sciatica pain and improve mobility, plus the top exercises to avoid.

    Note: It’s best to consult your doctor before starting an exercise routine or if you experience worsening pain.

    Swimming/Pool Exercises

    Happy senior woman in swimming pool, leaning on edge.

    Photo Credit: Shutterstock

    Water therapy is a fantastic option for sciatica patients! It reduces the weight-bearing load that can cause more pain, which means less discomfort while exercising.

    Pool exercises are also a great way to work on your core and provide you with some immediate relief from sciatica pain.

    Research has shown that water therapy can help to strengthen and lengthen the muscles in your back while reducing pain.

    Workout to try: Pool Exercises For Seniors (30 Minute Pool Workout)

    Yoga

    Senior couple doing yoga for healthy aging.

    Photo Credit: Depositphotos

    Yoga naturally helps strengthen and lengthen your spine, stretch your muscles, and fix your back’s alignment. Adding consistent preventative stretching targeted towards sciatic pain can be a game changer for your pain management and general wellness.

    Workouts to try: 

    Walking

    Senior couple in workout clothes walking in the park.

    Photo Credit: Shutterstock

    Regular exercise, such as walking, can help strengthen your core muscles, reduce inflammation, and improve flexibility, supporting your spine and reducing stress on your lower back. While walking is a great, low-impact option for sciatica relief, certain aspects should be avoided, such as walking uphill or on uneven surfaces. Keep your strides short and pace steady, and take breaks when needed. Start slow and work up to a quicker pace when you’re ready!

    Workouts to try: 

    You can also try a walking pad for indoor walks.

    Low-Impact Strength Training Moves

    Three women doing glute bridges in a yoga studio.

    Photo Credit: Shutterstock

    If you struggle with sciatica symptoms, high-impact exercises that include running, jumping, twisting, or bending should be avoided.

    Instead, try low-impact options that work your core without putting extra strain on the sciatic nerve.

    Moves to try: 

    Movements and Exercises to Avoid with Sciatica

    woman jump roping outside

    Photo Credit: Shutterstock

    While exercise is a great way to relieve sciatica pain, there are certain movements, activities, and exercises to avoid:

    • Avoid jarring motions and sudden changes in direction, especially those that force your back to bend or twist quickly and repetitively.  
    • As a general rule, high-impact exercise should be avoided until symptoms start to resolve. Running, jumping, high-impact aerobics, and burpees should all be avoided.
    • Many individuals need to avoid golf and tennis due to the amount of low back bending and twisting required.
    • Avoid sitting and/or standing in the same position for a long period of time. Sitting still for a long time can cause sciatica pain to flare up.
    • In general, avoid lifting anything heavy while twisting or bending your back, including exercises like weighted deadlifts.

    While sciatica symptoms look different for everyone, it’s important to understand the root cause of what can aggravate your specific pain. This will help you avoid making it worse and keep you on the path to healing!

    12 Standing Core Exercises to Boost Mobility After 40

    Did you know standing exercises for a flat stomach can be just as effective (if not more effective!) than core work on the mat? It’s a big reason standing ab exercises are so popular, especially for those dealing with back and knee pain who struggle to get on and off the floor.

    Our 12 standing ab exercises also mimic normal everyday activities, making them great functional strength training workouts. Functional strength training is all about incorporating movements that challenge your stability and mobility, like balancing on one leg or doing core exercises on an unstable surface. 

    Ready to get started? The following 12 standing ab exercises require no equipment and help work your core, improve your body’s ability to move efficiently, and reduce the risk of injury in everyday activities.

    1. Cross-Body Bicycle Crunches

    Chris Freytag wearing a pink tank top and black leggings doing a cross body bicycle crunch.

    Credit: Get Healthy U

    Performing cross-body bicycle crunches will engage your entire core, emphasizing oblique muscles for improved rotational strength.

    2. Cross-Body Leg Lifts

    Chris Freytag wearing a pink tank top and black leggings starting with hands behind the head and reaching out to touch the opposite toe while kicking the leg to hip height.

    Credit: Get Healthy U

    This standing ab exercise will strengthen your lower abs and hip flexors, enhancing stability and balance.

    How to Perform Cross-Body Leg Lifts:

    • Stand with feet hip-width apart, knees slightly bent, hands behind head.
    • Keep low abs pulled in tight and lift left leg straight up as right-hand reaches towards toes.  Keep your back straight and your head up. 
    • Lower back to start. Repeat on the opposite side.

      3. Standing Oblique Crunches

      Chris Freytag wearing a pink tank top and black leggings doing a standing oblique crunch.

      Credit: Get Healthy U

      This standing oblique exercise focuses on the obliques, enhancing side core strength and definition.

      How to Perform Standing Oblique Crunches:

      • Stand with your feet shoulder-width apart. Lift right arm up overhead. 
      • Bring the right knee up to the side to meet your right elbow, engaging through your obliques. 
      • Return to standing. Repeat on the other side. 

      4. Fully Body Circles

      Chris Freytag wearing a pink tank top and black leggings performing full body circles.

      Credit: Get Healthy U

      Performing full-body circles activates your entire core while enhancing flexibility and balance.

      How to Perform Fully Body Circles:

      • Stand with your legs hip-width apart.  Raise both arms up and clasp your hands overhead. Slightly soften your knees and contract your abs. 
      • Bend forward at the hips and slowly draw a full circle with your body. 
      • After several circles, one way, change directions. 

      5. Oblique Burners

      Chris Freytag wearing a pink tank top and black leggings performing oblique burners.

      Credit: Get Healthy U

      This standing oblique exercise specifically targets your oblique muscles, improving side torso strength and toning.

      How to Perform Oblique Burners:

      • Stand with wide feet, heels in, and toes turned out. Sink into a plie with knees bent and hands lightly touching the back of your head.
      • Bend to the right, reaching your right hand to the middle of your right calf. 
      • Return to the center. Repeat on the other side.

      6. Cross Behind Lunge with a Knee Lift

      Chris Freytag wearing a pink tank top and black leggings performing a cross behind lunge with a side knee raise.

      Credit: Get Healthy U

      This ab exercise strengthens your core and lower body while improving balance and coordination.

      How to Perform Cross Behind Lunge with a Knee Lift:

      • Begin standing with your feet hip-distance apart and your hands lightly touching the back of your head.
      • Cross your right food behind your left leg, keeping your hips facing forward as you bend both knees and lower yourself toward the floor in a lunge. Keep your back straight and chest lifted. 
      • Drive your right knee up to meet your right elbow in a side crunch. Repeat for desired number of reps and then repeat on the other side.

      7. Cross Body Knee Thrusters

      Chris Freytag wearing a pink tank top and black leggings performing cross body knee thrusters.

      Credit: Get Healthy U

      Performing cross-body knee thrusters engages your entire core, emphasizing the obliques and lower abs for a toned midsection.

      How to Perform Cross-Body Knee Thrusters:

      • Stand with your feet hip-width apart and extend your arms up and over your right shoulder. 
      • Drive your left knee up and across your body, and bring your arms down to meet your knee. 
      • Return to start. Repeat on the other side.

      8. Crossover Toe Touches

      Chris Freytag wearing a pink tank top and black leggings leaning forward and touching the opposite toe.

      Credit: Get Healthy U

      Performing crossover toe touches engages your entire core, emphasizing flexibility and coordination.

      How to Perform Crossover Toe Touches:

      • Stand with your feet wide and extend your arms into a T position. 
      • Engage your core, rotate your torso to the left, and reach your right hand to your left foot.  Bend your knees slightly if your hamstrings are tight. 
      • Return back to standing and alternate to the other side. 

      9. Side Twist Standing

      Chris Freytag wearing a pink tank top and black leggings performing pilates standing ab twists.

      Credit: Get Healthy U

      This standing oblique exercise will strengthen your obliques and improve rotational flexibility and balance.

      How to Perform a Side Twist Standing:

      • Stand with feet hip-width apart, slight bend at the knee, pelvis slightly tucked under, and abs pulled in toward the spine.
      • Hold your arms in a circle directly out in front of your chest, as if you are holding an imaginary beach ball. Take a deep breath in, and as you exhale, twist your imaginary ball to the left 3 times, moving far, farther, and farthest.
      • Do not move your hips. The rotation should come right at your ribcage.
      • Return to center, inhale, then twist the “ball” to the right far, farther, farthest, returning to the center to inhale. Repeat twisting three times in each direction.

      10. Fast Corner Punches

      Chris Freytag wearing a pink tank top and black leggings doing fast corner punches!

      Credit: Get Healthy U

      I love using fast corner punches to increases core engagement and cardiovascular endurance while targeting my obliques.

      How to Perform Fast Corner Punches:

      • Begin in a standing position with feet hip-width apart and knees slightly bent.
      • Pull your arms close to your side, bending the elbows and making two tight fists facing toward you.
      • Punch your left arm across your body to the right corner and then do the same to the left.  Keep your hips steady and rotate from the waist area, contracting your abs. 
      • Repeat for the desired amount of repetitions. 

      11. Fast Uppercuts

      Chris Freytag wearing a pink tank top and black leggings perform fast upper cuts.

      Credit: Get Healthy U

      You might think of fast uppercuts as a boxing exercise, but this standing ab movement actually enhances core strength and coordination, focusing on your upper abs and obliques.

      How to Perform Fast Uppercuts:

      • Begin in a standing position with feet hip-width apart and knees slightly bent.
      • Pull your arms close to your side, bending the elbows and making two tight fists facing toward you.
      • Punch each fist in an upward motion stopping right about chin level, alternating right and left. Keep your hips steady and rotate from the waist area, contracting your abs.  
      • Repeat for the desired amount of uppercut repetitions. 

      12. Chair Pose with a Twist

      Chris Freytag wearing a pink tank top and black leggings performing a yoga chair post with a twist from side to side.

      Credit: Get Healthy U

      The chair pose with a twist exercise engages your entire core, improving balance, flexibility, and spinal strength.

      How to Perform Chair Pose with a Twist:

      • Stand with your feet close together.  Engaging your core and inner thighs, bend your knees and send your hips back into a chair pose.
      • Lift your chest and chin up, hands in a prayer position. 
      • Rotate your upper body to the right, aiming to get your left elbow to your right knee. Think about rotating from the waist, and don’t rotate your hips. 
      • Return back to the start and rotate to the other side.

      5 Targeted Exercises to Help Get Rid of Love Handles

      Along with a healthy diet and exercise, our love handle workout can help tone your obliques and slim your waist!

      But before we dive into the exercises, it’s important to note that you can’t spot-reduce body fat. To lose love handles, you need to reduce your overall body fat percentage.

      Some of the best ways to do this include:

      • Maintaining a balanced diet and cutting down on calories. Focus on a nutritious diet with plenty of fruits, vegetables, lean proteins, and whole grains while cutting back on processed foods, sugary drinks, and high-fat foods.
      • Including healthy fats in your diet. Foods like avocados, nuts, and olive oil can help control hunger and support weight loss.
      • Staying hydrated. Drink plenty of water, which can help control your appetite and support metabolism.
      • Easing stress. A lot of stress can lead to increased cortisol levels that contribute to weight gain.
      • Exercising regularly. It’s important to incorporate both cardiovascular (aerobic) and strength-training exercises into your routine! Cardio workouts like running, cycling, and swimming can help burn calories and reduce overall body fat. HIIT workouts can be effective for burning calories and reducing body fat (including love handles).

      Ready to get started? In addition to healthy lifestyle choices, the following five exercises can help slim your waist and get rid of love handles.

      Workout instructions:

      • Go through each of the five exercises as instructed.
      • Rest for 1 minute, and then repeat the list two more times. (A total of 3 rounds!)
      • Do this workout 3 times per week for the best results.
      • Note: If you don’t have a dumbbell, a water bottle or other weighted item will work.

      1. Full-Body Roll-Up (12 Reps)

      Chris Freytag doing a full body roll up exercise.

      Photo Credit: Get Healthy U

      How to do a full-body roll-up:

      • Start lying on the mat with your arms extended overhead, legs long, and feet flexed.
      • Inhale as you lift arms up and begin curling your chin and chest forward. Exhale as you roll the entire torso up and over your legs, keeping abs engaged while you reach for your toes.
      • Inhale as you begin rolling your spine back down one vertebra at a time, and exhale as the upper portion of the back lowers and arms reach overhead.  
      • Repeat moving slowly, using the abdominals to lift and lower (not momentum).
      • Complete 12 reps.

      2. Russian Twist Exercise (12 Full Rotations)

      Chris Freytag doing a russion twist exercise.

      Photo Credit: Get Healthy U

      How to do Russian twists:

      • Start seated with knees bent and feet flat on the floor, holding both hands in front of your chest (a dumbbell is optional).
      • Keeping the spine long and the abdominals tight, lean back slightly and lift the feet a few inches off the floor. (To modify, keep the feet on the floor.)
      • Slowly twist the torso to the left and bring the hands beside the left hip. Return to center, slowly twist to the right, and bring the hands beside the right hip to complete one rotation.
      • Do 12 rotations (24 twists total).

      3. Side Plank Lift/Lower (12 Reps Per Side)

      Chris Freytag doing a side plank lift and lower exercise.

      Photo Credit: Get Healthy U

      How to do a side plank lift and lower:

      • Come into a side forearm plank by lying in one long line on one side, stacking your elbow under your shoulder, and keeping your forearm on the mat perpendicular to your body.
      • Stack your feet and stay in one long line as you engage your core and lift your hips up, forming a side forearm plank.
      • Dip your hips down towards the mat and lift back up using your obliques and core muscles.
      • Perform 12 times on the right side and 12 times on the left side.

      4. Mountain Climbers Exercise (30 Seconds)

      Chris Freytag doing a mountain climber exercise.

      Photo Credit: Get Healthy U

      How to do mountain climbers:

      • Start in a plank position with arms and legs long. Keep your abs pulled in and your body straight. Squeeze your glutes and pull your shoulders away from your ears
      • Pull your right knee into your chest.  As the knee draws to the chest, pull your abs in even tighter to be sure your body doesn’t sag or come out of its plank position.
      • Quickly switch and pull the left knee in. At the same time you push your right leg back, pull your left knee into the chest using the same form.
      • Continue to switch knees. Pull the knees in right, left, right, left—always switching simultaneously so that you are using a “running” motion
      • Repeat for 30 seconds.

      5. Oblique Crunch Exercise (12 Reps Per Side)

      Chris Freytag doing an obique crunch exercise.

      Photo Credit: Get Healthy U

      How to do an oblique crunch:

      • Start lying on your side in one long line on your forearm, with your shoulder stacked over your elbow.
      • Swing your legs forward and lean back on your glutes slightly (like you’re sitting on the back pocket of your blue jeans) and lift your legs off the mat diagonally with your arm extended.
      • Contract your core as you reach your toes up to your hand. Then lower your legs and lift your arm to return to start.
      • Do 12 reps on each side.

      Now, go back and complete the list two more times! (And remember to stretch when you’re done.)

      10 Exercises from a Trainer for Leaner, More Toned Legs

      Ready for toned, lean legs? This quick and effective leg workout combines cardio exercises to burn fat and strengthening exercises to strengthen your legs. 

      No equipment is required, and you can do it anywhere—your living room, the bedroom, outdoors, in a hotel room while traveling, or wherever works best for you!

      Workout Instructions:

      • This workout is divided into two portions: Exercises 1-5 are cardio, and exercises 6-10 are strength training.
      • Go through the cardio exercises for 1 minute each.
      • Do 15 reps of the strength training exercises on each side. (Or 15 reps total if you’re not doing each side.)

      Try to do this workout at least 2 -3 times per week for the best results!

      1. Jumping Jacks (1 minute)

      Chris Freytag doing jumping jacks.

      Photo Credit: Get Healthy U

      • Start standing up with your legs together, a slight bend in your knees, and hands resting on your thighs.
      • Keeping the knees bent, open the arms and jump your legs out to the sides. Arms come above the head, and legs are wider than the shoulders.
      • Close your arms and legs back to your sides, returning to your start.
      • Repeat for 1 minute.

      2. Split Jumps (1 minute)

      Chris Freytag doing split jumps.

      Photo Credit: Get Healthy U

      How to do split jumps:

      • Stand tall with your feet hip-distance apart. Hands are in front of the chest hand on fist.
      • Take a large step forward with one foot and lower your body toward the floor. Both legs should be bent at a 90-degree angle at the bottom of the lunge.
      • Lower the back knee slightly and jump to switch the feet.  While in the air, the front foot comes back, and the back foot comes to the front.  Land in a bent knee lunge.
      • Repeat for 1 minute.

      3. Squat Jumps (1 minute)

      Chris Freytag doing squat jumps.

      Photo Credit: Get Healthy U

      How to do squat jumps:

      • Start standing with feet hip distance apart and lower into a squat position by bending the knees.
      • Keep the spine straight, chest lifted, and knees behind your toes. Arms are in front of the chest for balance.
      • Jump straight up and swing your arms overhead. Return to squat.
      • Repeat for 1 minute.

      4. Butt Kicks (1 minute)

      Chris Freytag doing butt kicks.

      Photo Credit: Get Healthy U

      How to do butt kicks:

      • Stand up straight with your legs slightly wider than your hips. Bring one heel off the floor toward your glutes while the opposite-side hand comes up towards your shoulder like you’re running.
      • Repeat this movement on the other side.
      • Alternate sides at a brisk pace. (Similar to running in place.)
      • Repeat for 1 minute.

      5. Jump Rope (1 minute)

      Chris Freytag doing a jump rope exercise.

      Photo Credit: Get Healthy U

      How to do jump ropes:

      • Start with feet hip distance apart, and arms stretched to the sides like your holding a jump rope with your hands.
      • Circle your hands like you’re swinging a jump rope and hop over it from side to side, jump roping in place.

      6. Plié Leg Lift (15 reps on each side)

      Chris Freytag doing a plie leg lift.

      Photo Credit: Get Healthy U

      How to do plié leg lifts:

      • Stand with feet slightly wider than shoulder-distance apart, and toes turned out.
      • Bend your knees and lower your torso into a plié while keeping your back straight.
      • Squeeze your glutes and inner thighs and come to standing while lifting one leg out to the side.
      • Return to your plié and repeat on the other side.
      • Perform 15 reps on each side.

      7. Releve Plié (15 reps)

      Chris Freytag doing a releve plie exercise.

      Photo Credit: Get Healthy U

      How to do releve pliés:

      • Stand with feet slightly wider than shoulder-distance apart, toes turned out, and lift your heels into releve.
      • Bend at the knees, lowering your torso, while keeping your back straight and abs tight. Squeeze glutes and straighten legs to return to starting position.
      • Perform 15 reps.

      8. Leg Lifts (15 reps on each side)

      Chris Freytag doing leg lifts.

      Photo Credit: Get Healthy U

      How to do leg lifts:

      • Start on all fours with one leg extended long on the mat.
      • Lift the extended leg up towards the ceiling, engaging the hamstrings and glutes, then lower to the floor.
      • Perform 15 reps on each side.

      9. Fire Hydrant (15 reps on each side)

      Chris Freytag doing a fire hydrant exercise.

      Photo Credit: Get Healthy U

      How to do fire hydrants:

      • Begin on all fours.
      • Using the outer thigh muscles and glutes, lift one knee out and up, keeping your knee bent at a 90-degree angle. (Like a dog next to a fire hydrant!) Lower your leg and repeat.
      • Perform 15 reps on each side.

      10. Single-Leg Bridge (15 reps on each side)

      Chris Freytag doing a single leg bridge exercise.

      Photo Credit: Get Healthy U

      How to do a single-leg bridge:

      • Lie on your back with bent knees hip-distance apart, and feet flat on a mat stacked under the knees. Extend one leg long towards the ceiling.
      • Squeeze glutes and lift hips off the mat into a bridge. Repeat lifting and lowering.
      • Perform 15 reps on each side.

      What is a Tabata Workout? 5 Exercises You Can Do Anywhere

      If you’ve never heard of Tabata workouts before, they’re about to become your new best friend for burning fat, toning your muscles, and getting an effective workout checked off your list in less time!

      Tabata workouts provide a full-body workout, burning serious calories in only a few minutes. 

      Here, we’ll cover what a Tabata workout is and five key Tabata exercises you can do anywhere, anytime. 

      What is a Tabata Workout?

      Smiling woman with her hands behind her head at the gym.

      Photo Credit: Shutterstock

      Tabata is a form of high-intensity interval training (HIIT). HIIT is one of the best ways to burn fat, as it utilizes intense periods of all-out effort paired with short rest periods.

      These intervals accelerate fat loss and help you achieve more with your workouts in a shorter amount of time. HIIT intervals can be any amount of time, but Tabata intervals specifically use the following time frame:

      • Work hard for 20 seconds
      • Rest for 10 seconds

      Tabata intervals were developed by Dr. Izumi Tabata his research team at the National Institute of Fitness and Sports in Tokyo.  They found that intense interval training allowed athletes to work both their aerobic (cardio) and anaerobic (muscle) systems simultaneously while working out. In contrast, more moderate-intensity exercise only worked the athlete’s aerobic systems.

      Using high-intensity interval training in general, and specifically Tabata, you can get your heart pumping while still building muscle.

      Here are some key benefits of a Tabata Workout:

      • Works your aerobic and anaerobic Systems.
      • It’s a cardiovascular and strength workout rolled into one
      • Helps you Retain or build muscle
      • Boosts your metabolism
      • Saves time

      Ready to get started? Here are the instructions for the next five exercises: 

      • Perform each exercise for 20 seconds hard, then rest for 10 seconds.
      • Repeat each exercise four times before moving on to the next. 

      Remember to breathe and sip water when needed!

      Skaters

      Chris Freytag doing a skater tabata exercise.

      Photo Credit: Get Healthy U

      Leap far and fast for 20 seconds, then rest for 10 seconds. Repeat for a total of 4 rounds.

      How to do skaters:

      • Start with your legs slightly wider than shoulder distance apart and arms at the sides.
      • Bring one leg behind at a slight angle into a reverse lunge. The front knee will come to a 90-degree angle.
      • Swing the arms in front of that bent knee and leap the back leg forward to switch sides in a skating motion. Arms alternate as you switch sides like a speed skater.

      Push-Up Punch

      Chris Freytag doing a push-up punch exercise for toned arms.

      Photo Credit: Get Healthy U

      Perform as many as you can for 20 seconds and then rest for 10 seconds. Repeat for a total of 4 rounds.

      How to do a push-up punch:

      • Begin in a plank position with your shoulders over your wrists, your feet together, and your body in a straight line.
      • Keeping your body straight, bend your arms to lower your body toward the floor.
      • Straighten your arms to push your body back up into plank position as you punch your right arm forward.  Return your hand to the floor, lower your back to the bottom of your push-up, and repeat on the opposite side.

      High Knees

      Chris Freytag doing a high knees tabata exercise.

      Photo Credit: Get Healthy U

       Run fast for 20 seconds and then rest for 10 seconds. Repeat for a total of four rounds.

      How to do high knees:

      • Start standing with feet hip distance apart.
      • Lift one knee up as high as it will go and raise the opposite arm, then switch quickly. Continue alternating arms and legs.

      Stiletto Squat

      Chris Freytag doing a stiletto squat tabata exercise.

      Photo Credit: Get Healthy U

      Do as many as you can for 20 seconds and then rest for 10 seconds. Repeat for a total of 4 rounds.

      How to do a stiletto squat:

      • Start standing and lift your heels high like you’re wearing heels. Keeping your abs engaged, slowly drop into a squat, bringing your hips to knee height.
      • Squeeze your glutes and return to your starting position.

      Plank Jacks

      Chris Freytag doing a plank jack tabata exercise.

      Photo Credit: Get Healthy U

      Fast but controlled for 20 seconds and then rest for 10 seconds. Repeat for a total of four rounds.

      How to do plank jacks:

      • Begin in a plank position with your shoulders over your wrists, your feet together, and your body in a straight line.
      • Similar to the motion of a jumping jack, jump your feet wide, keeping your buttocks down. Jump your feet back together.